
Color Matching Algorithms Comparison
In this blog post I want to show the differences in performance of 3 different color matching algorithms. The algorithms that are going to be compared are Cameramatch from Ethan-ou, MatchLight from LightIllusion, and ColourMatch.
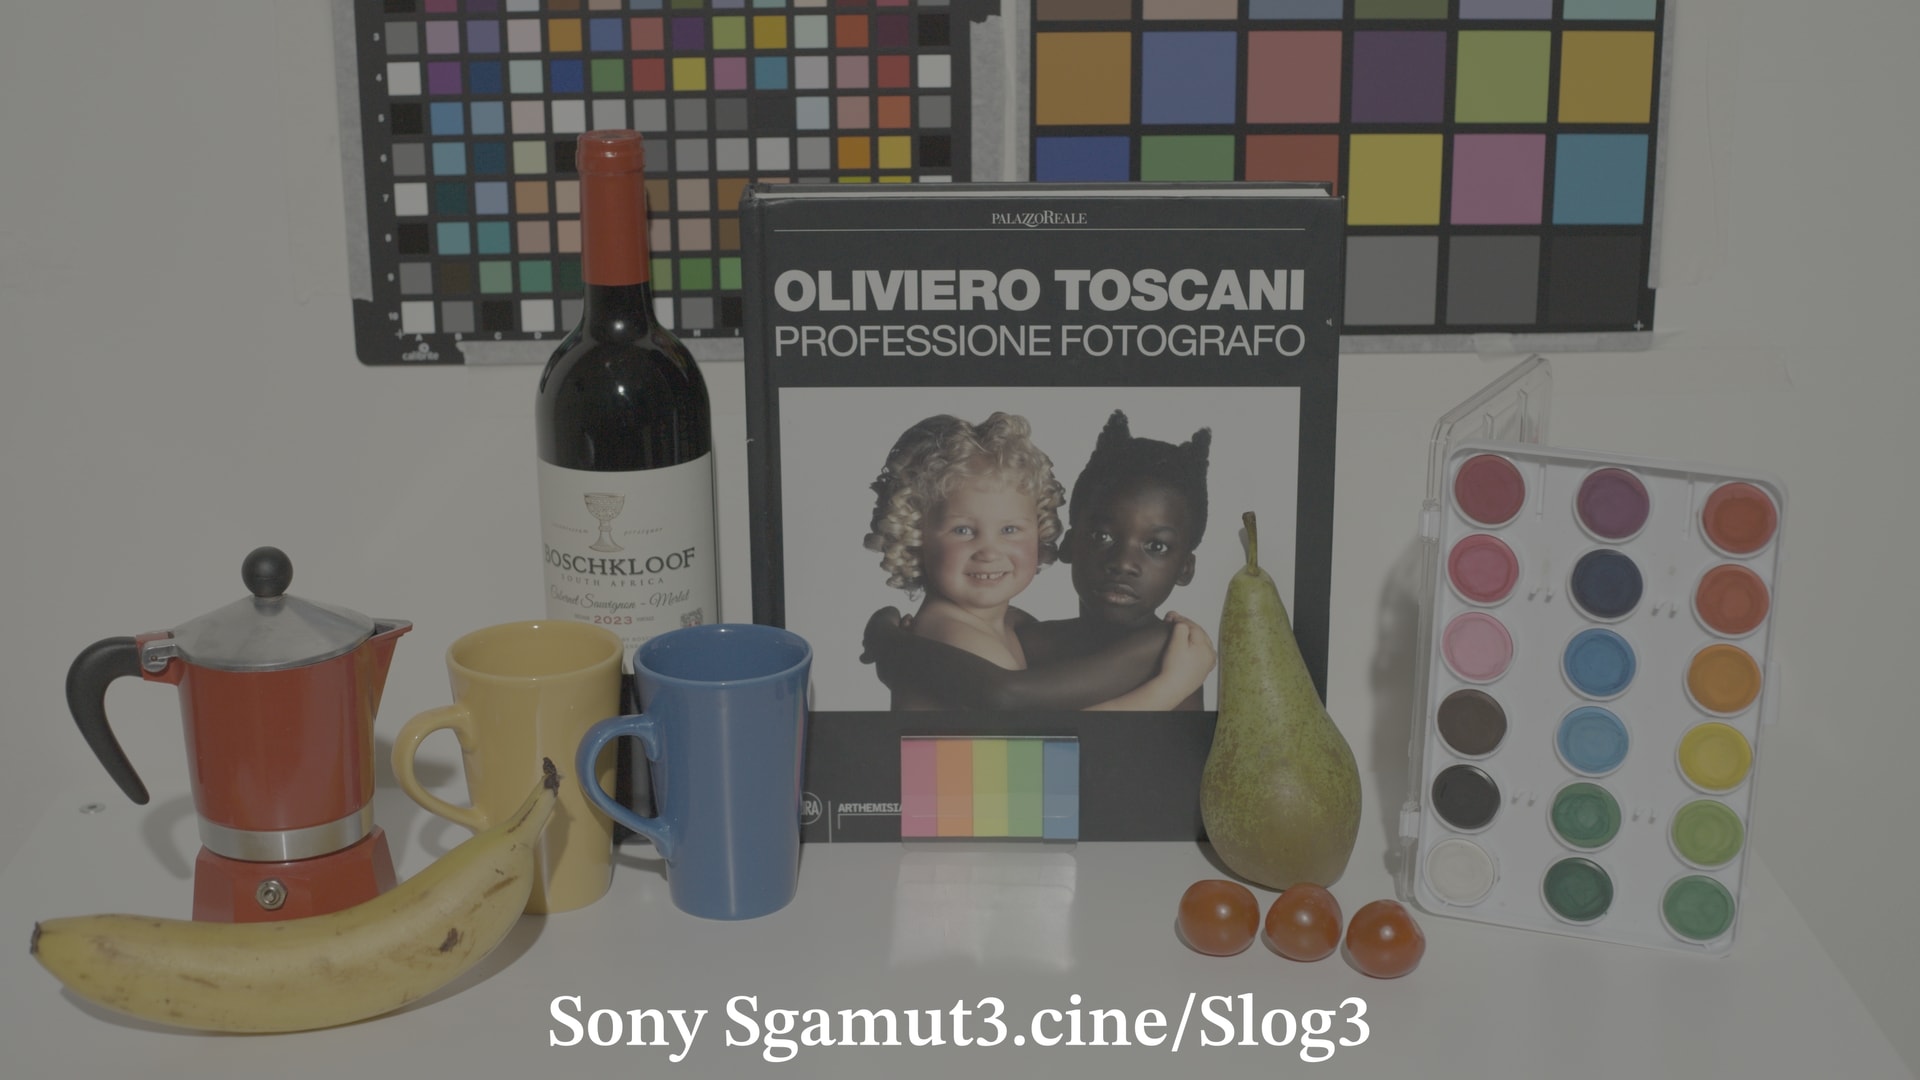
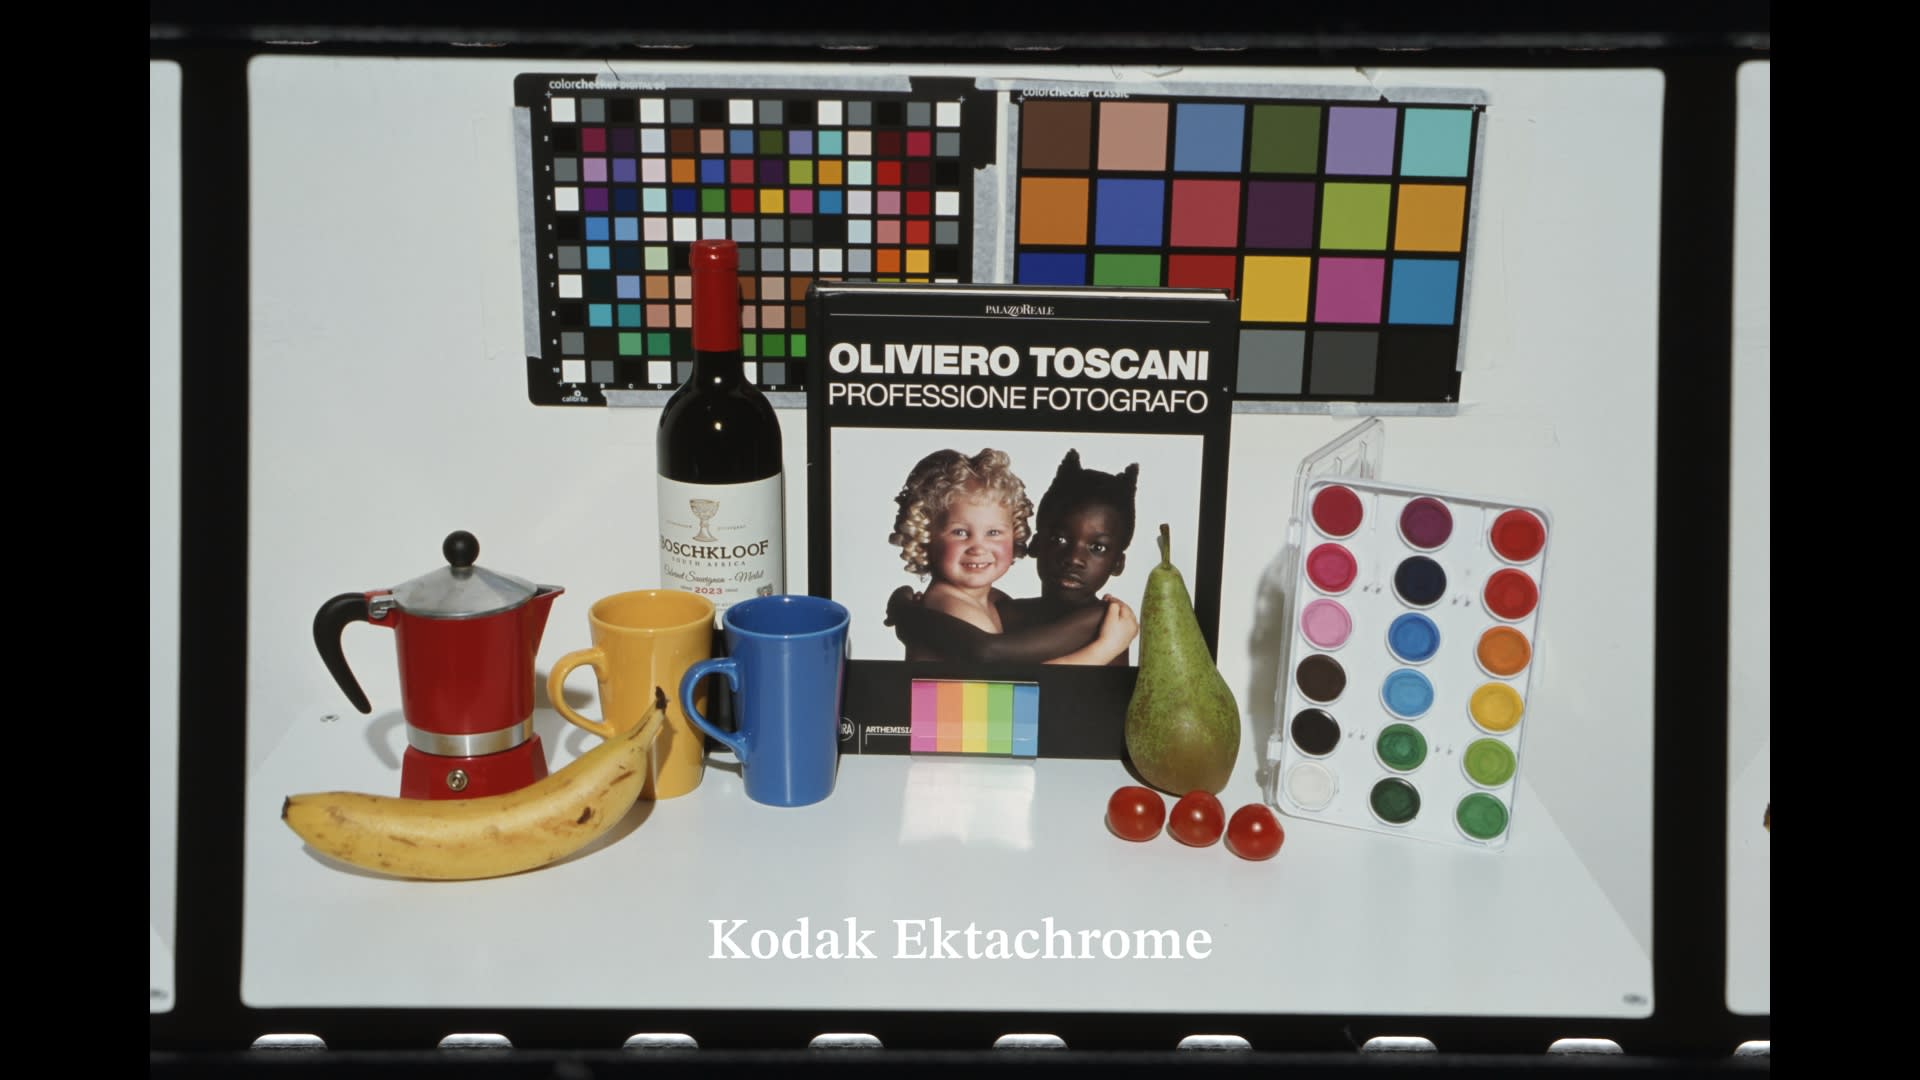
What we’re going to feed to the algorithms
4695 color samples have been captured on a digital sensor (Sony FX3) and on film (Kodak Ektachrome e100). The samples have been captured all across the exposure range and covering the wides gamut possible, mixing both reflective and emissive sources. The Ektachrome frames are then scanned with narrow RGB lights to retrieve the most color information. These color samples are then read as floats and saved to 2 .txt files, one represents the digital sensor, the other the film stock
The goal of the comparison
I want to assess which algorithm produces the best results matching digital to film. They could also be used to match a digital sensor to another digital sensor. The best results are determined by how accurate the match is while at the same time assessing the smoothness of the transformation. The 3 algorithms differ in terms of price range, cameramatch is free and it can be used in google colab. Matchlight is 525,00 pounds, plus the purchase of ColourSpace to be able to convert the LUT from MatchLight LUT format to a .cube format.
The datasets fed to the algorithms are going to be exactly the same, with the only difference that MatchLight works with pixel aligned images only, not float RGB values. So in order to feed it the same exact data I first needed to convert the .txt float RGB values datasets, to 16 bits images containing color patches corresponding to those RGB values. Basically we’re feeding the same exact dataset but we need this conversion step in the middle. I’ve been told by Steve Shaw that can I get more accurate results by feeding an image sequence where each image is a single RGB value of the dataset. So I’m also going to do that to squeeze the maximum amount of accuracy out of MatchLight. (I spent over 1000 euros for Matchlight and Colorspace after all, so let’s do that!).
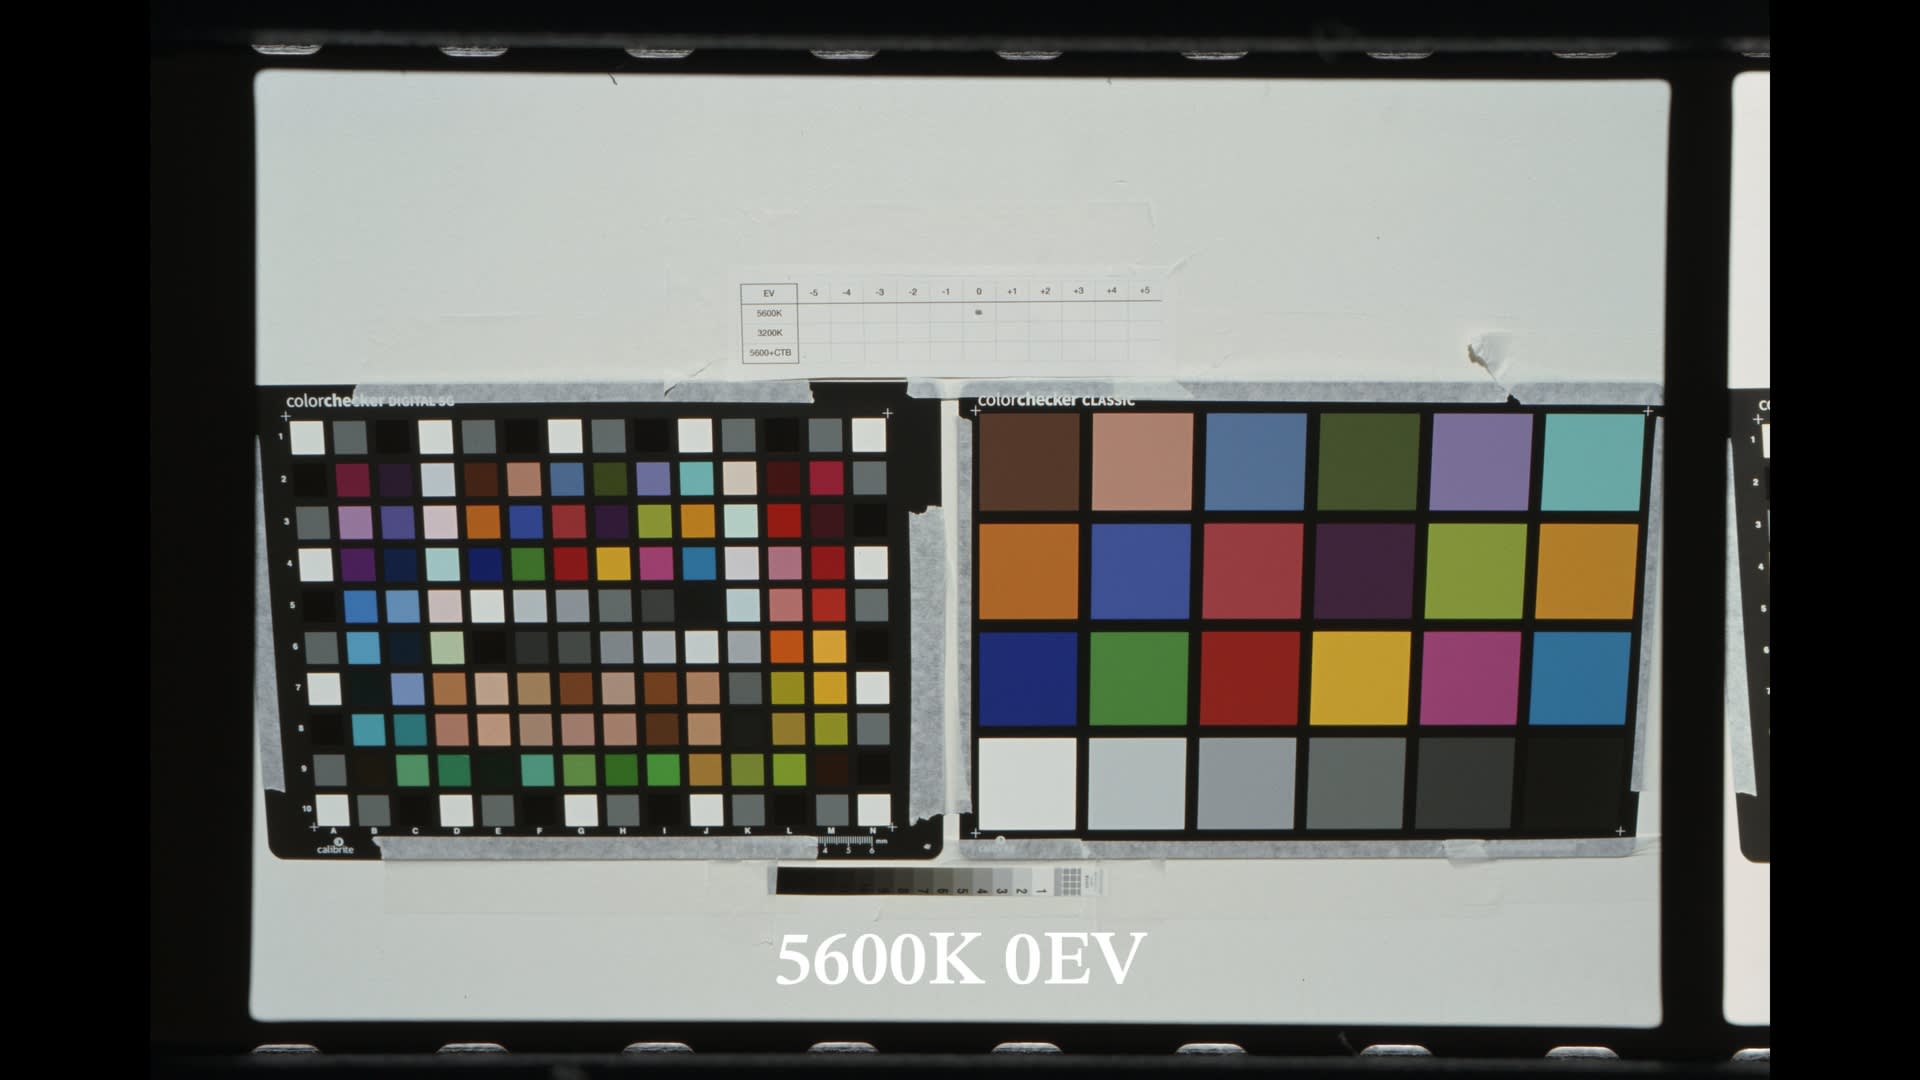
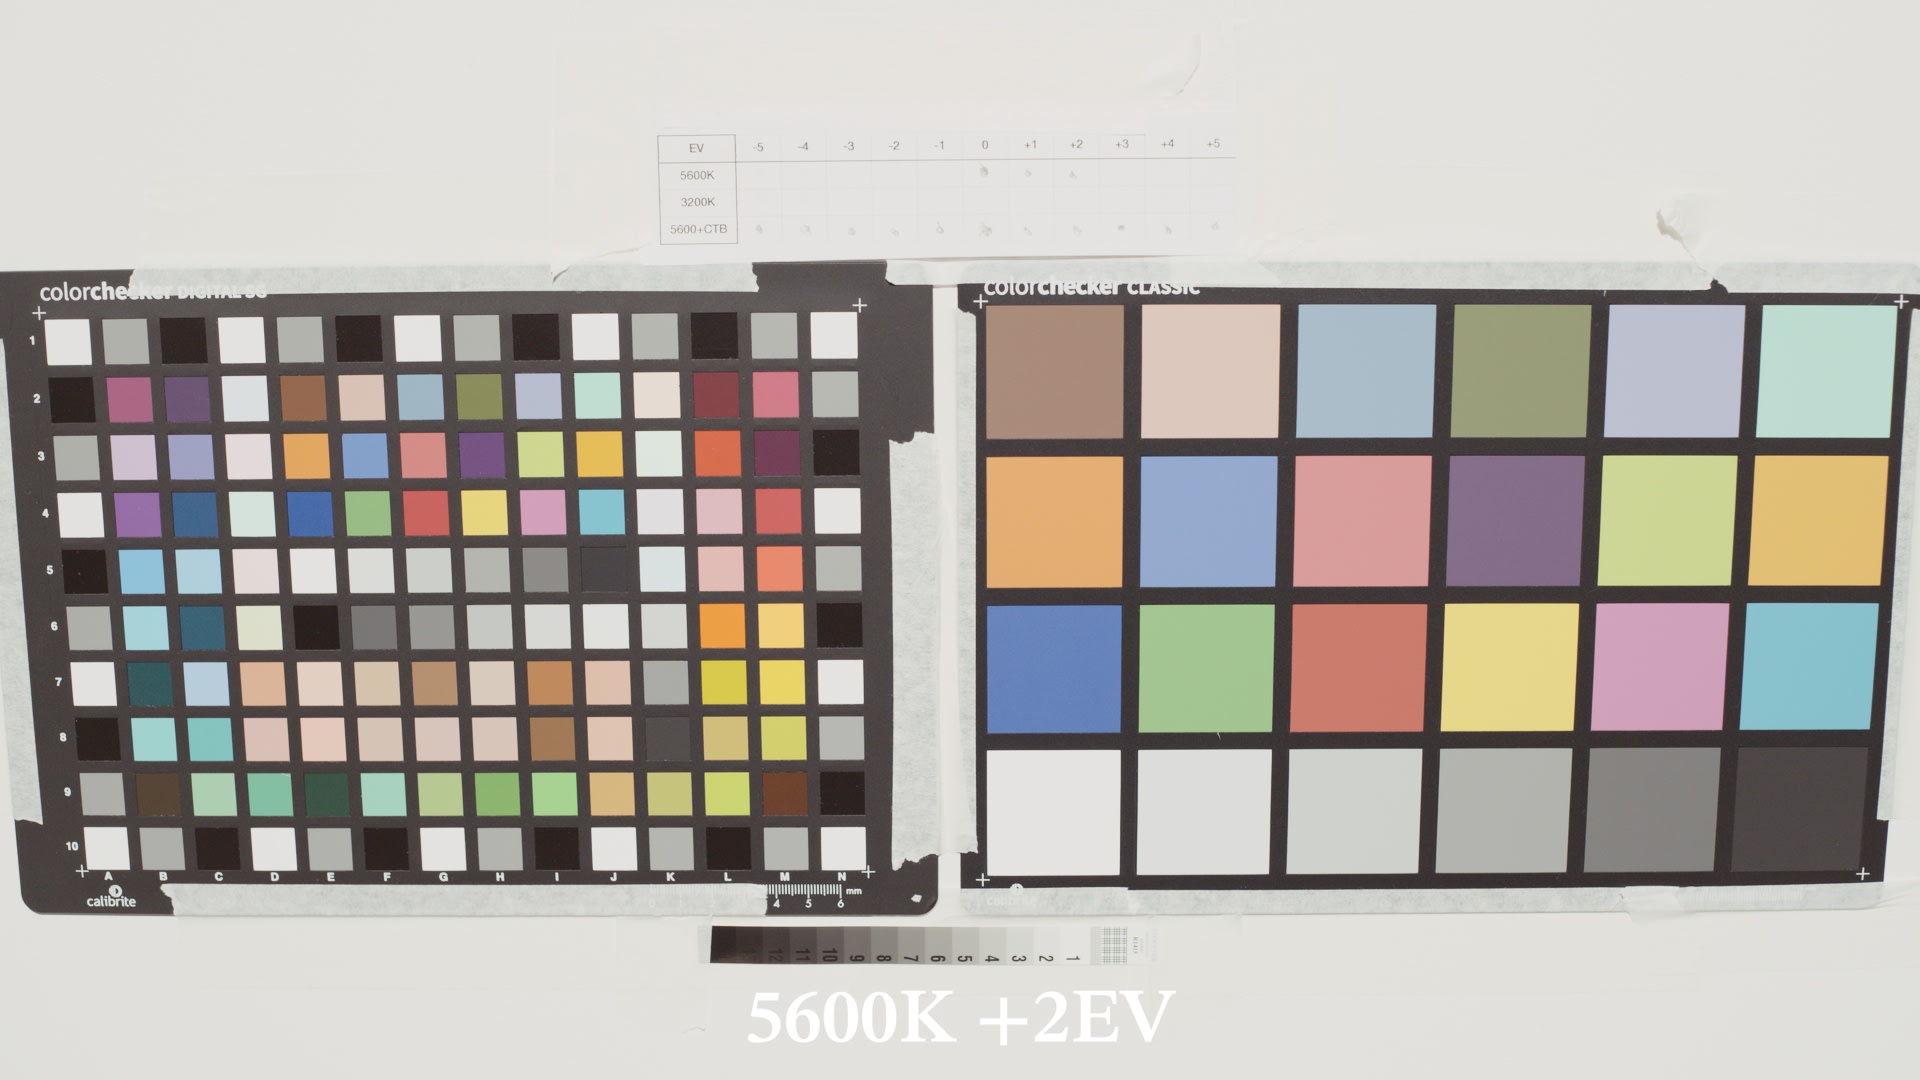
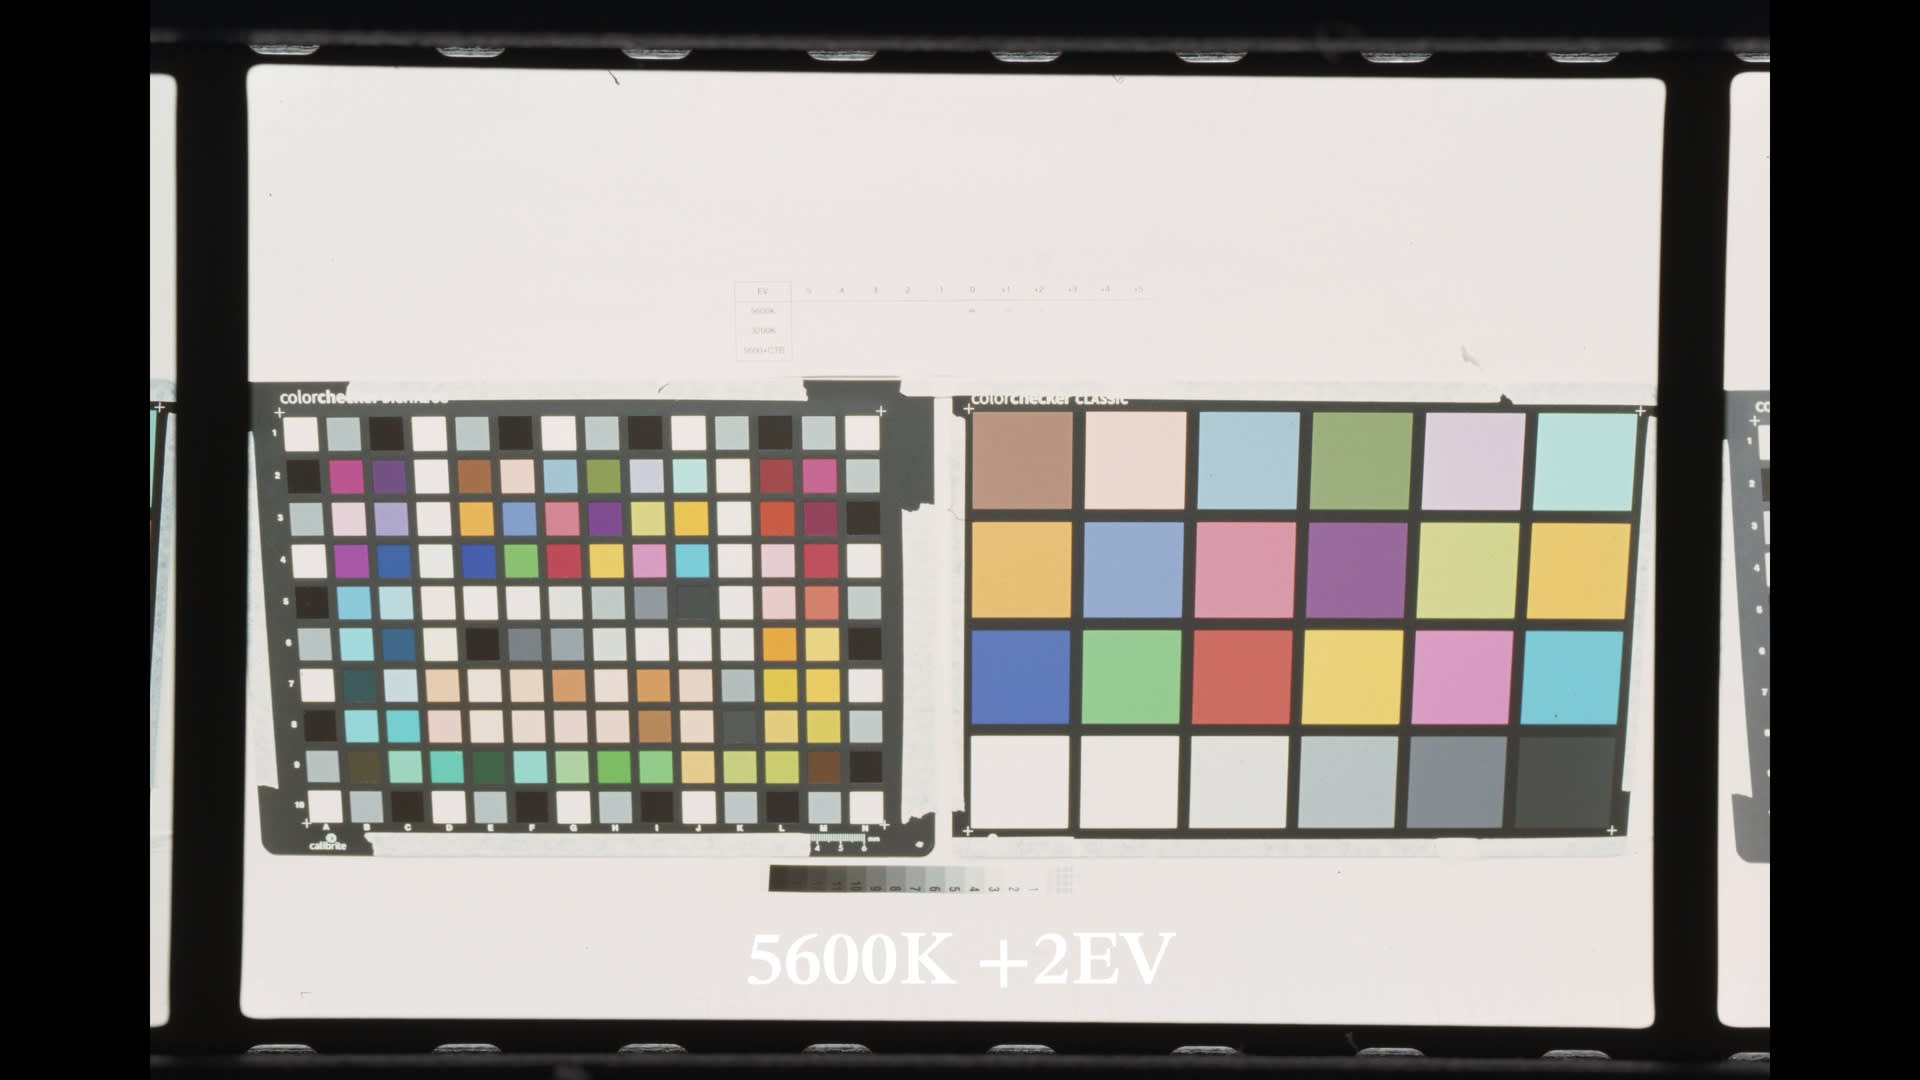
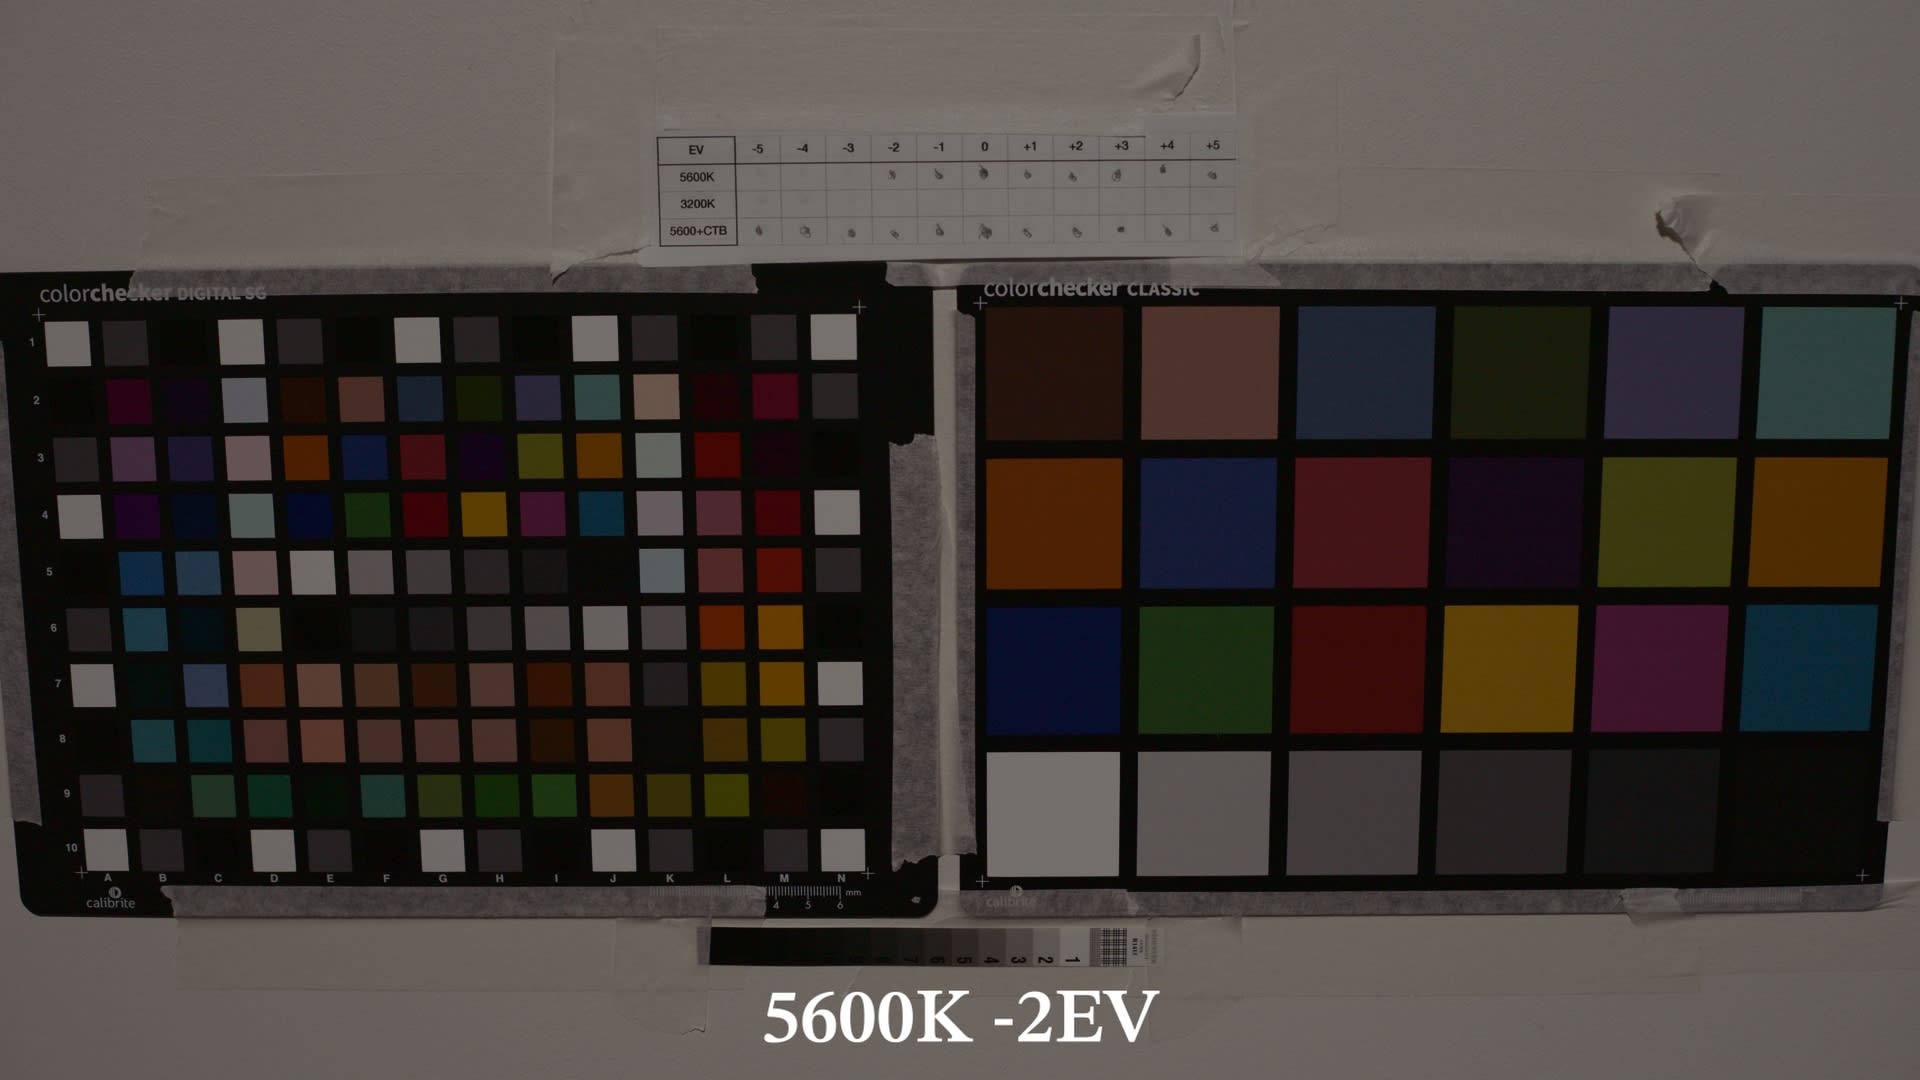
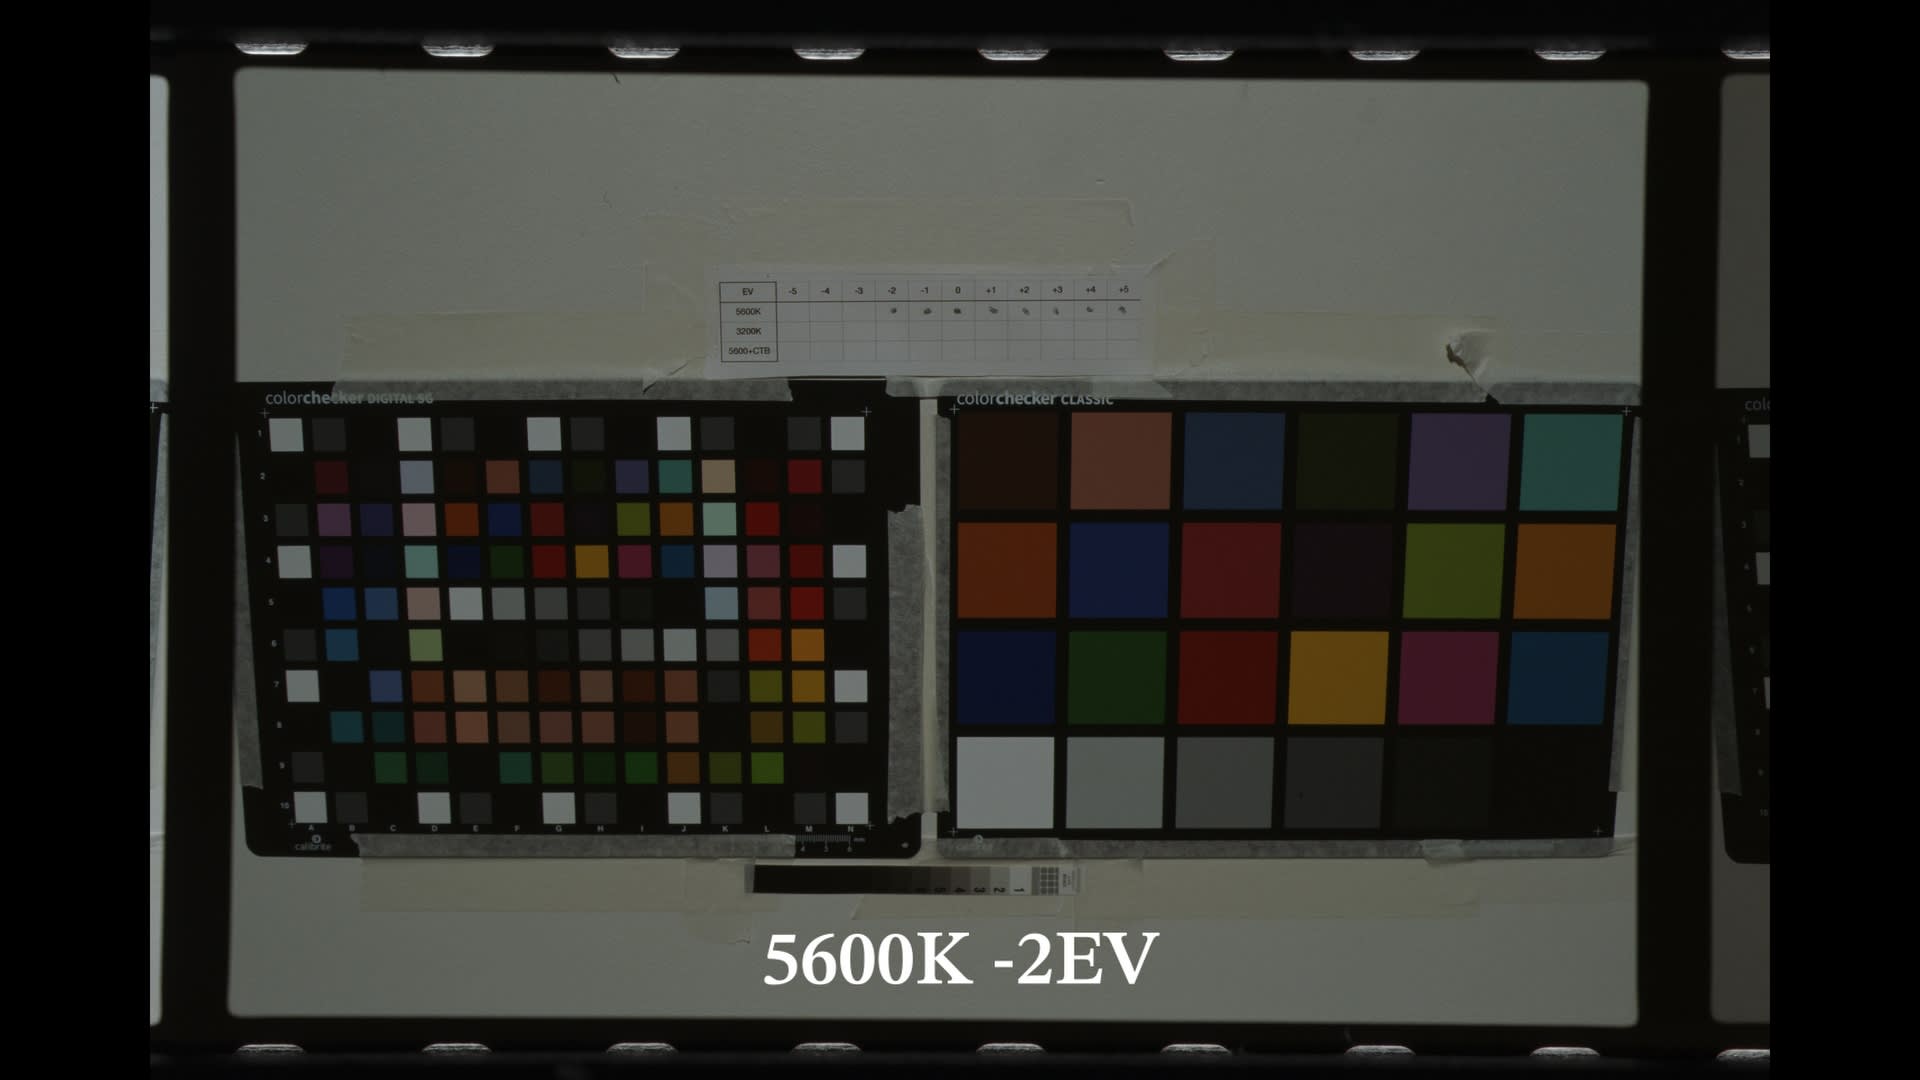
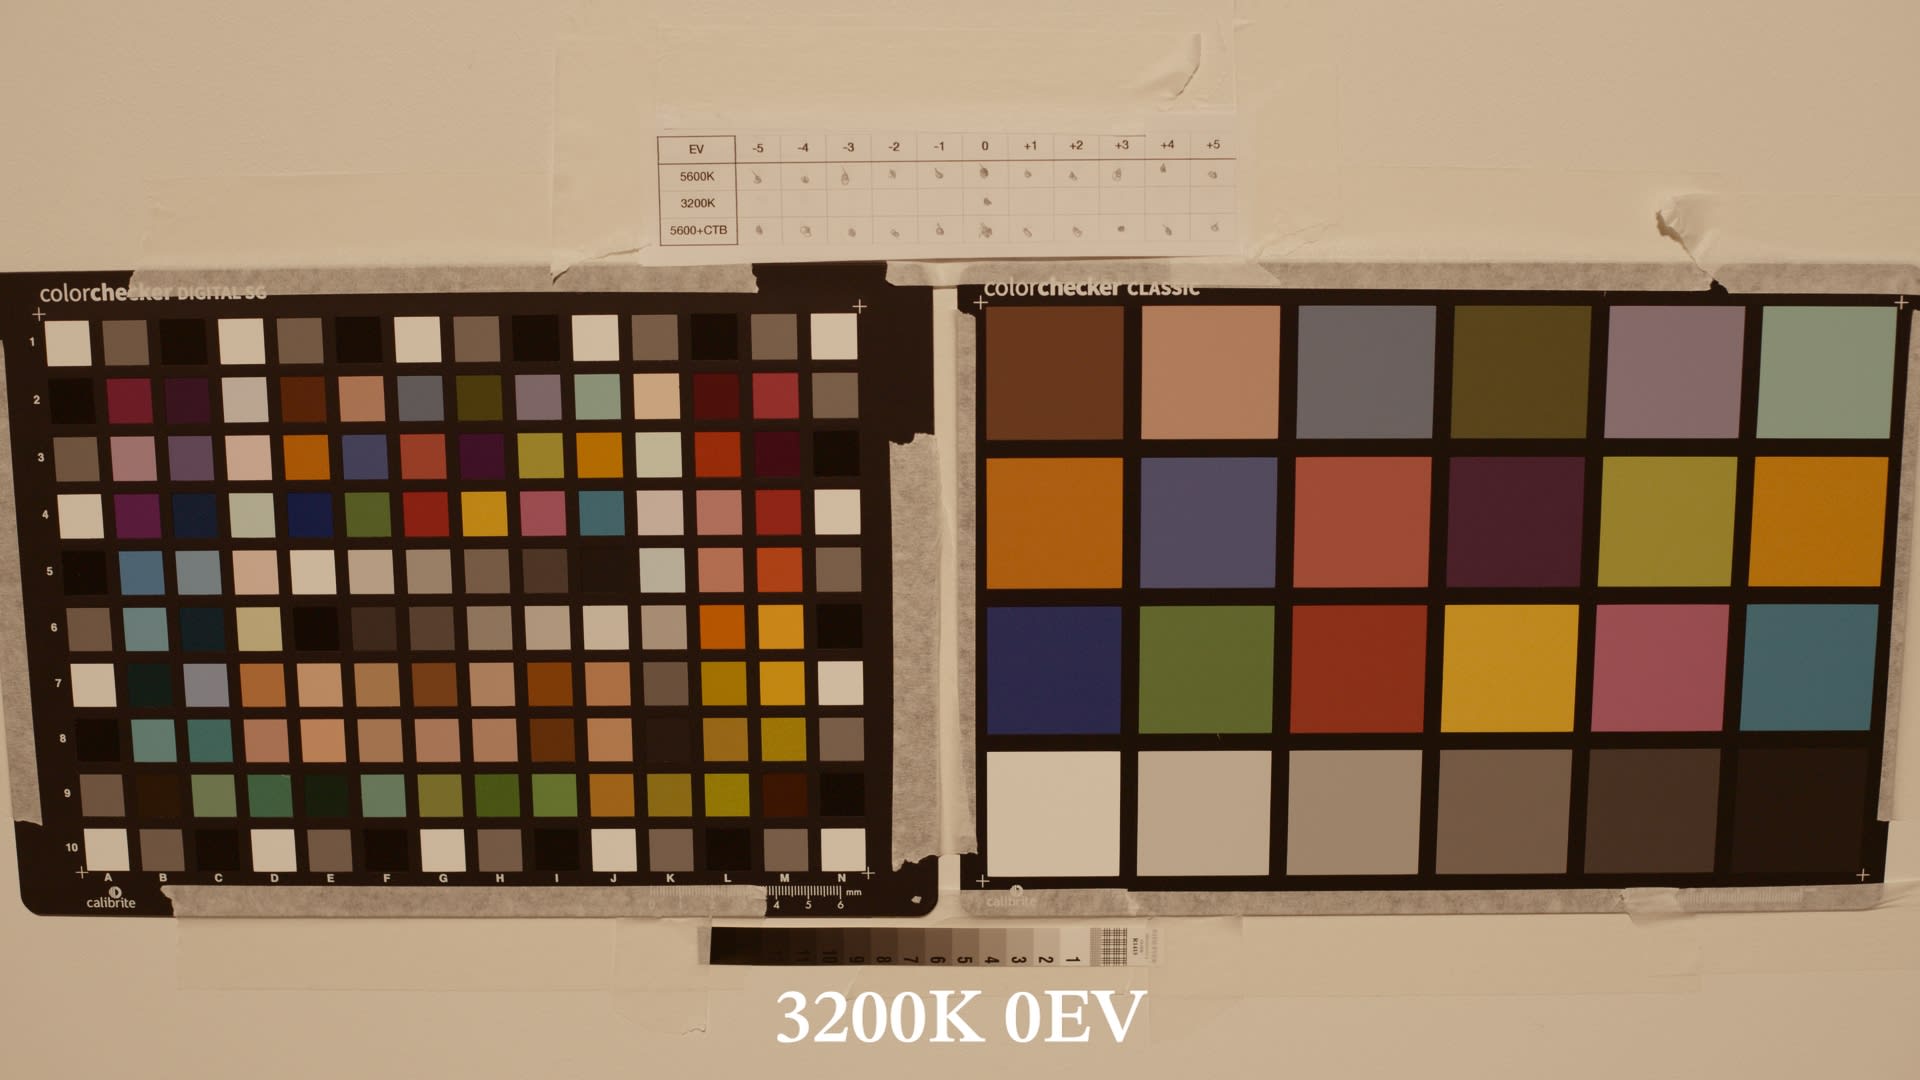
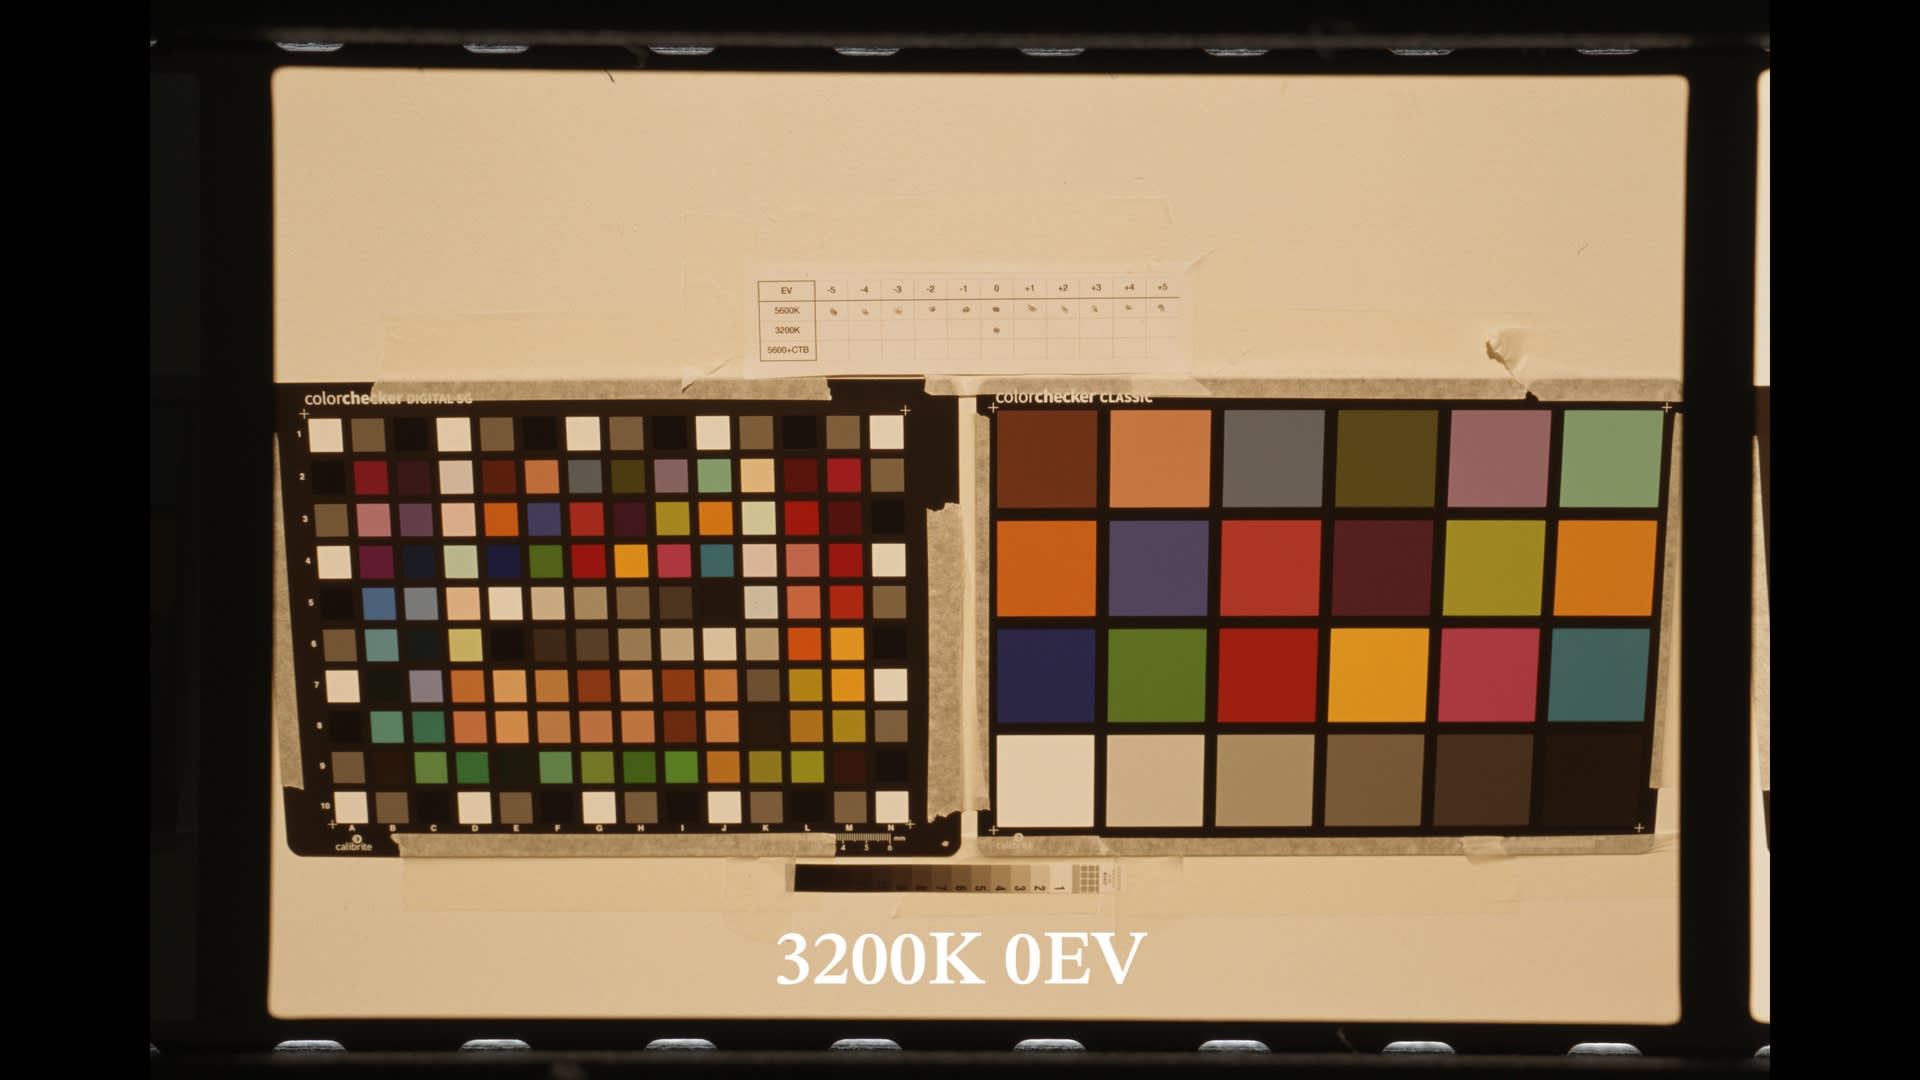
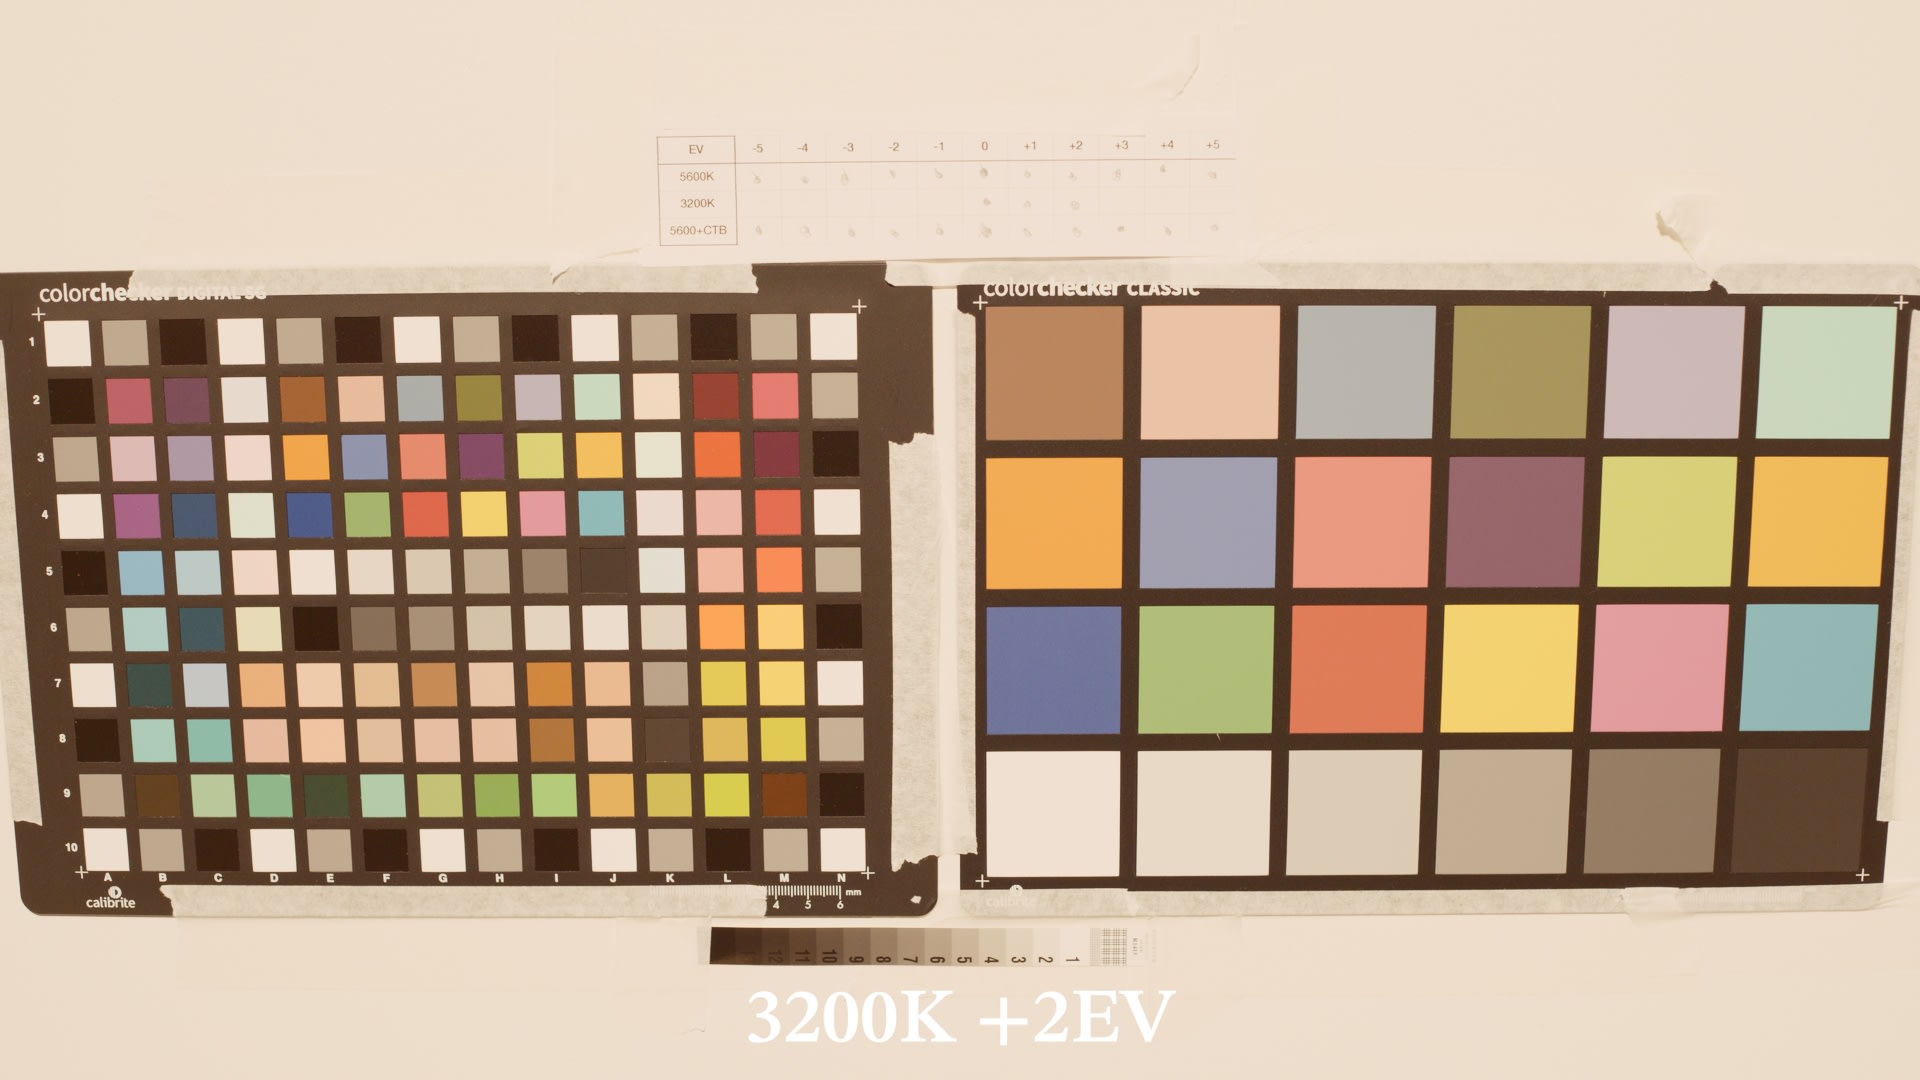
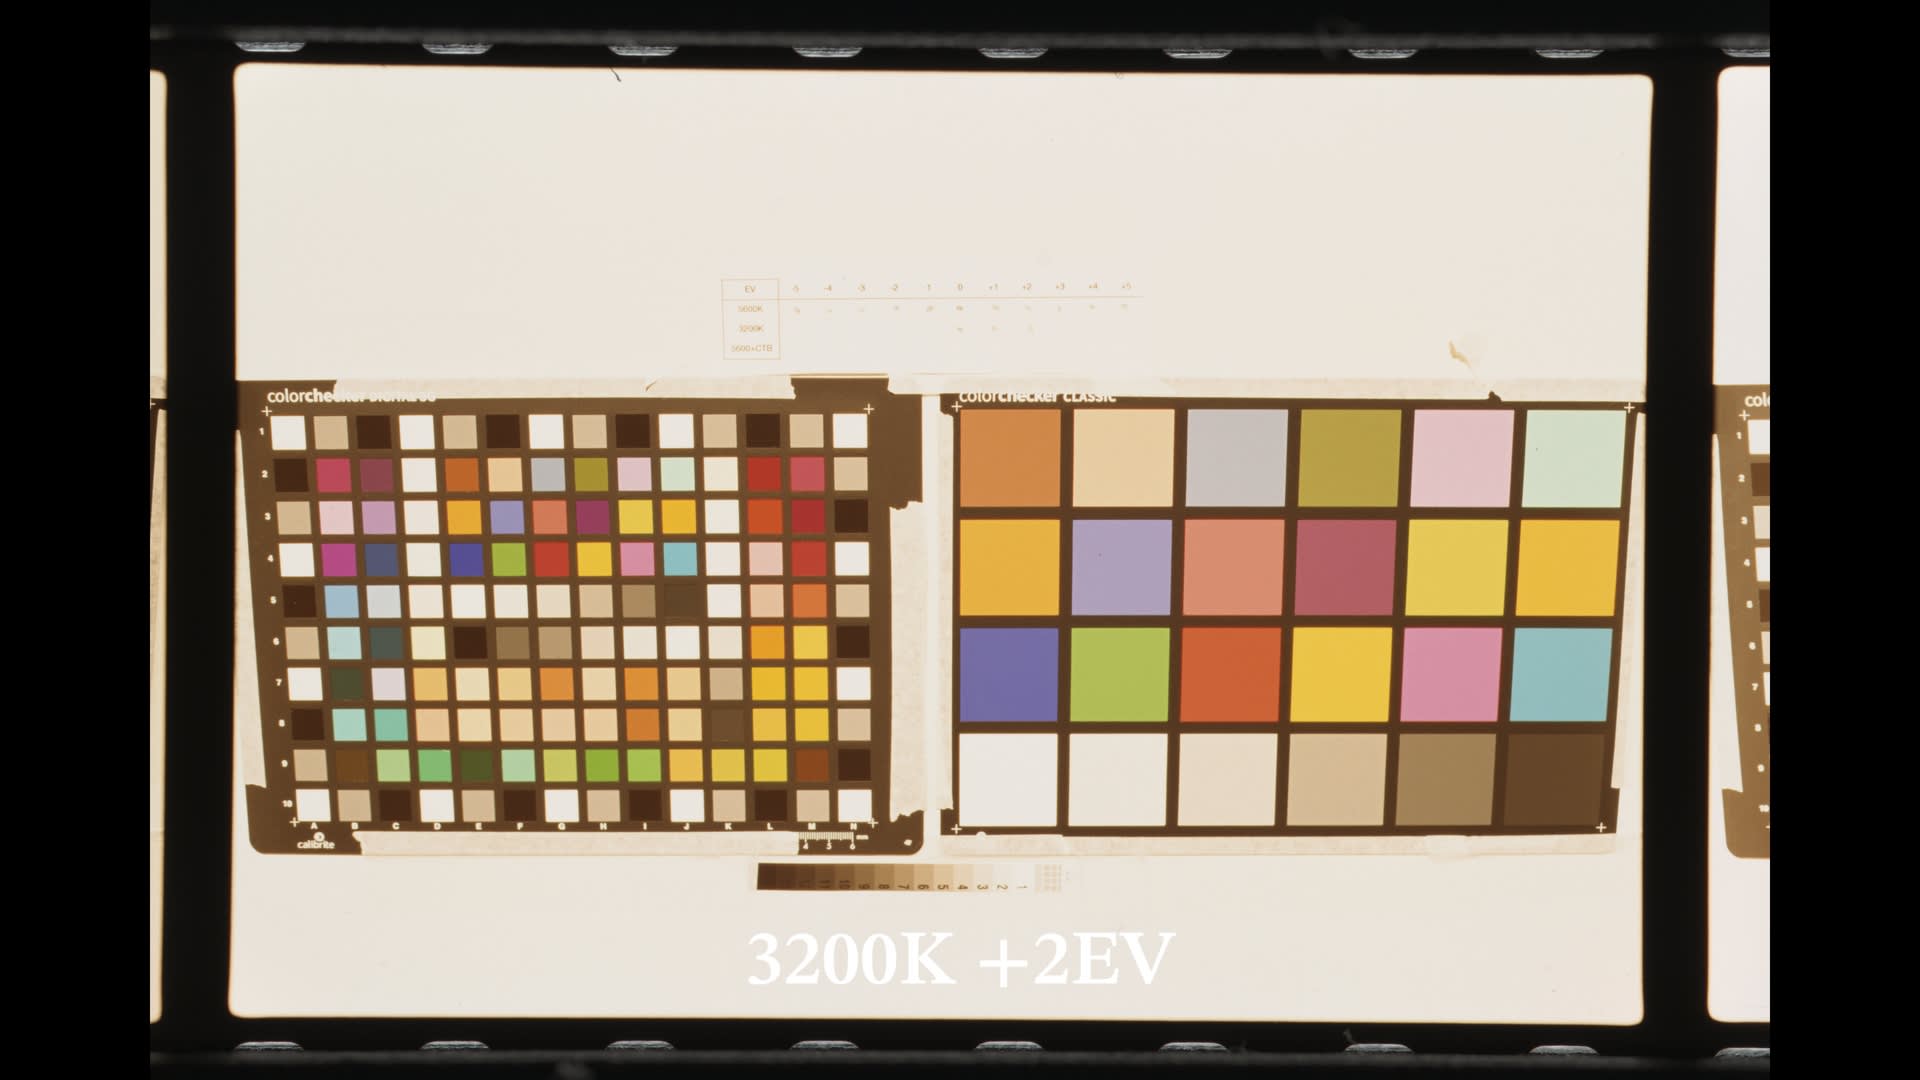
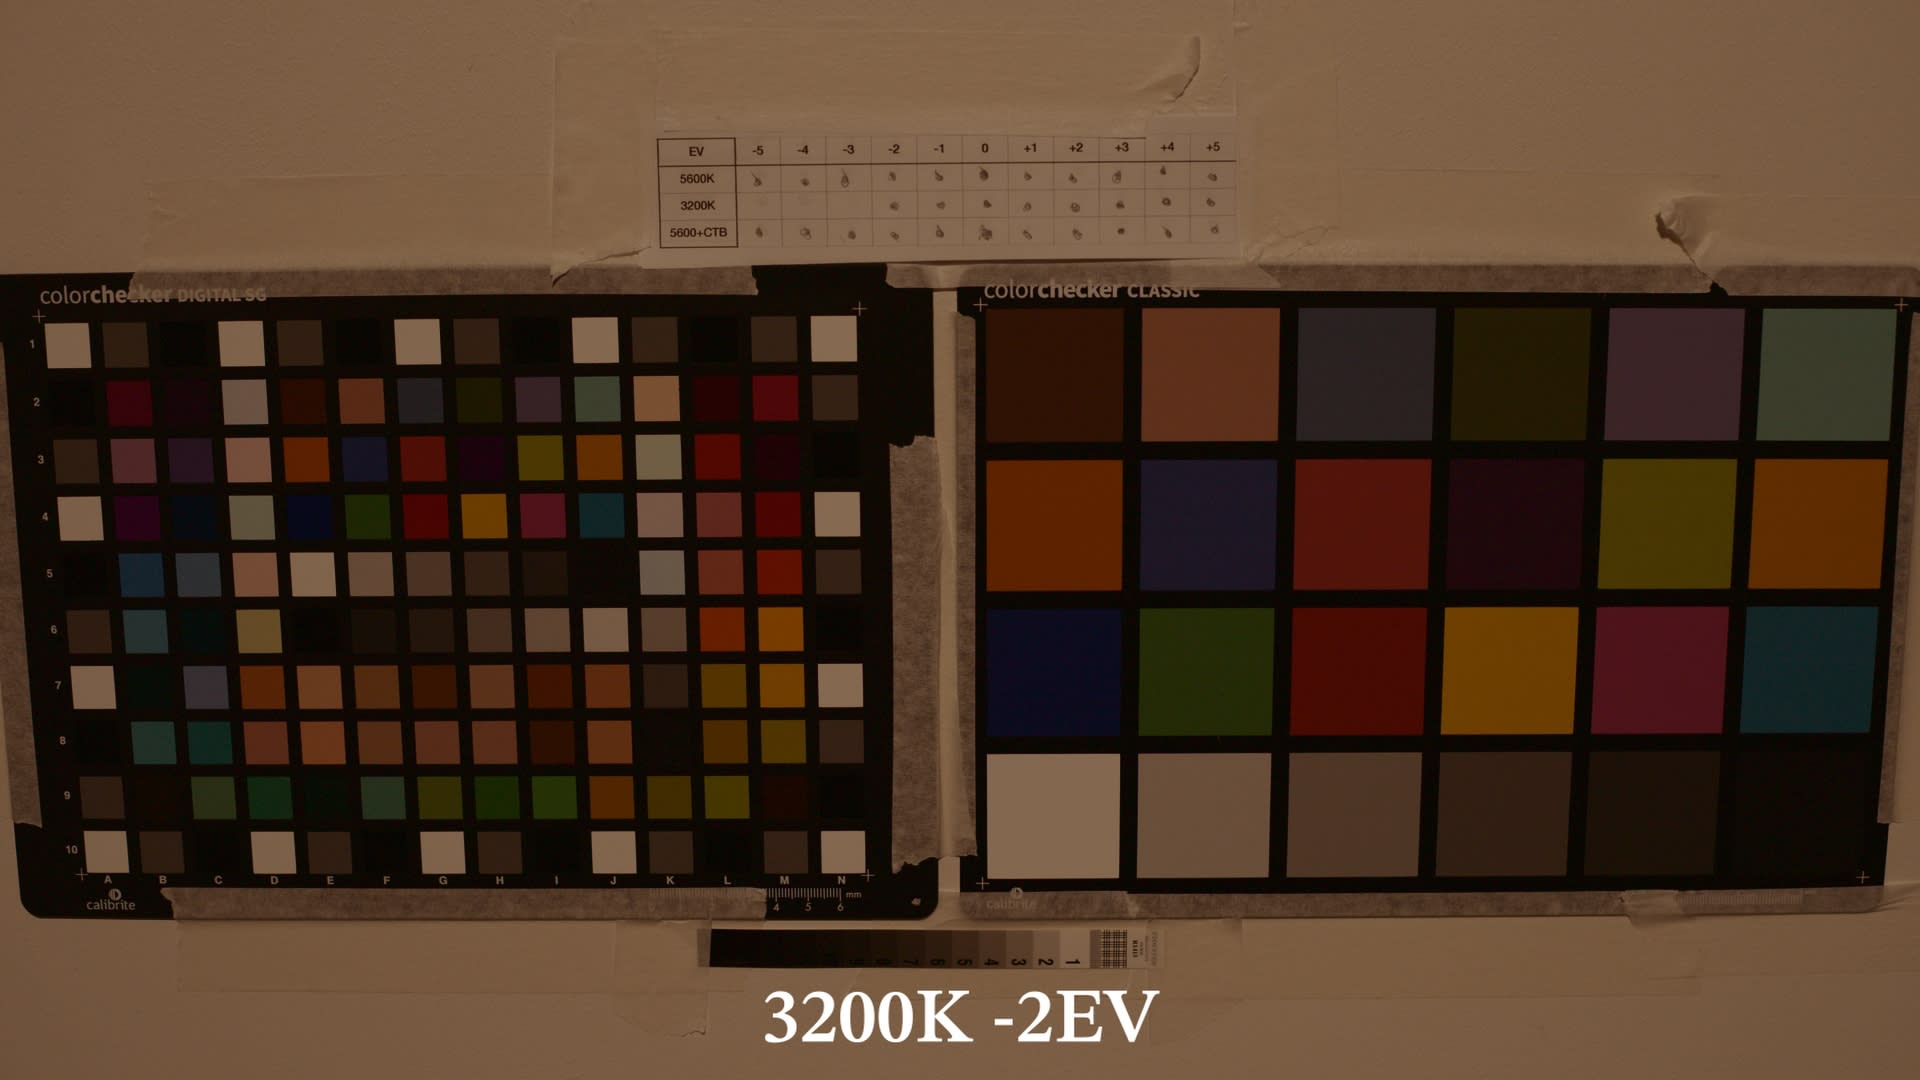
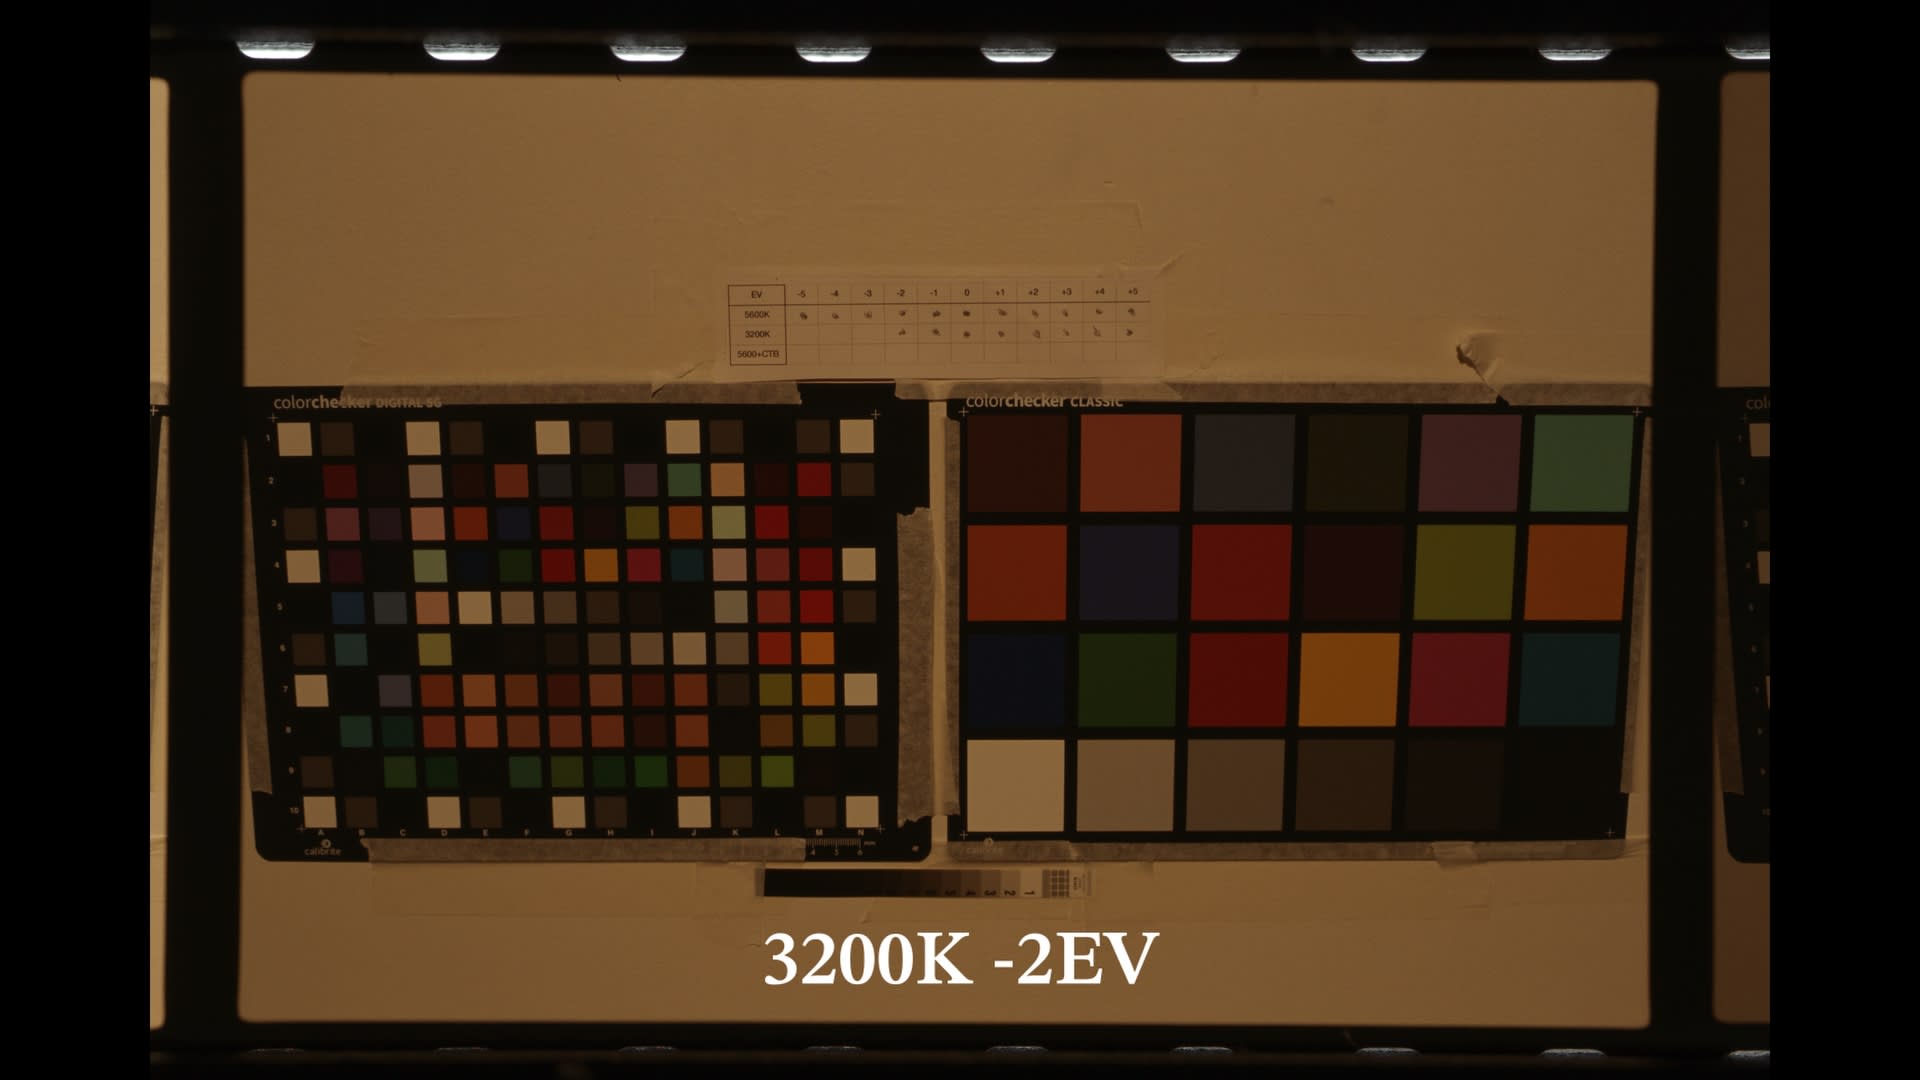
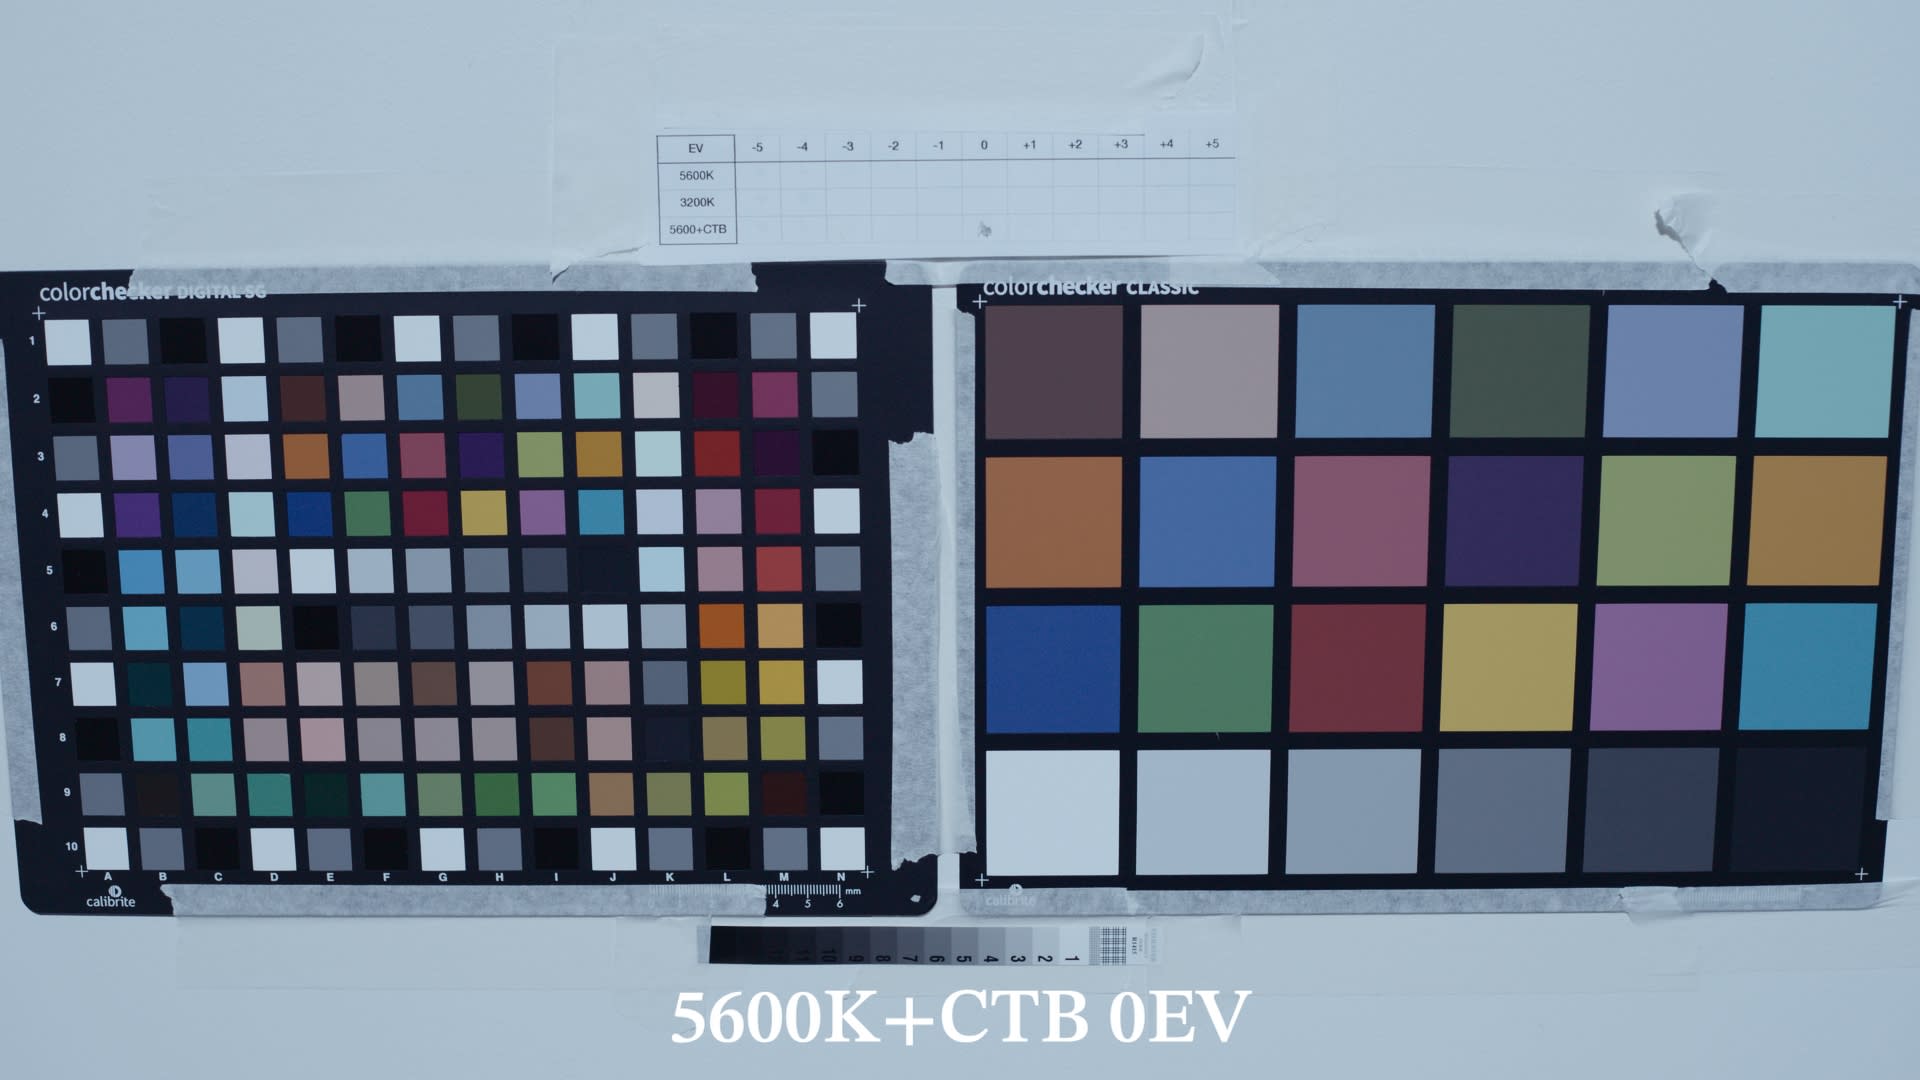
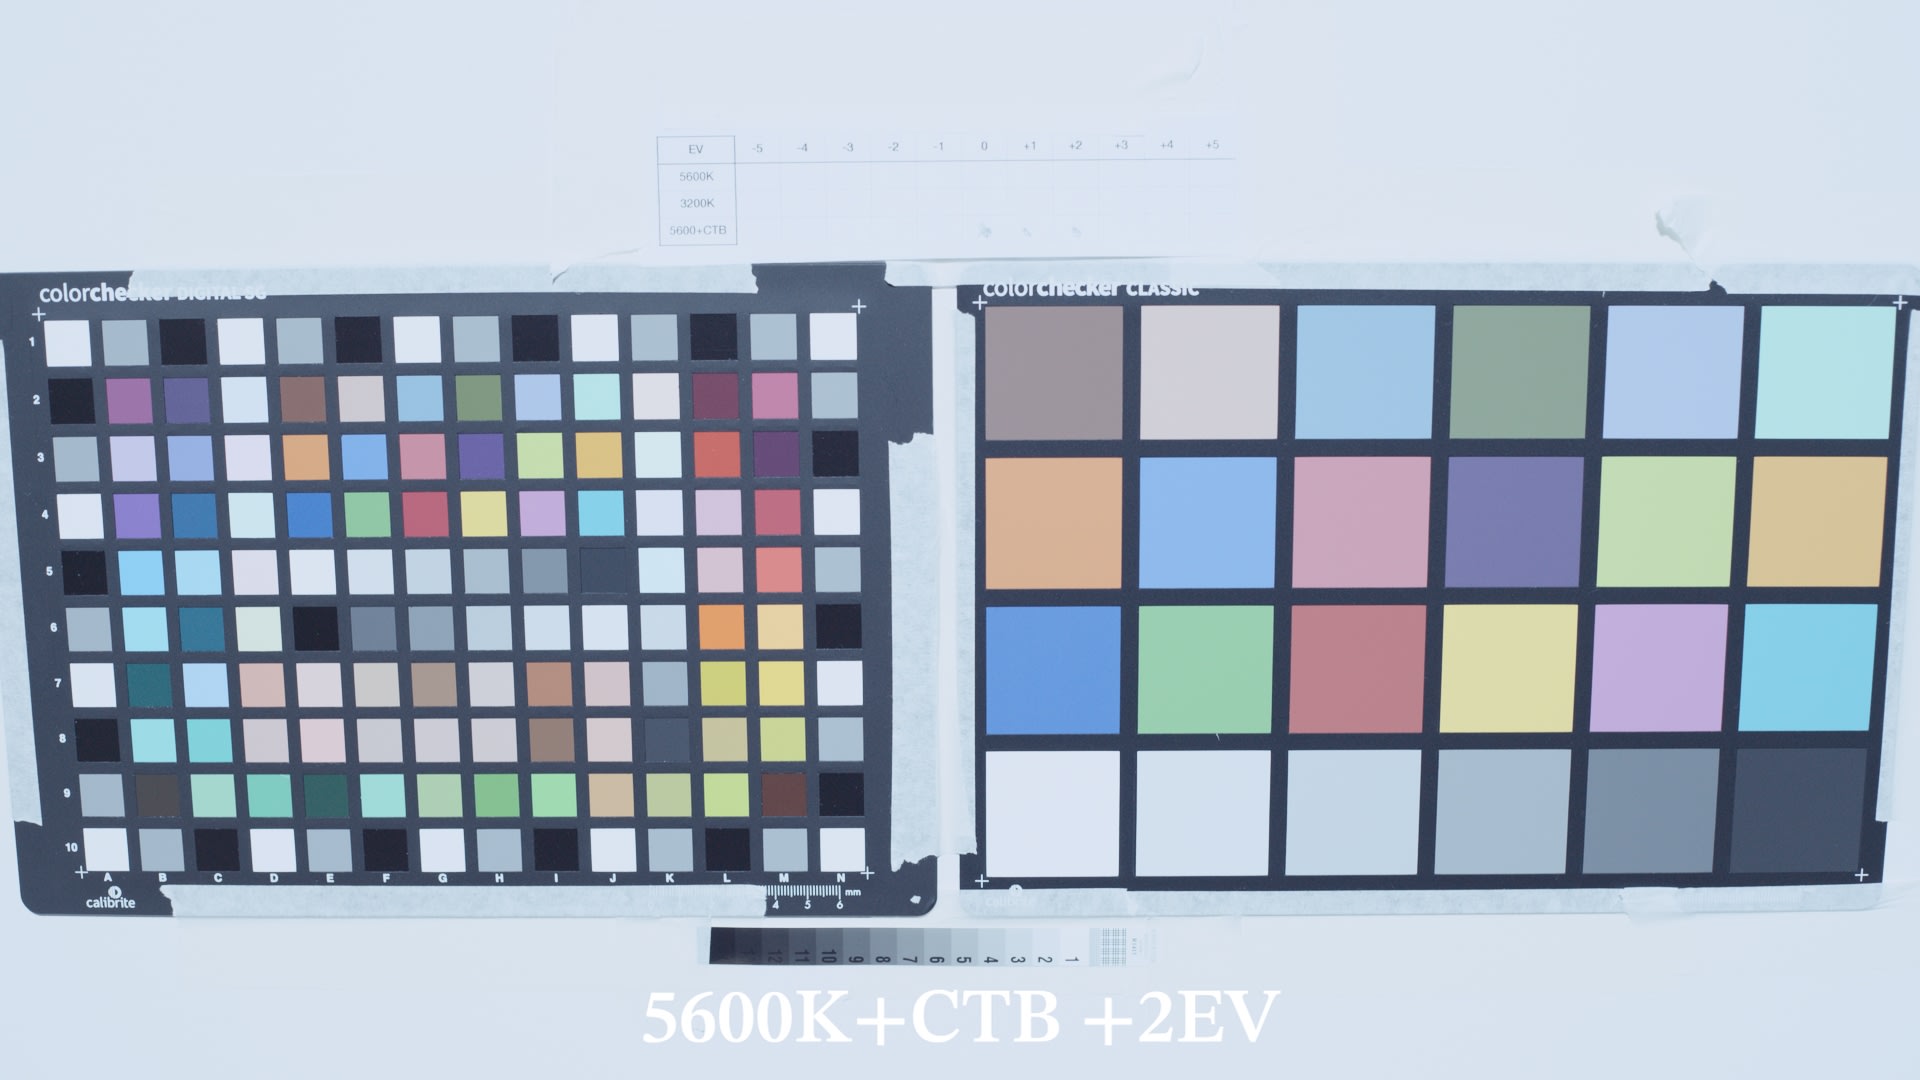
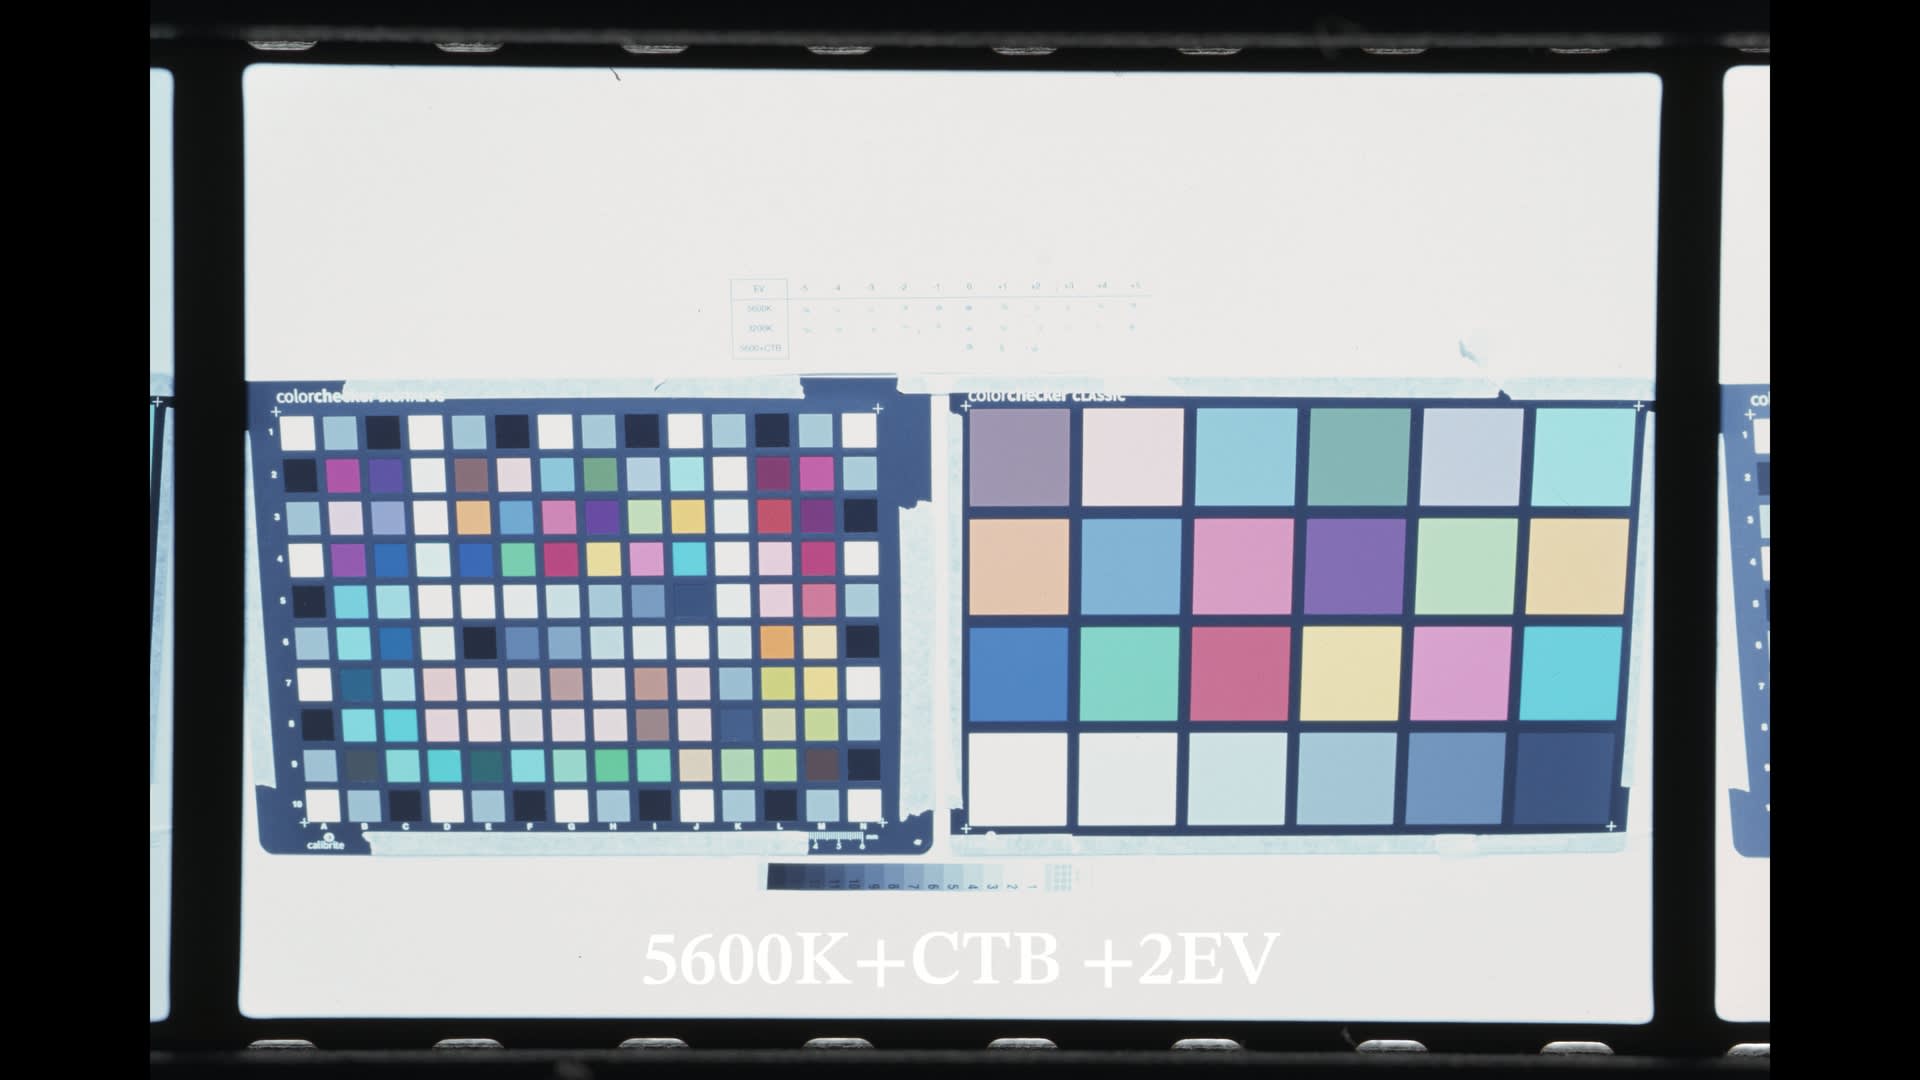
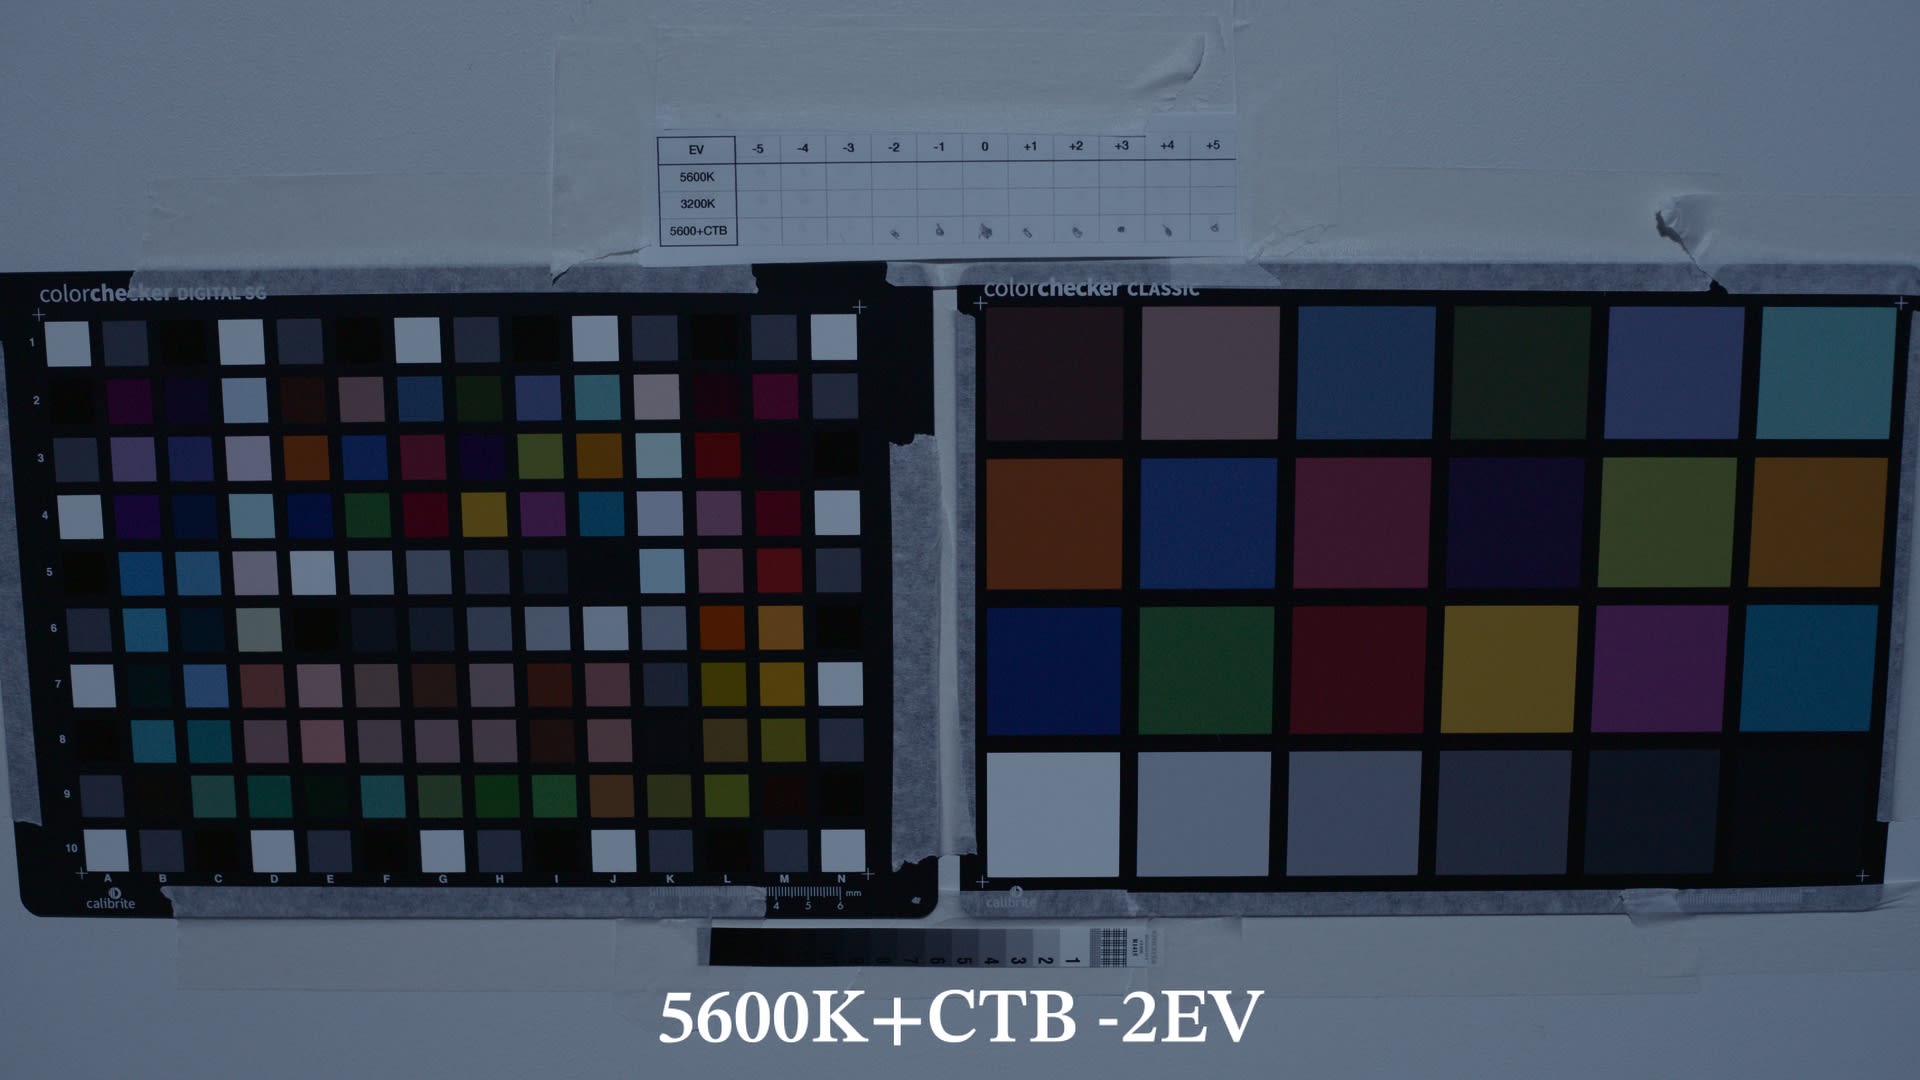
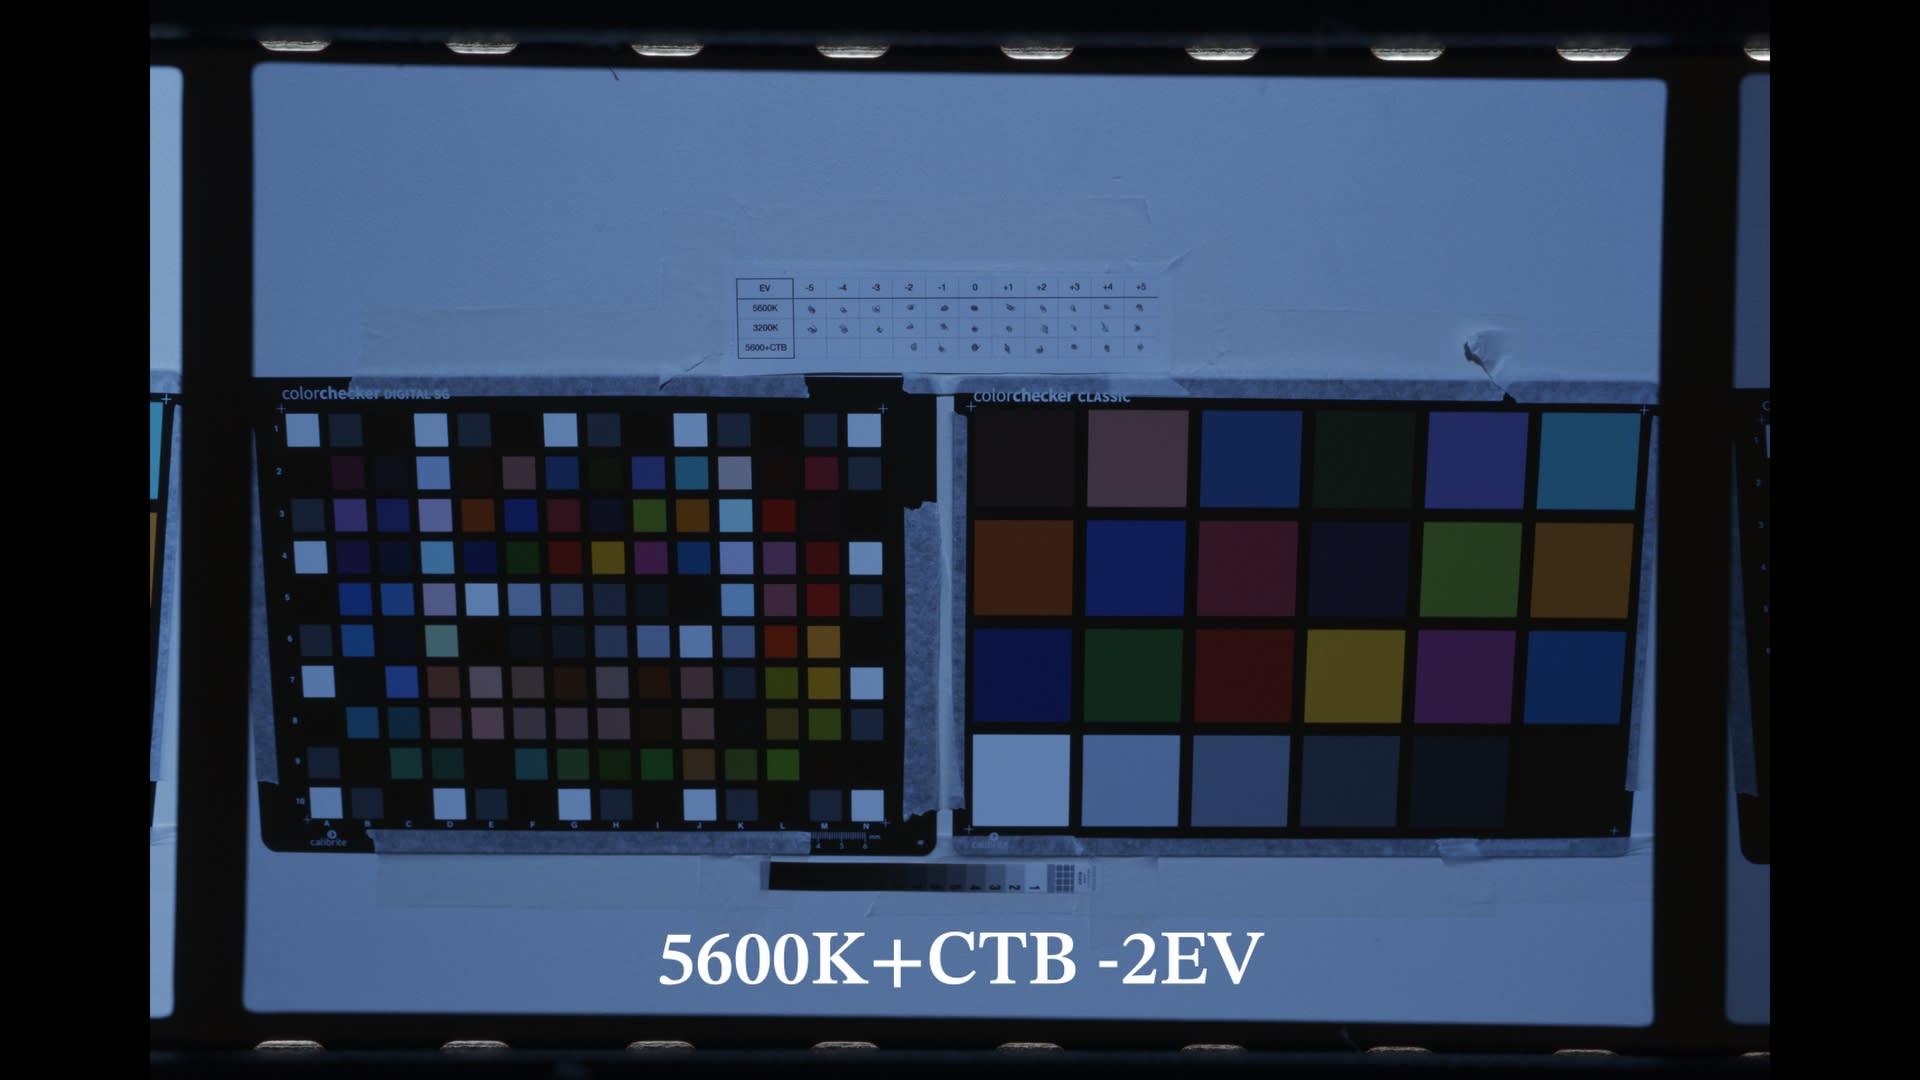
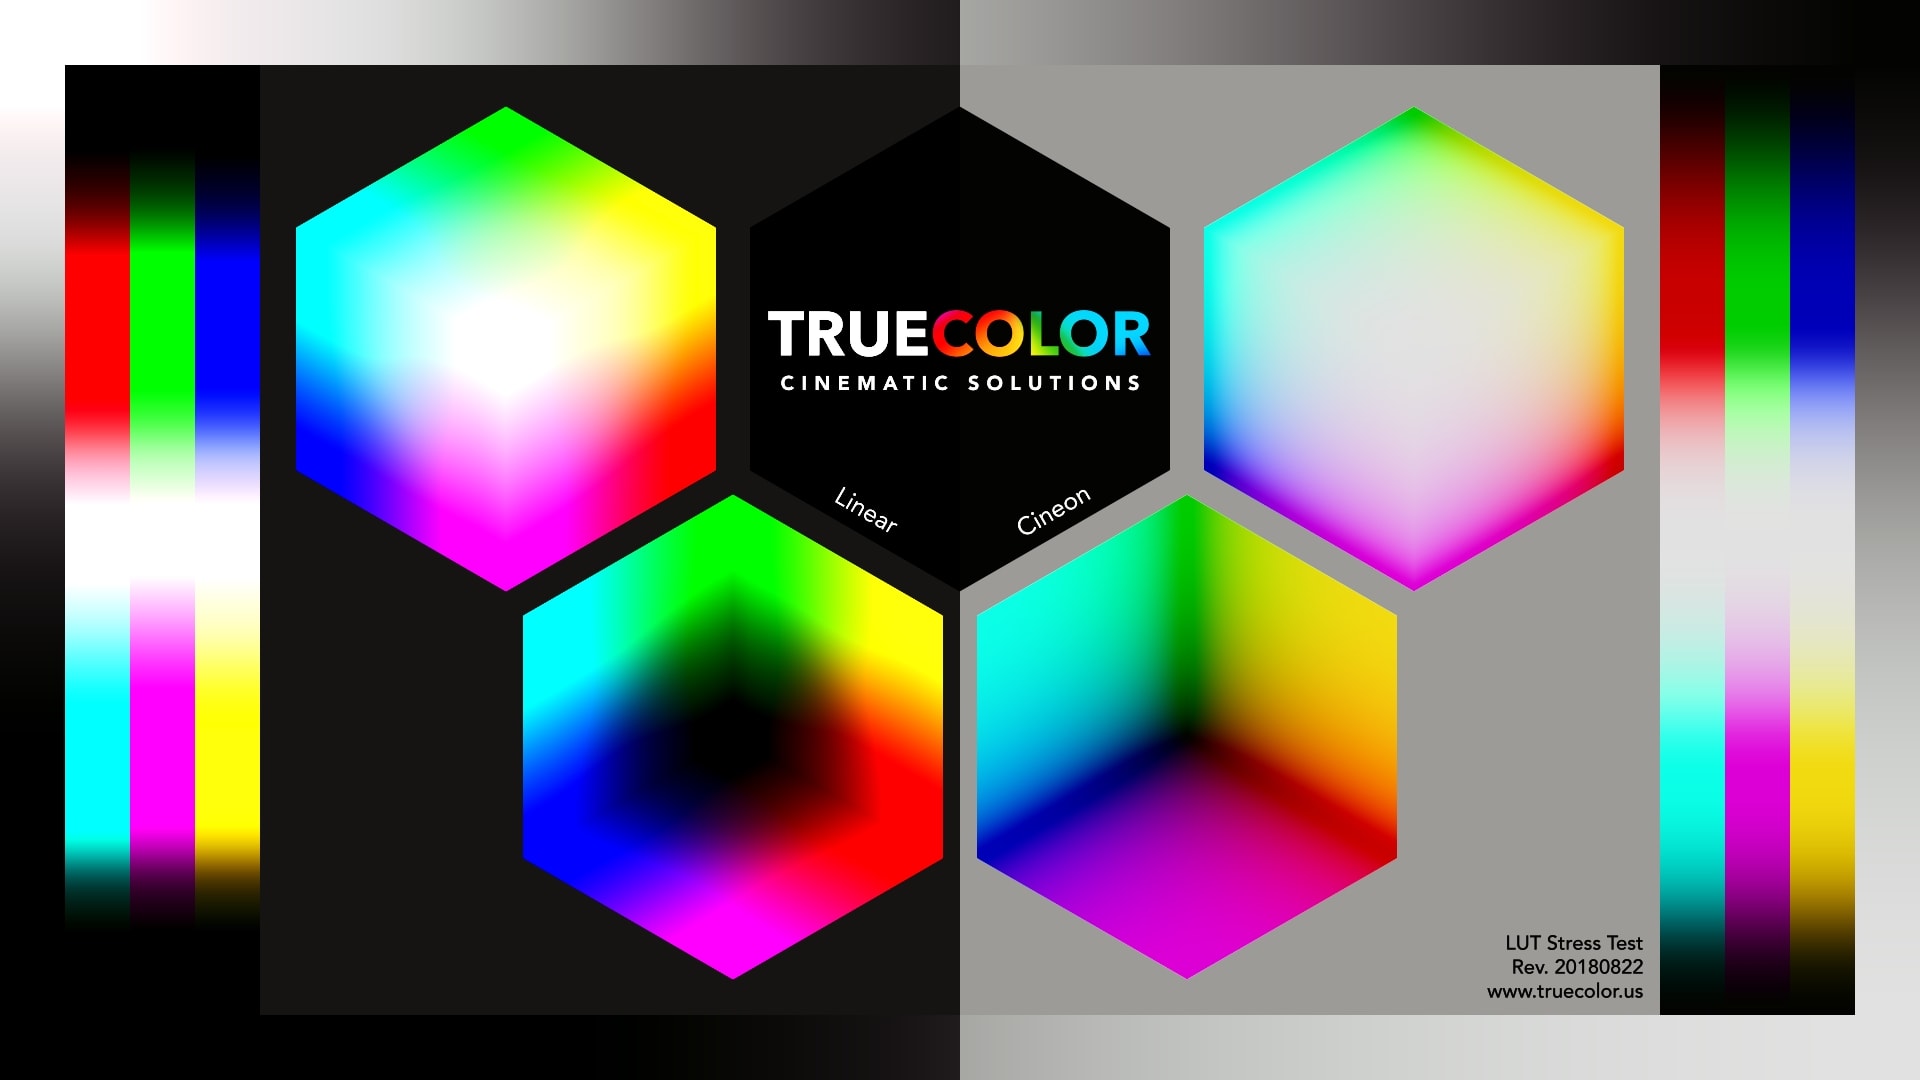
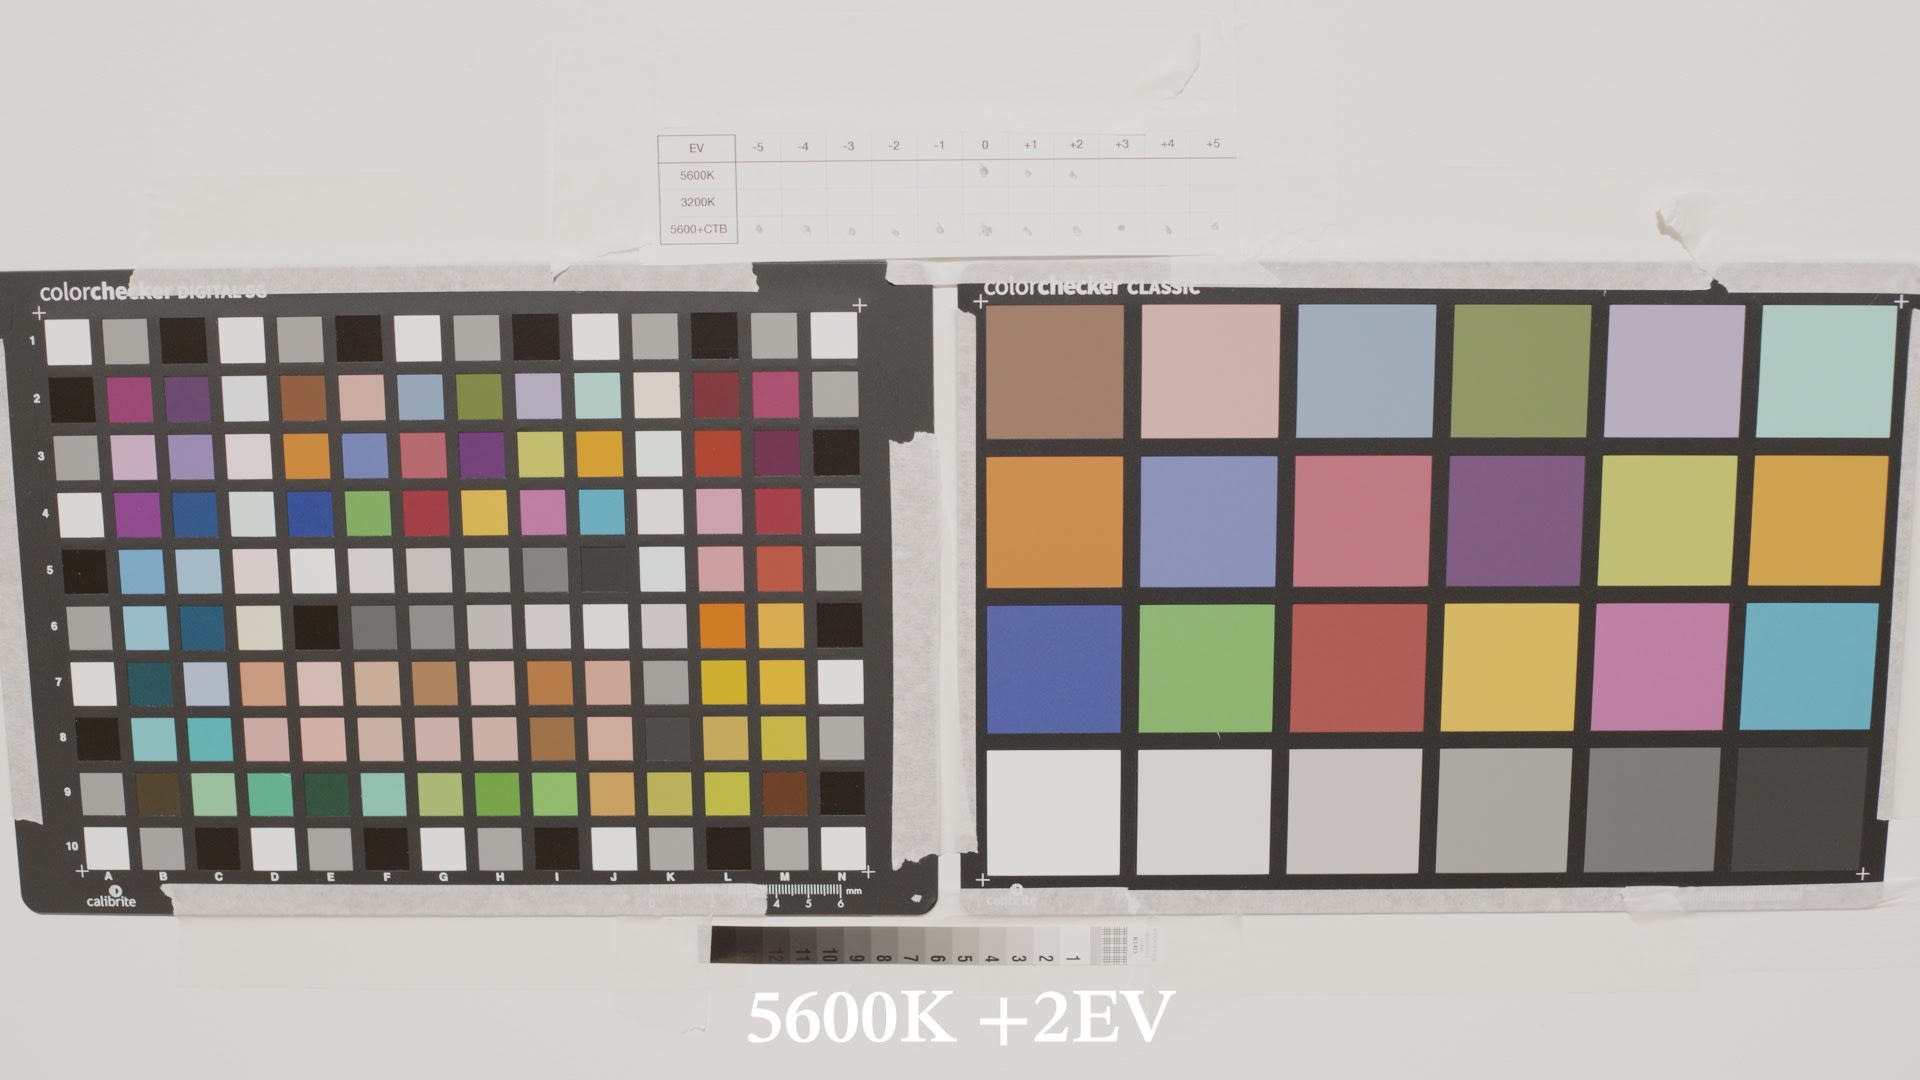
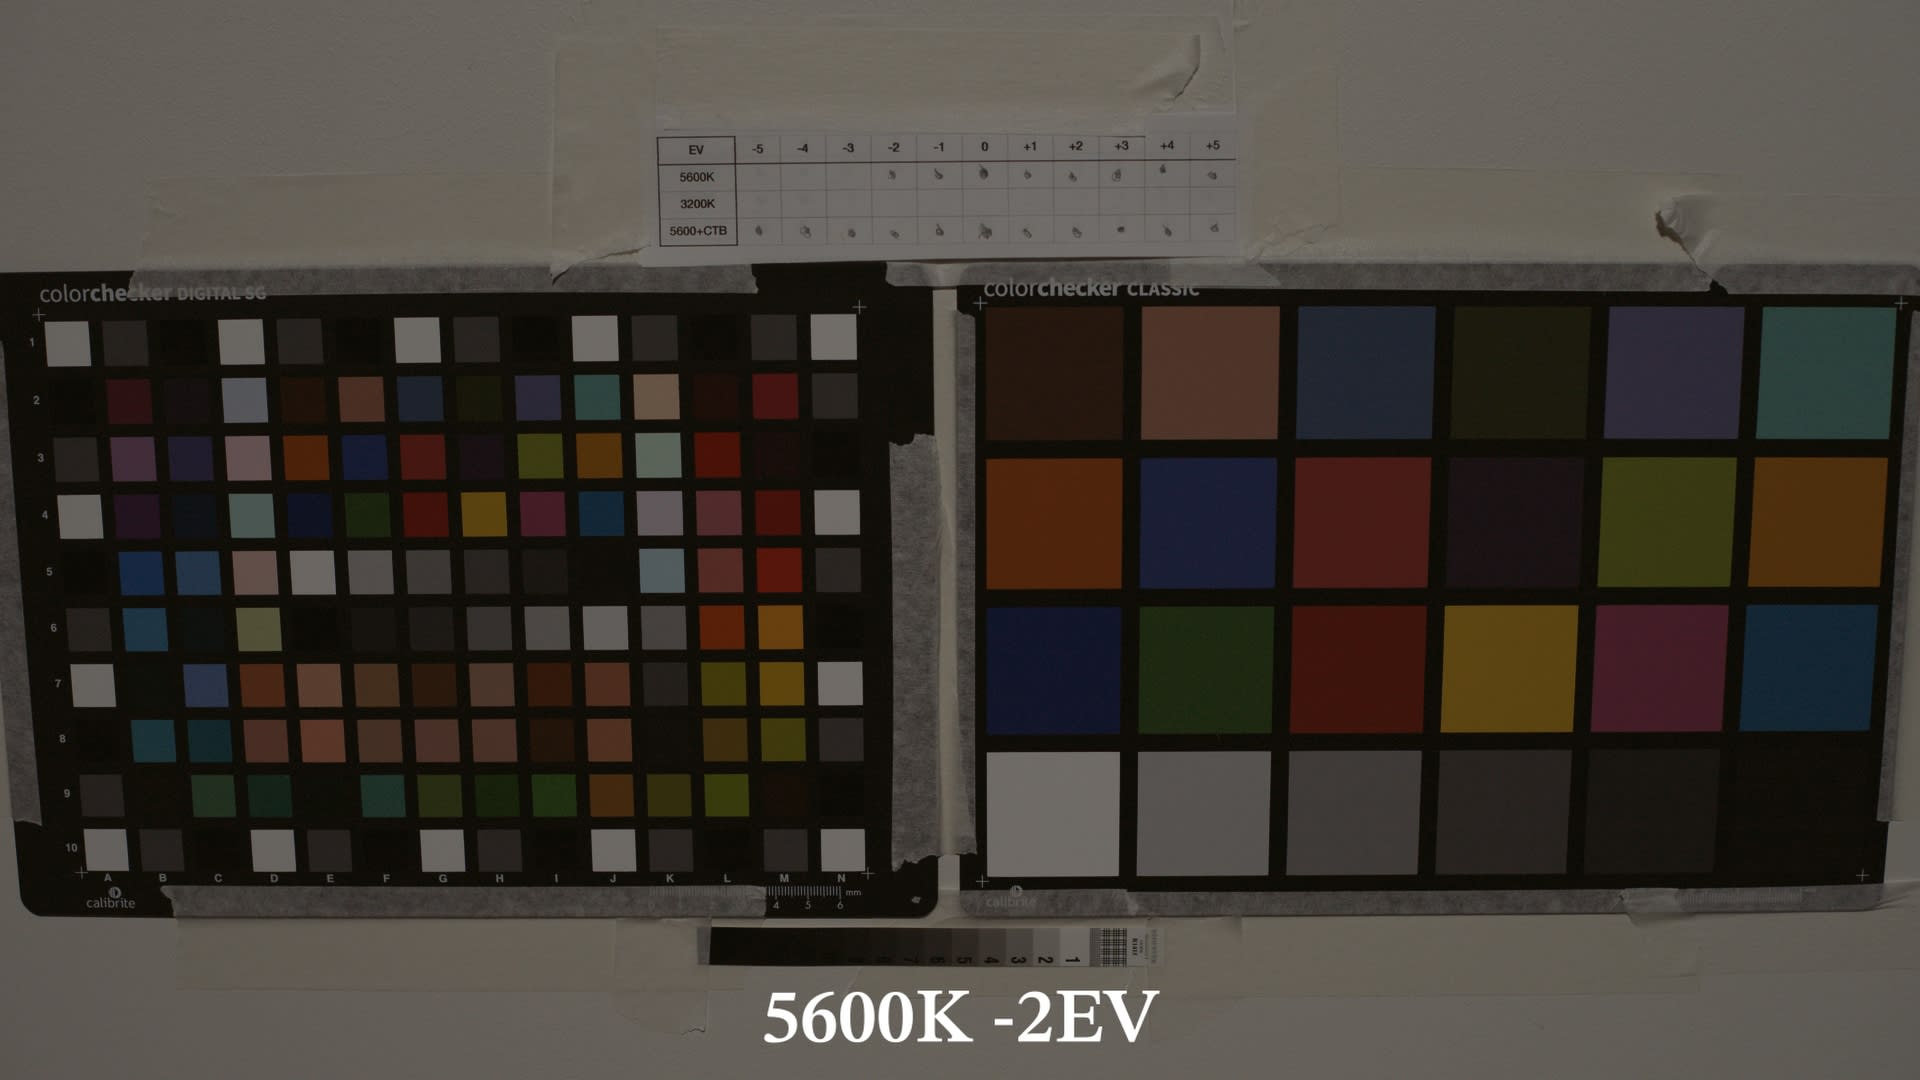
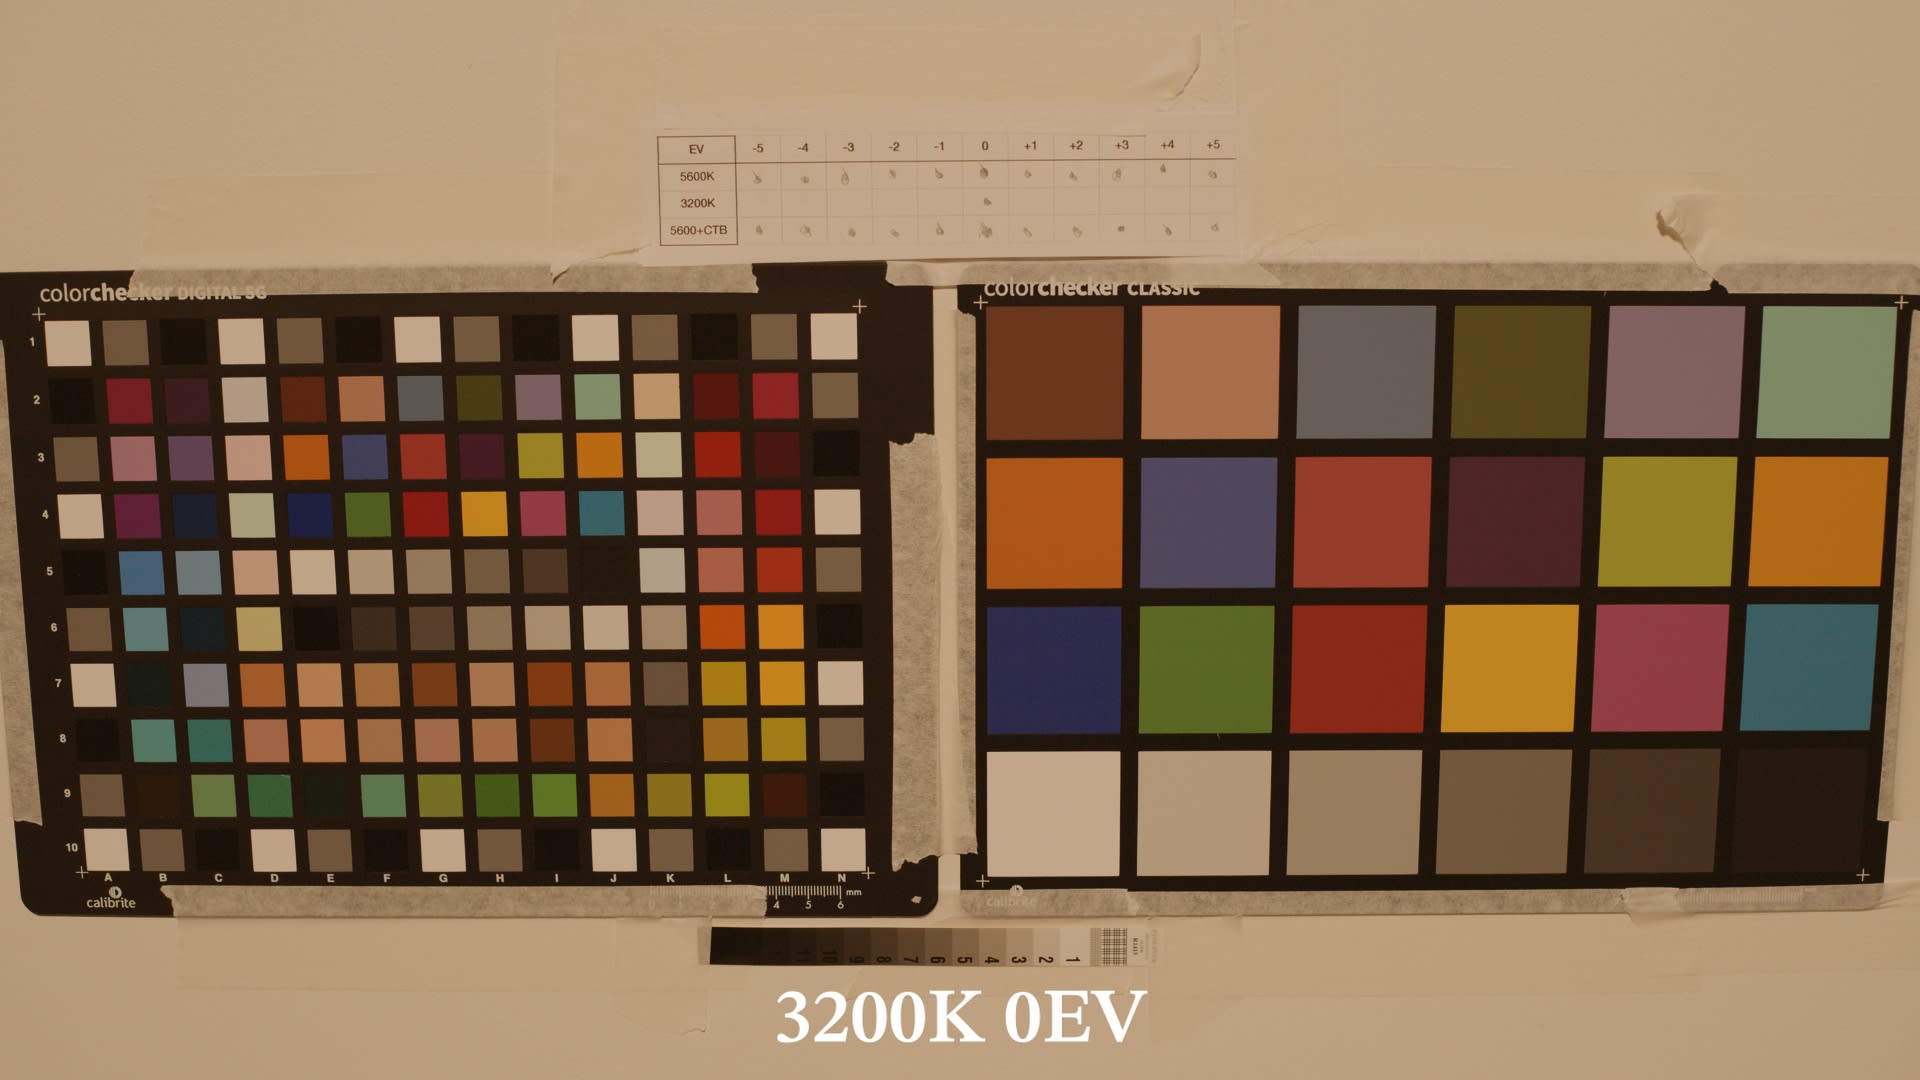
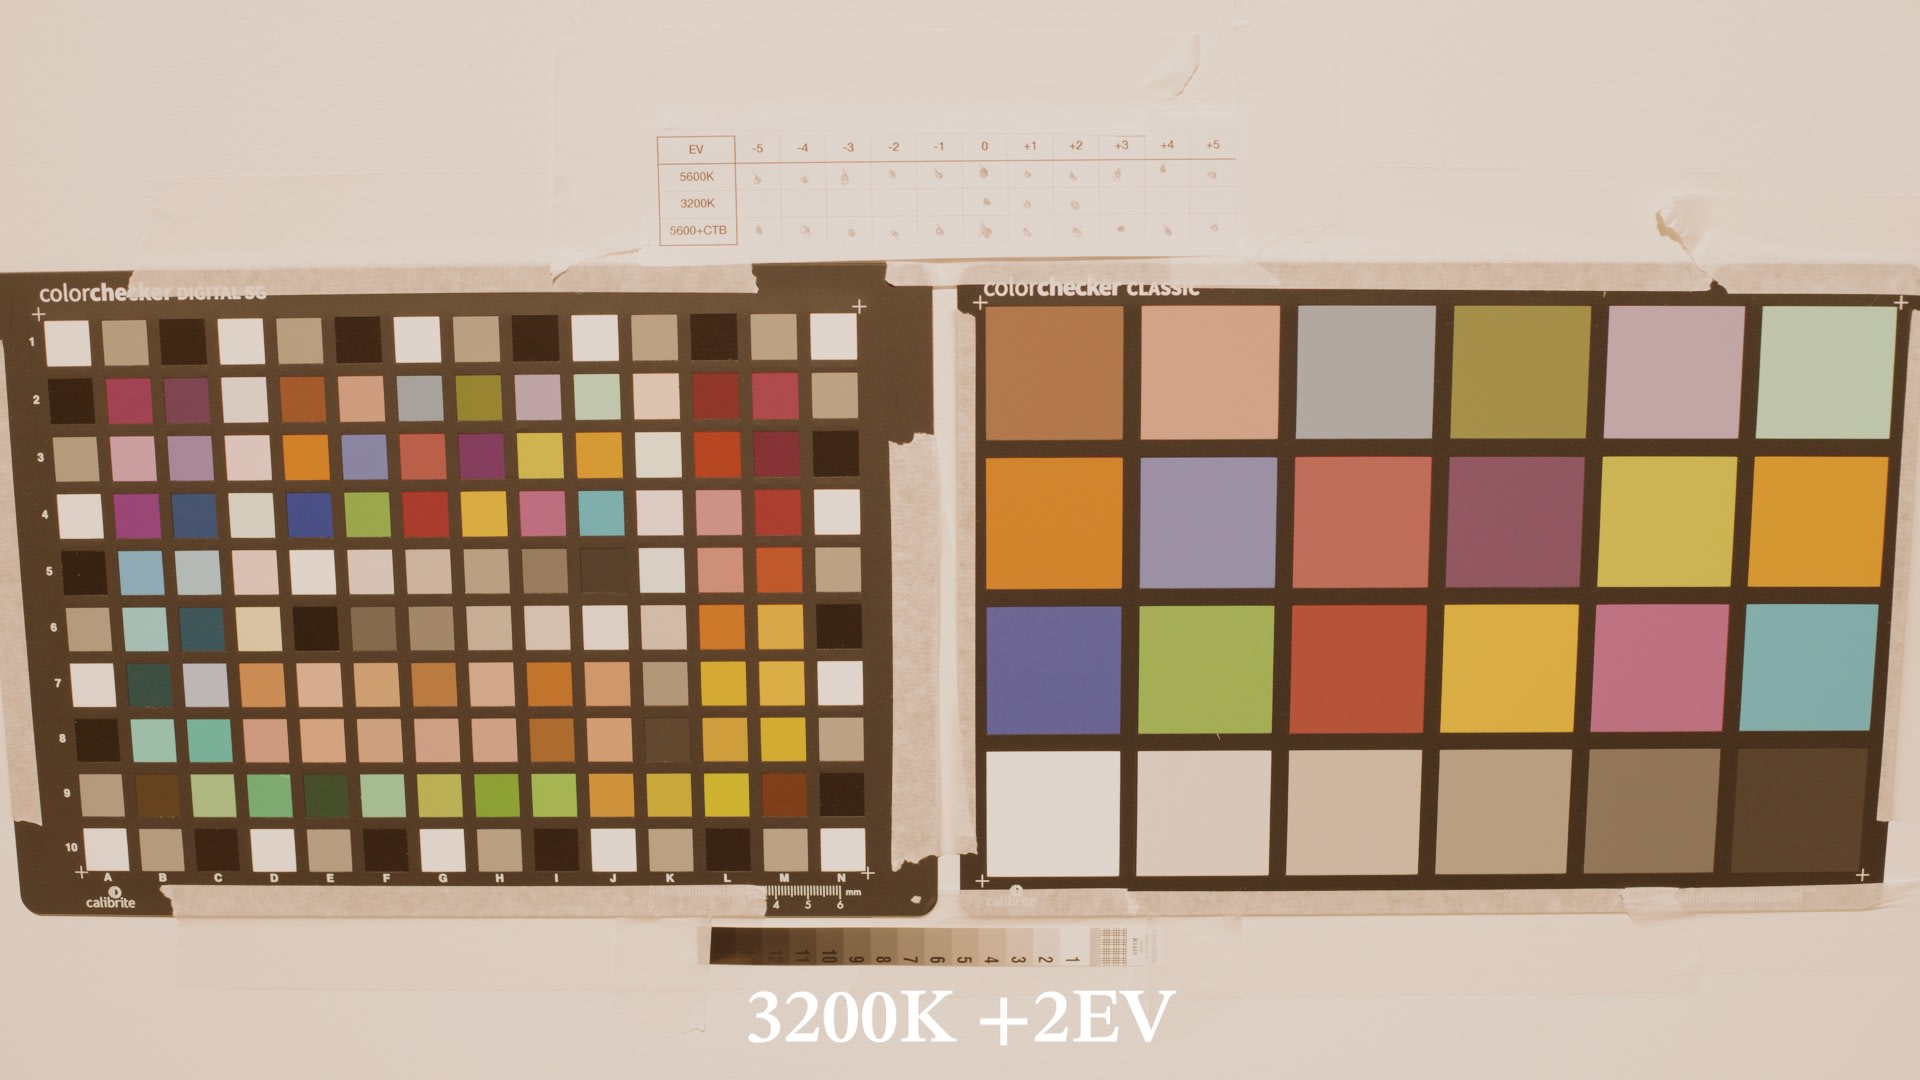
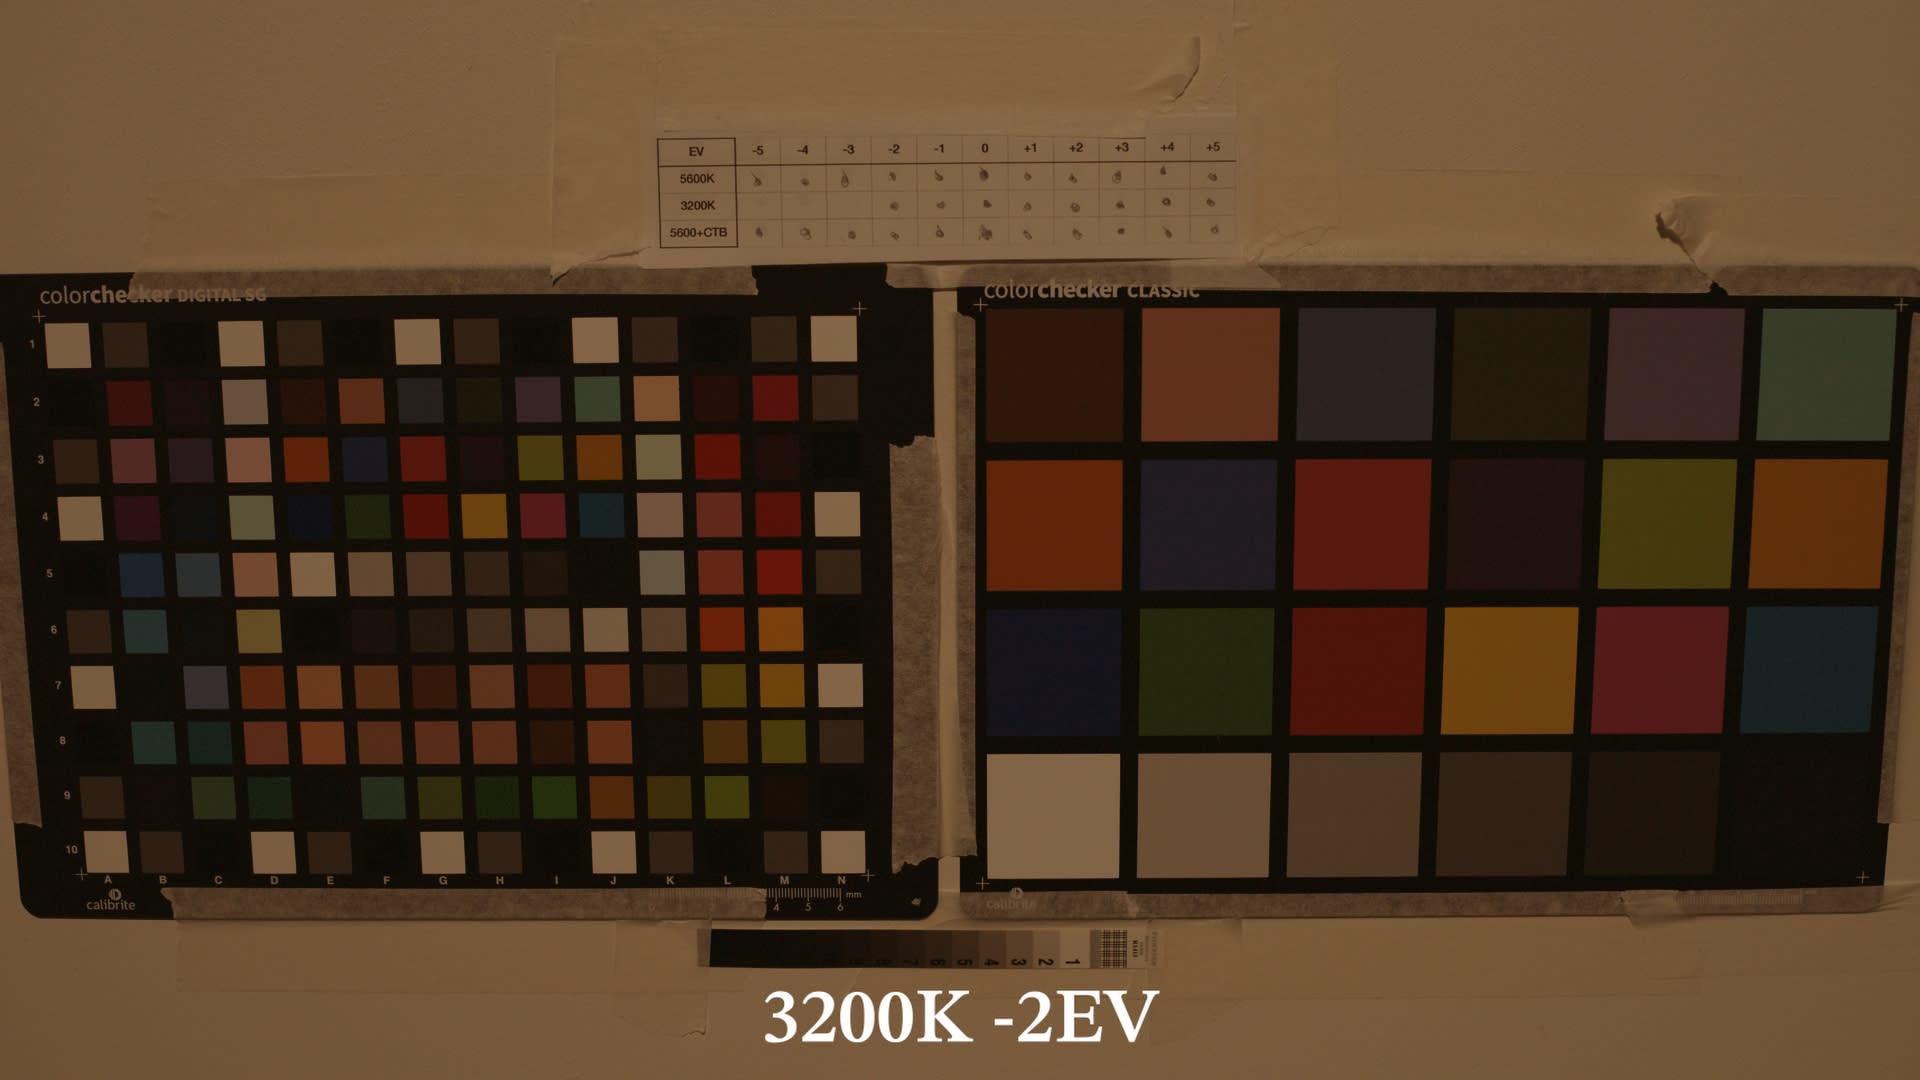
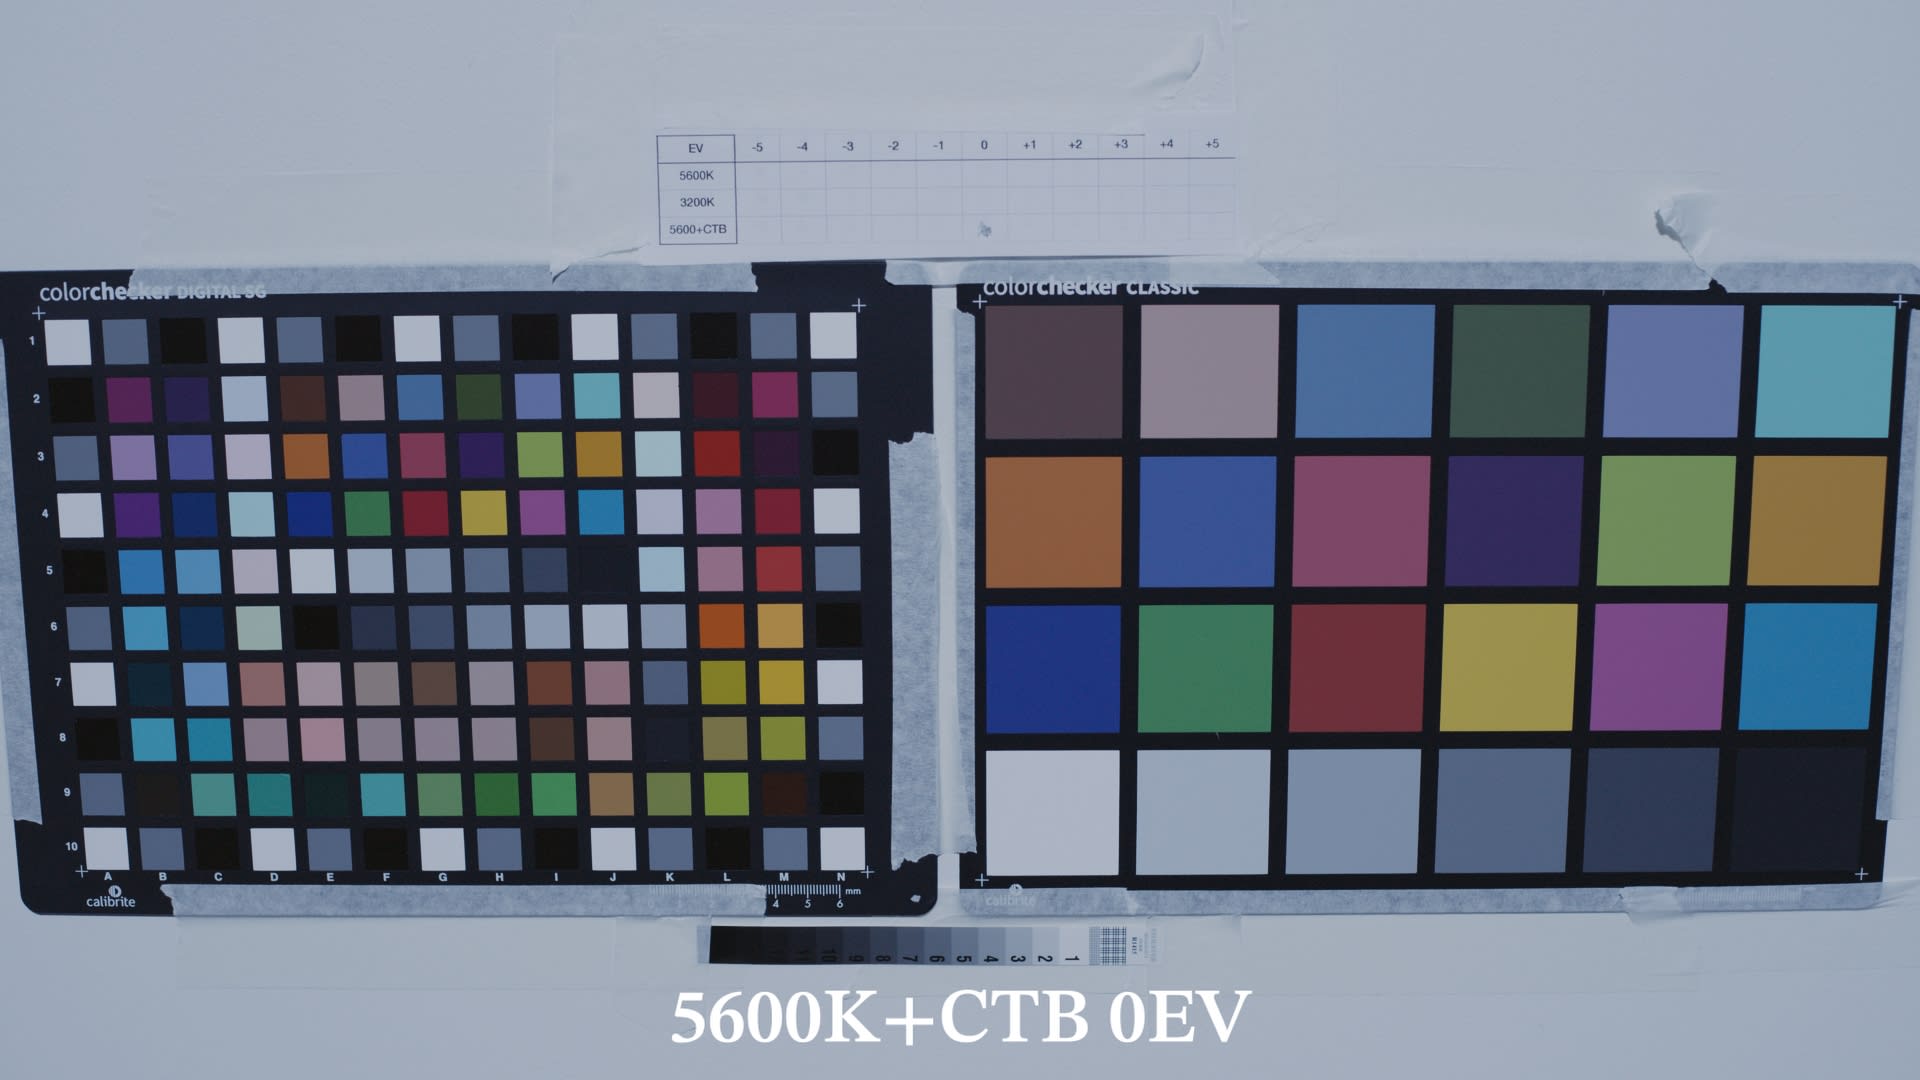
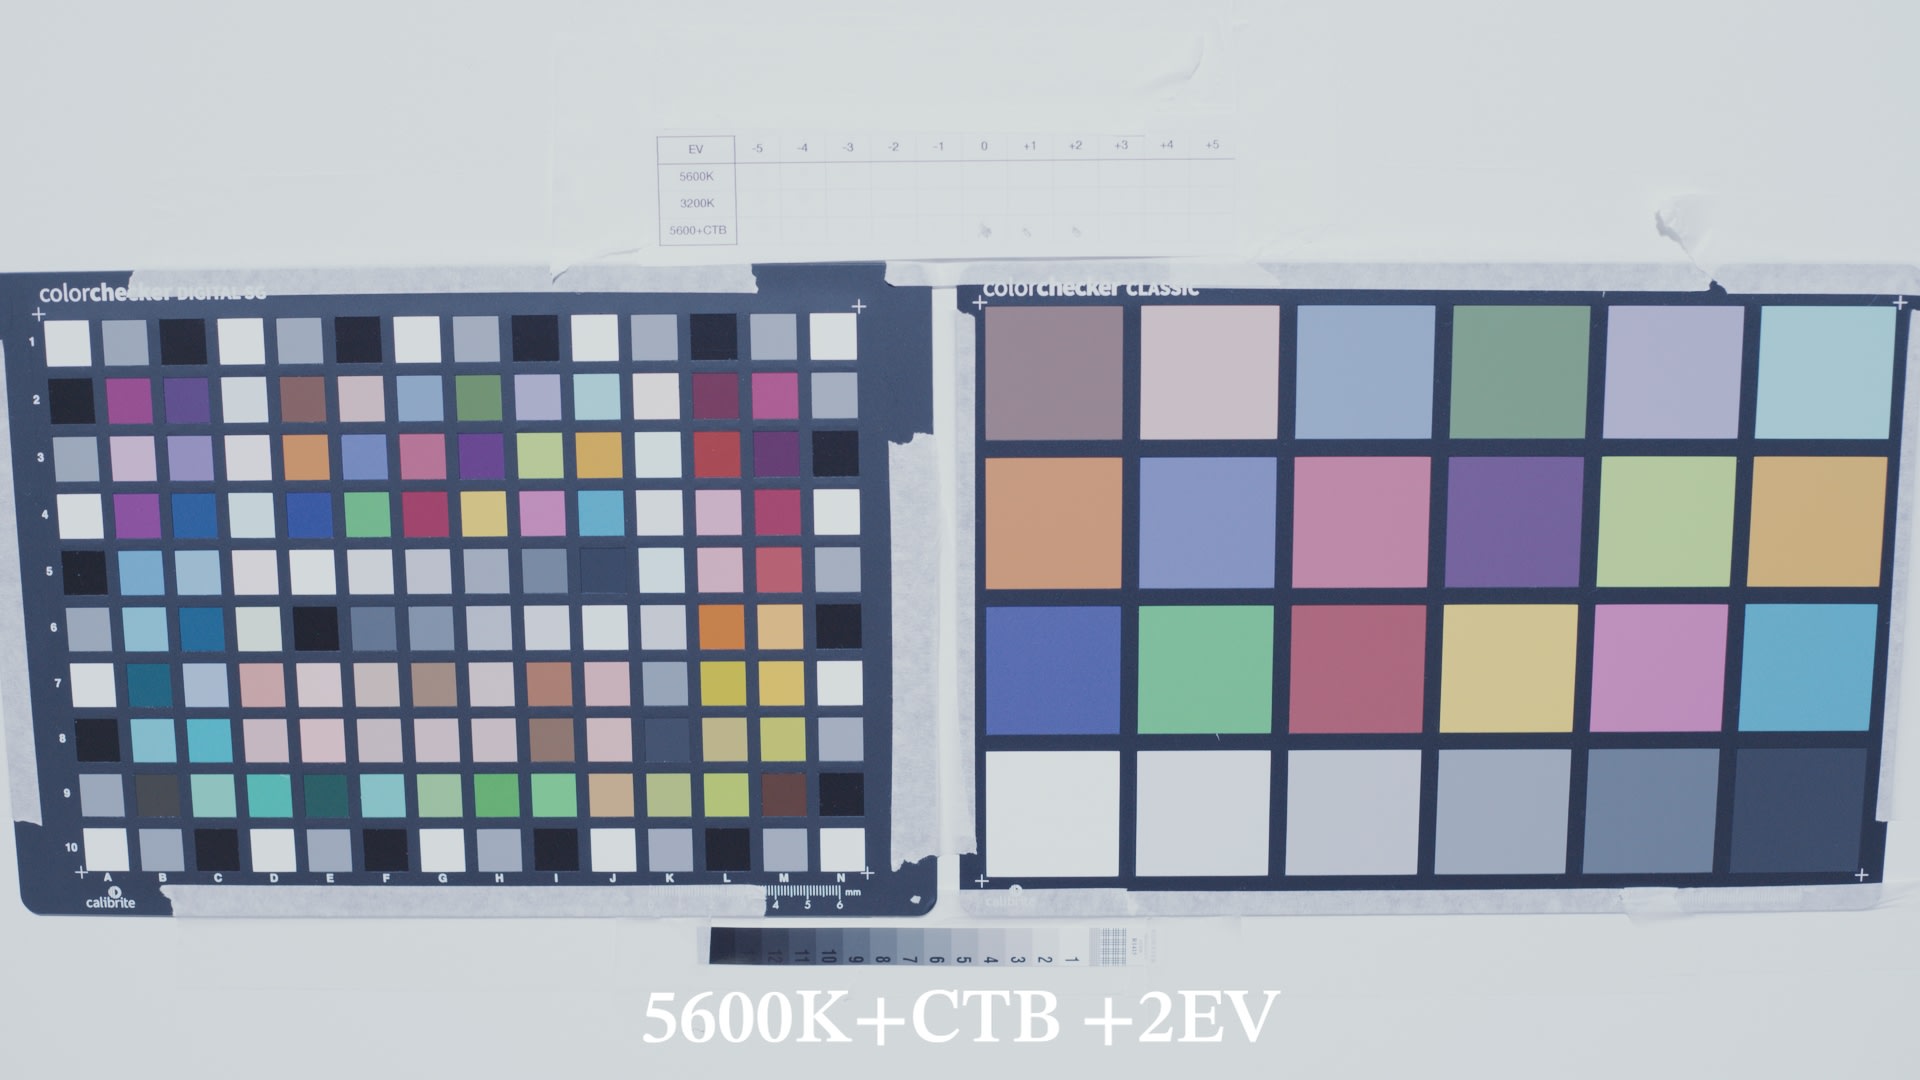
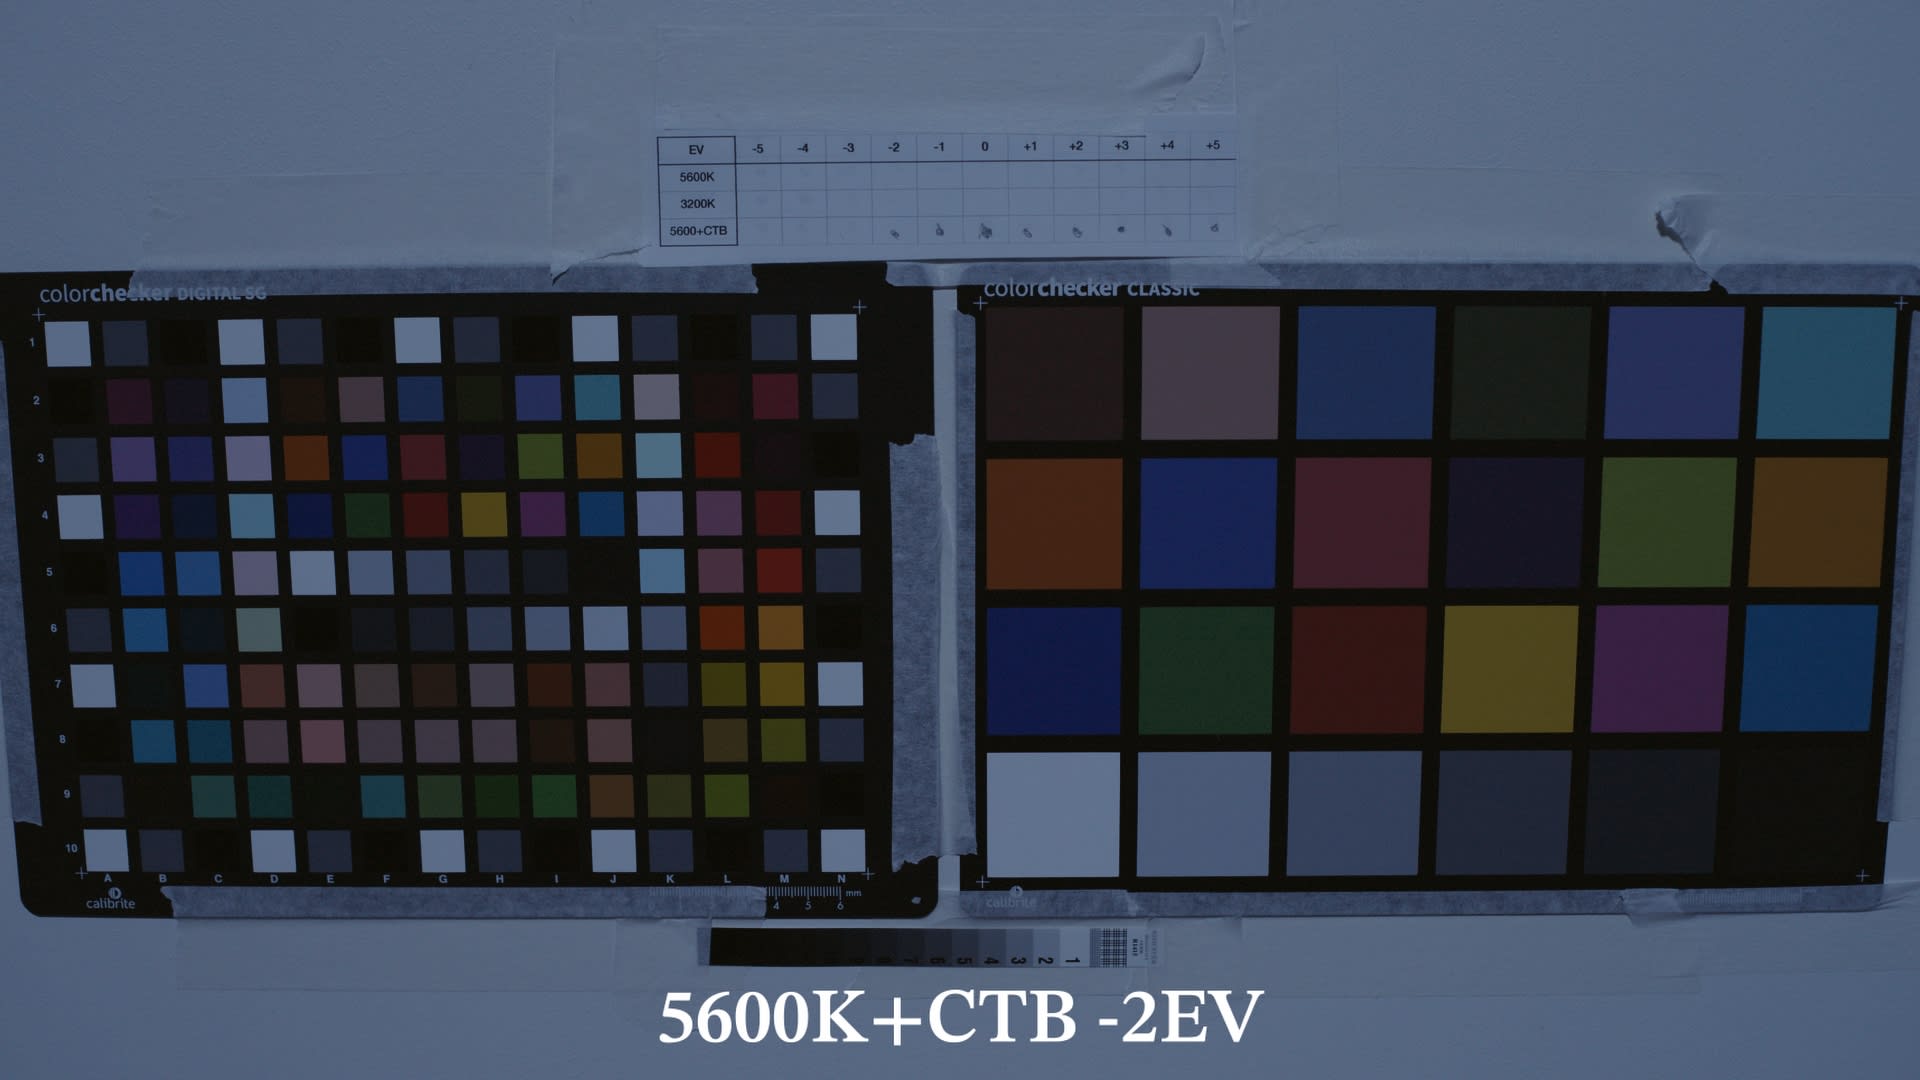
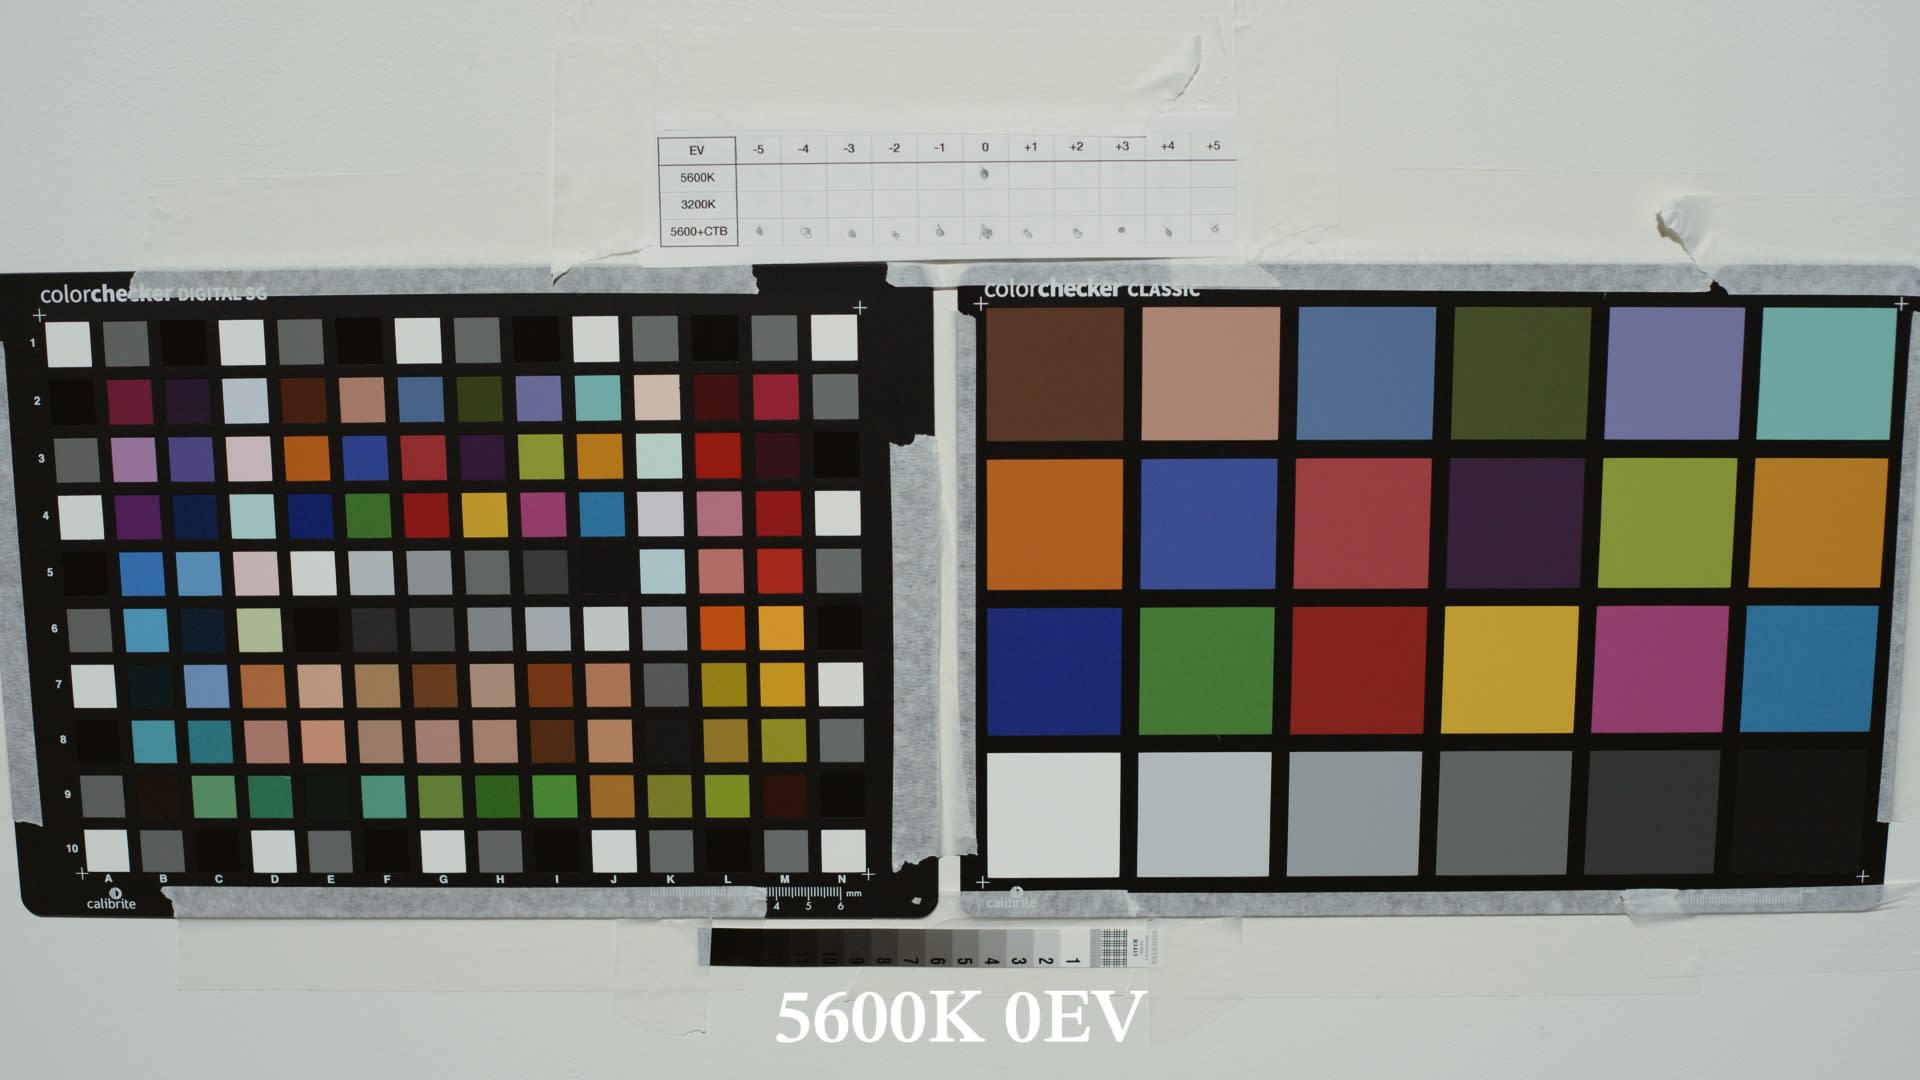
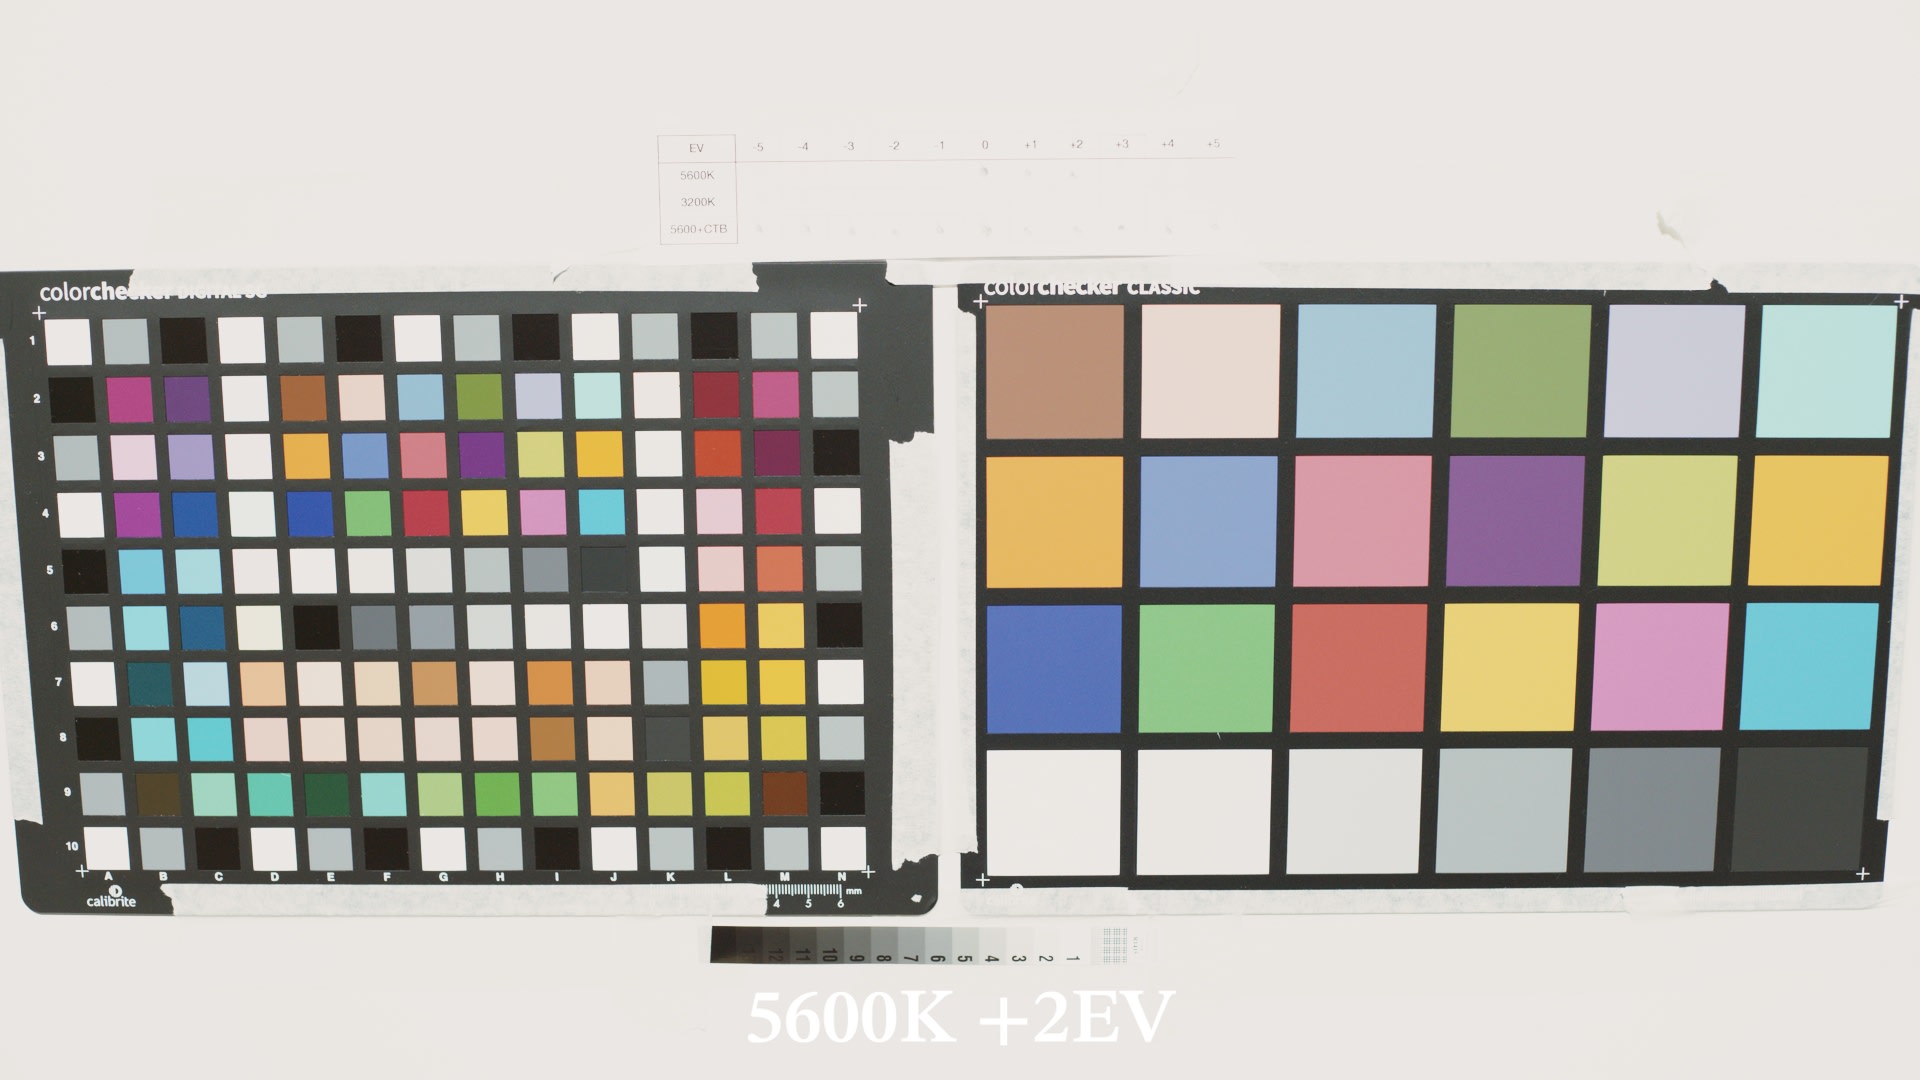
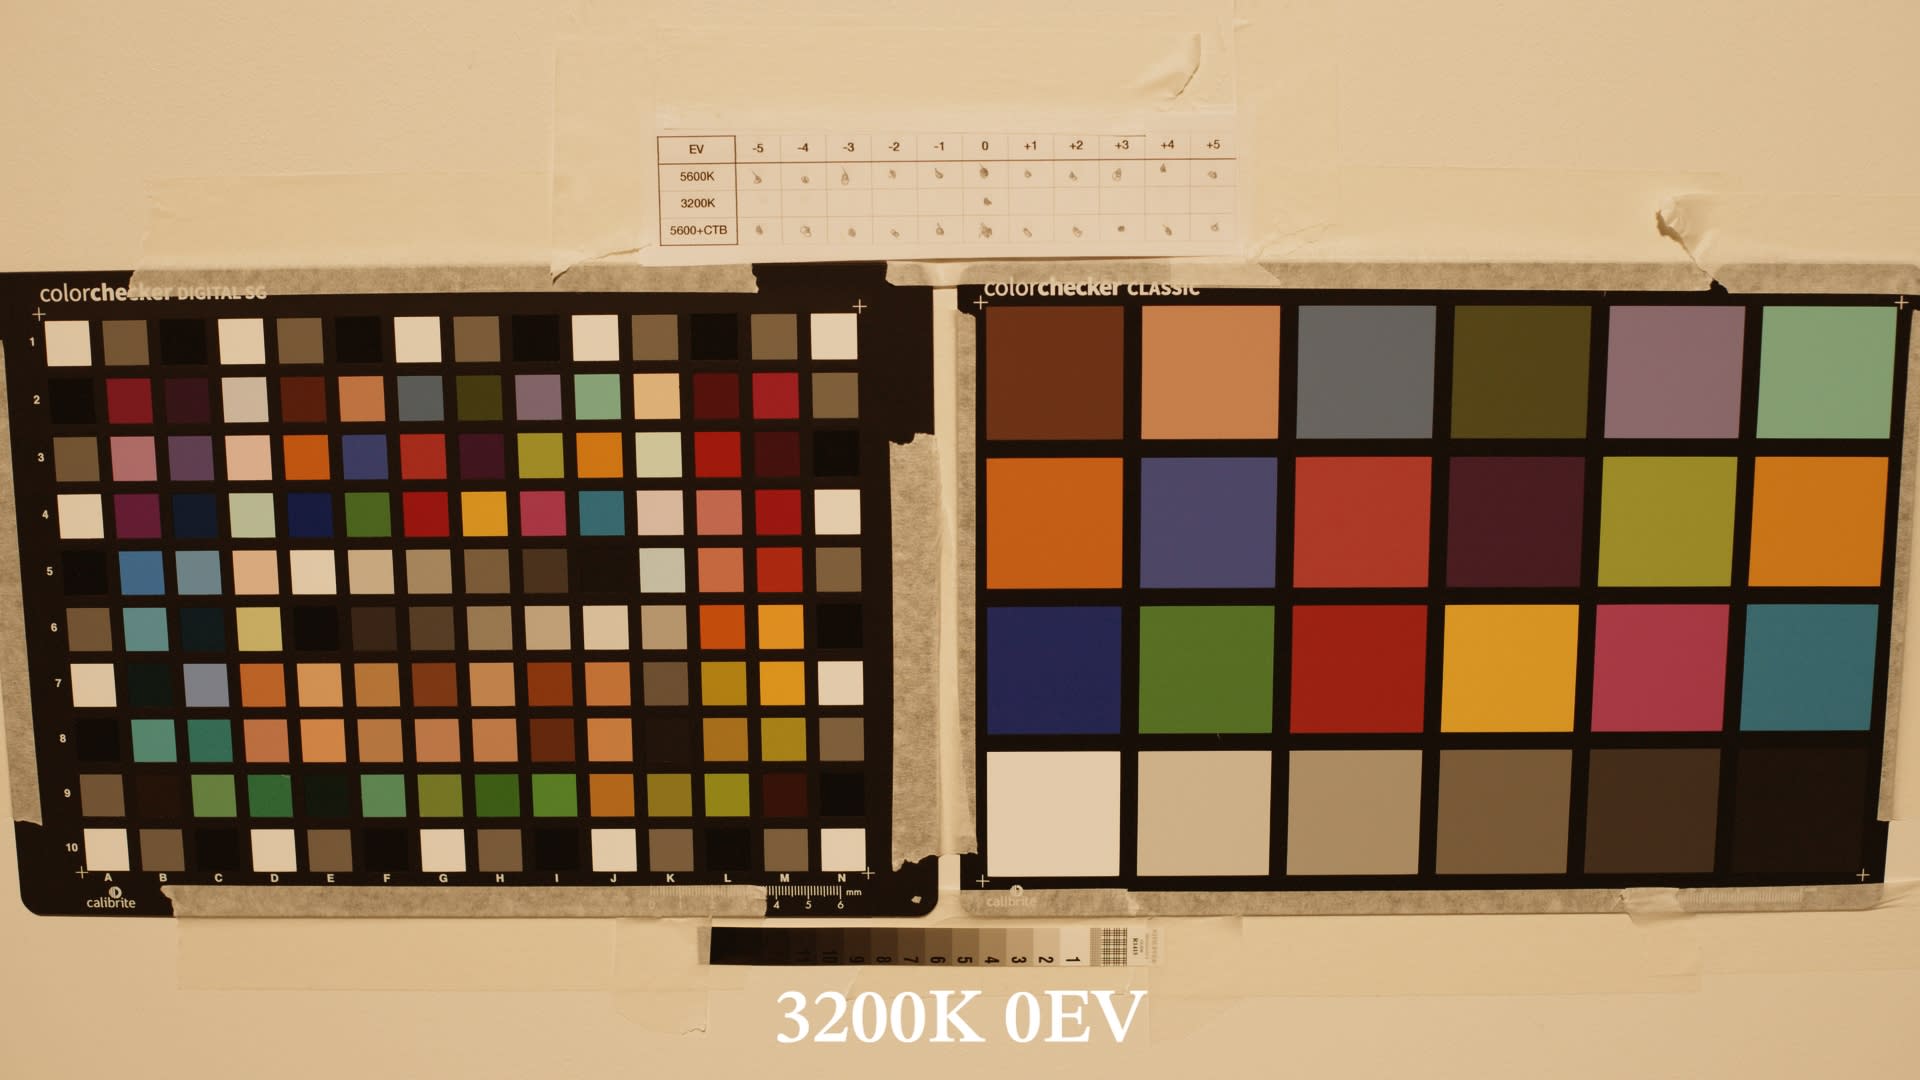
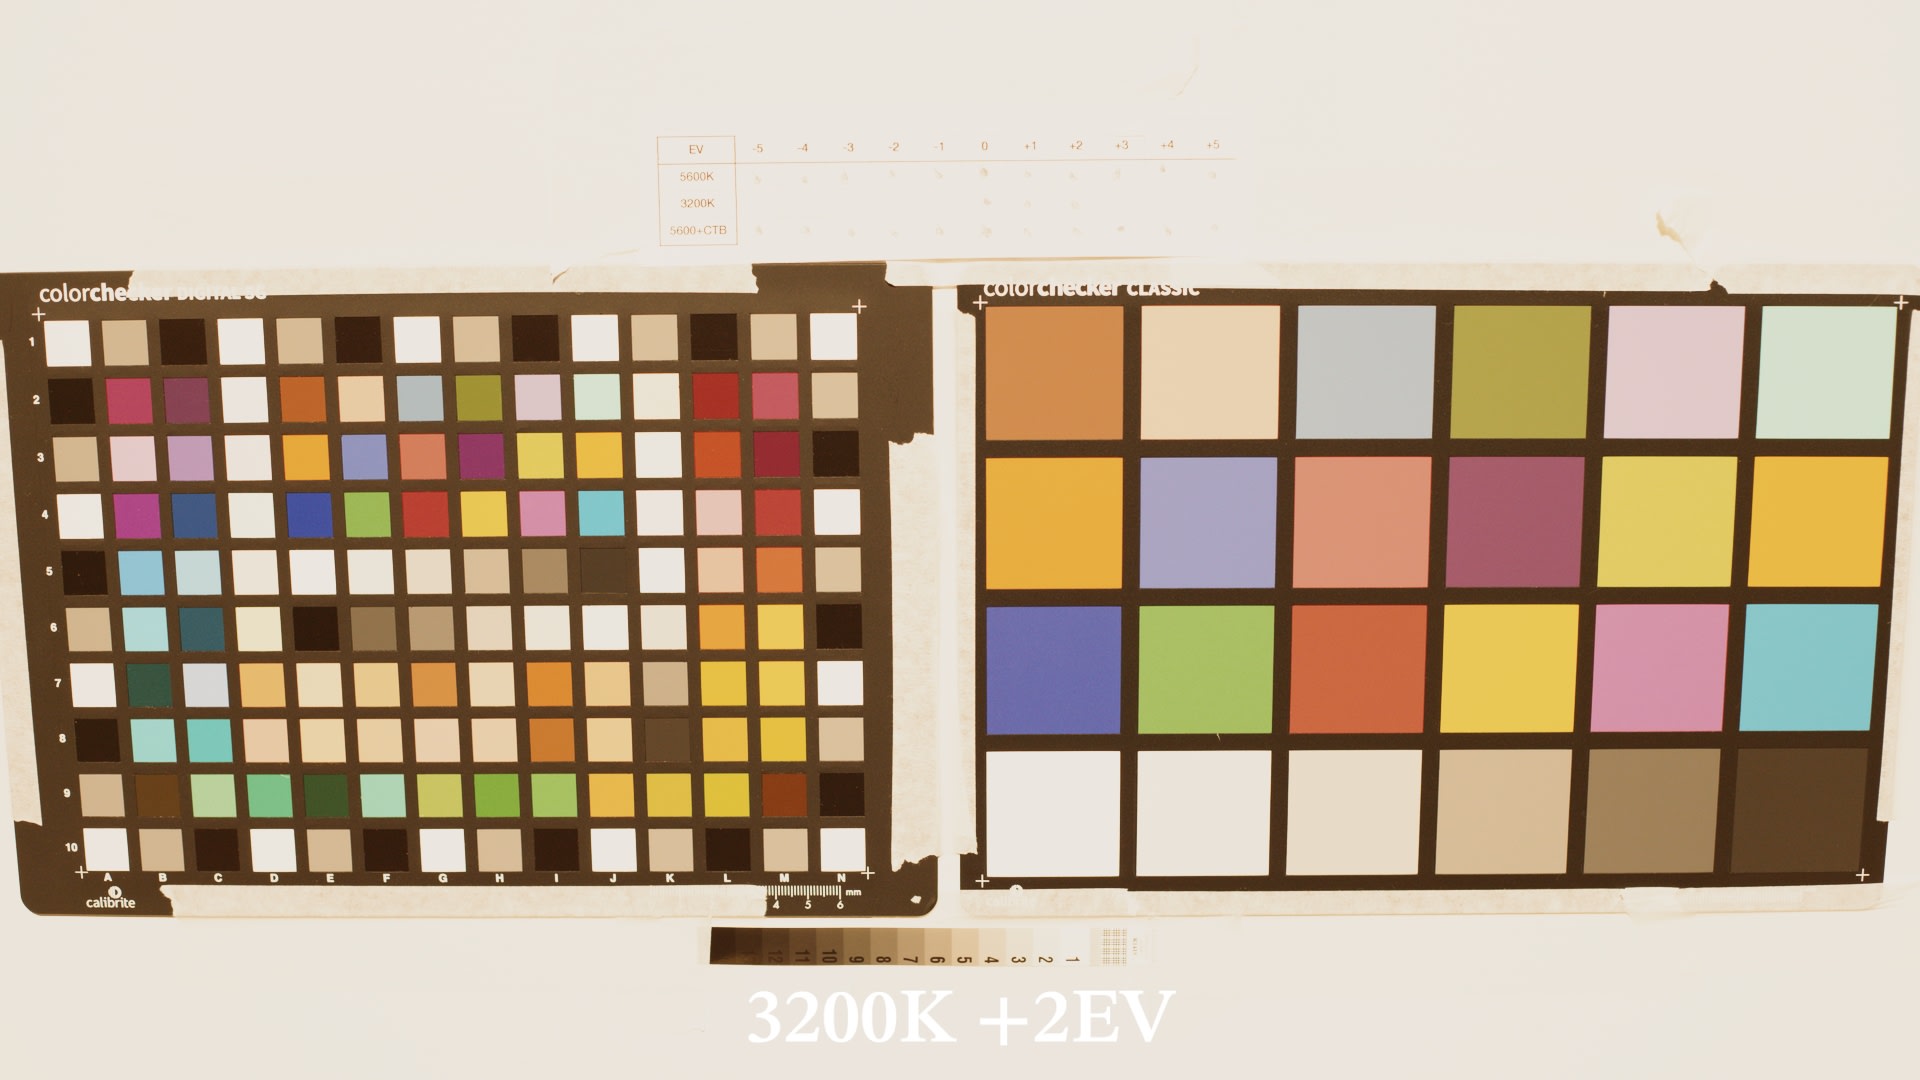
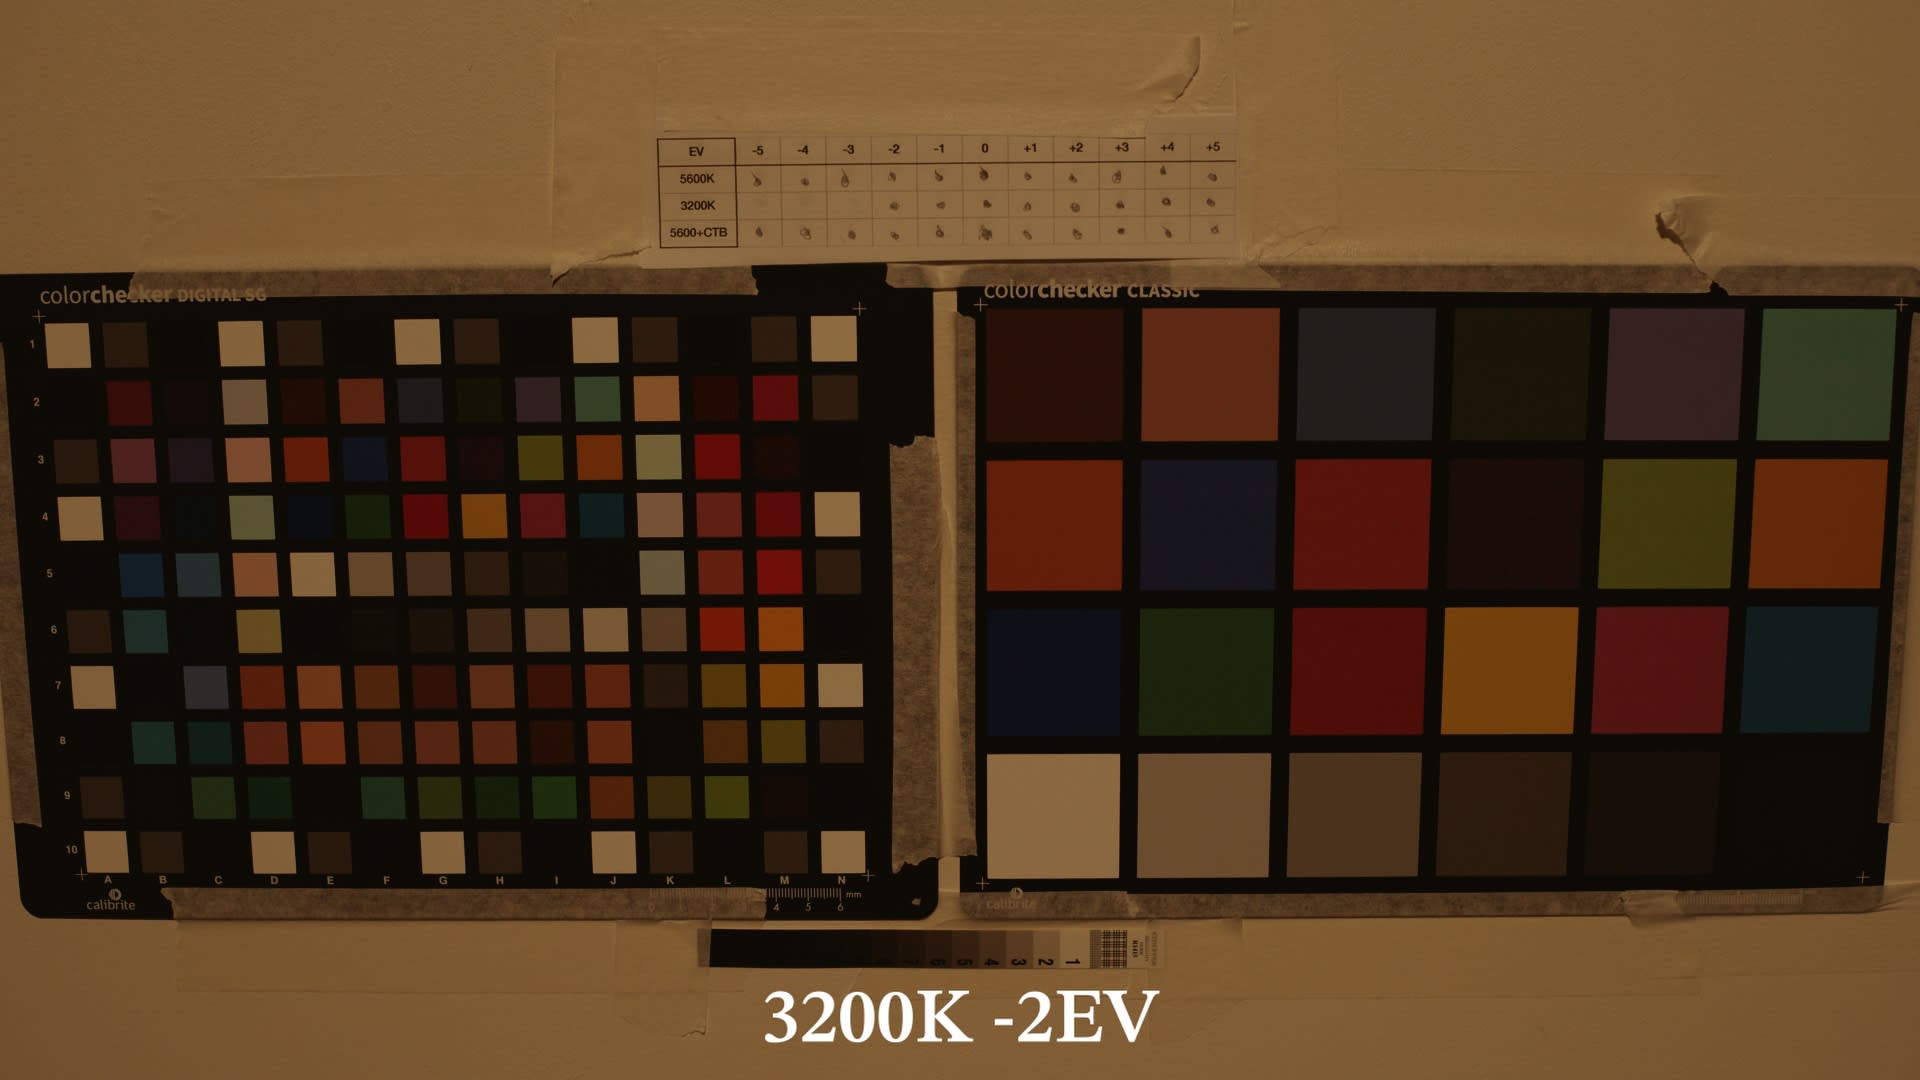
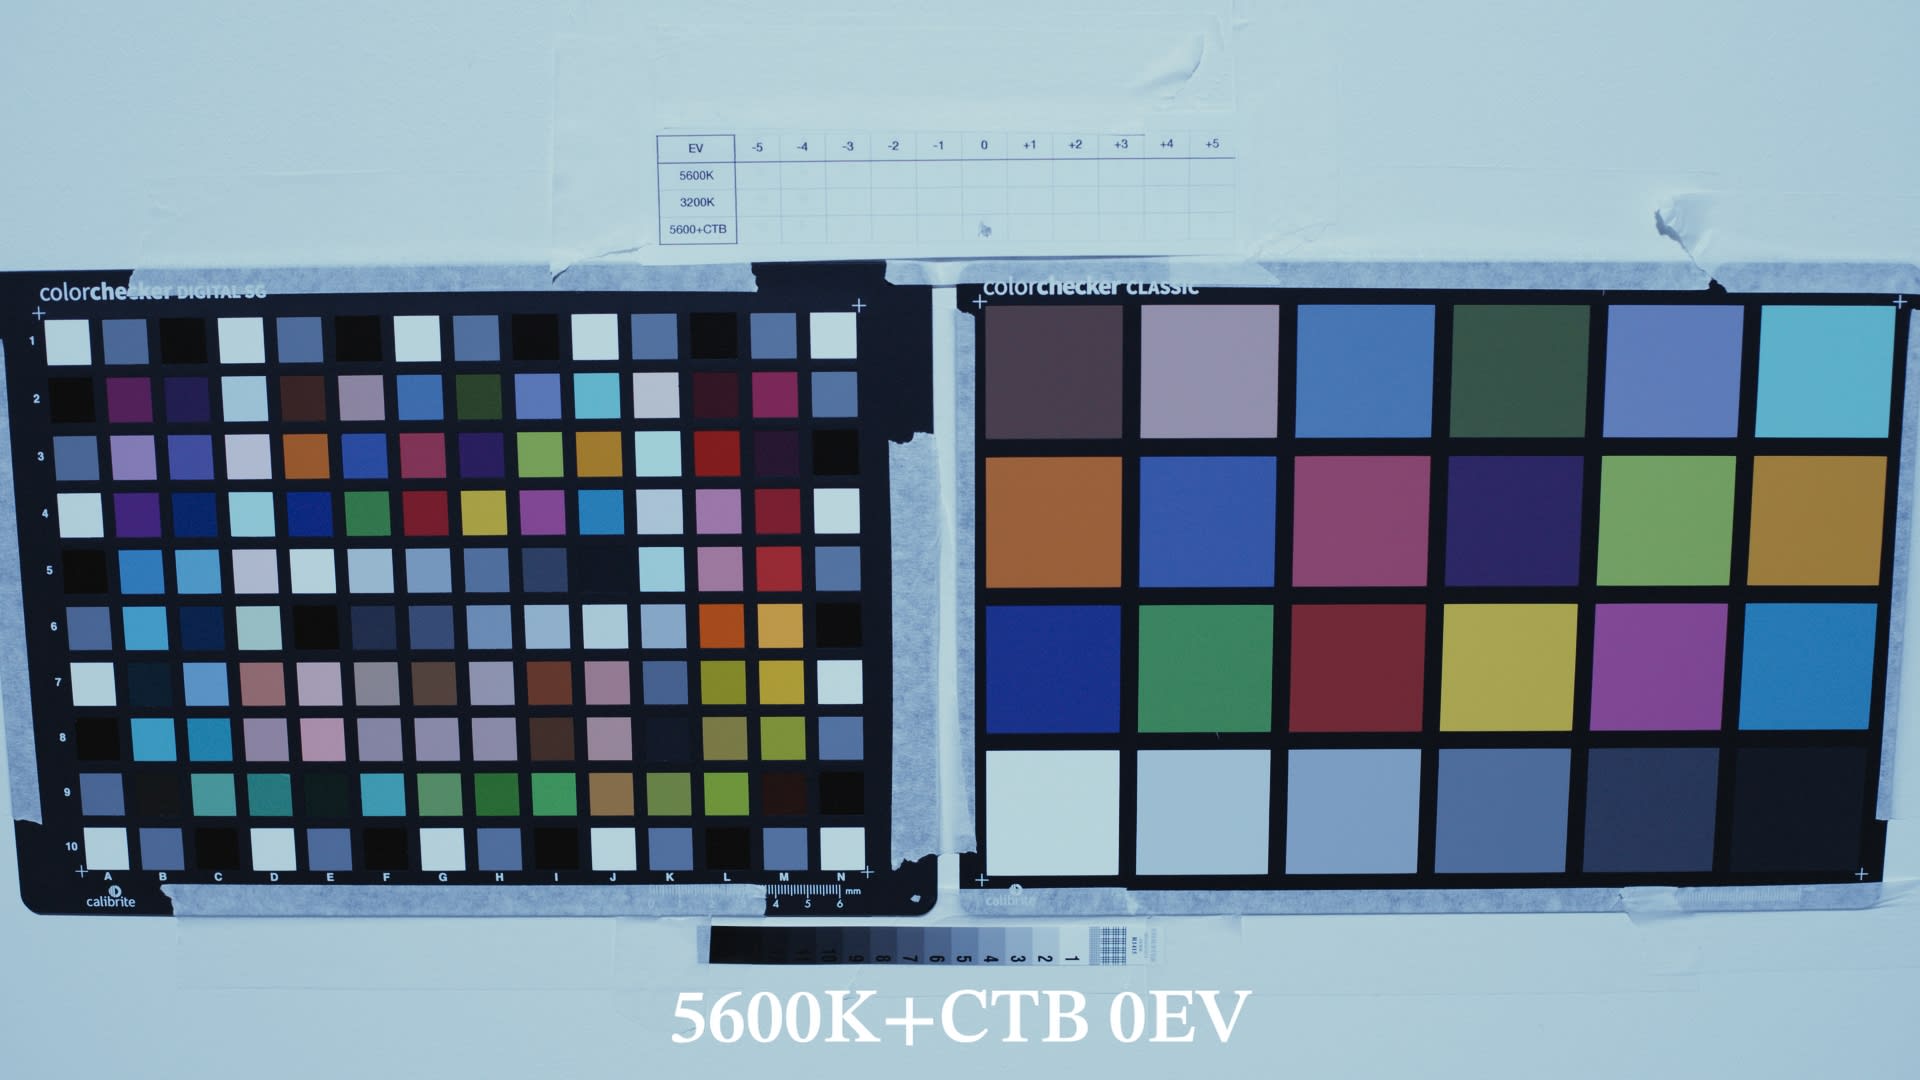
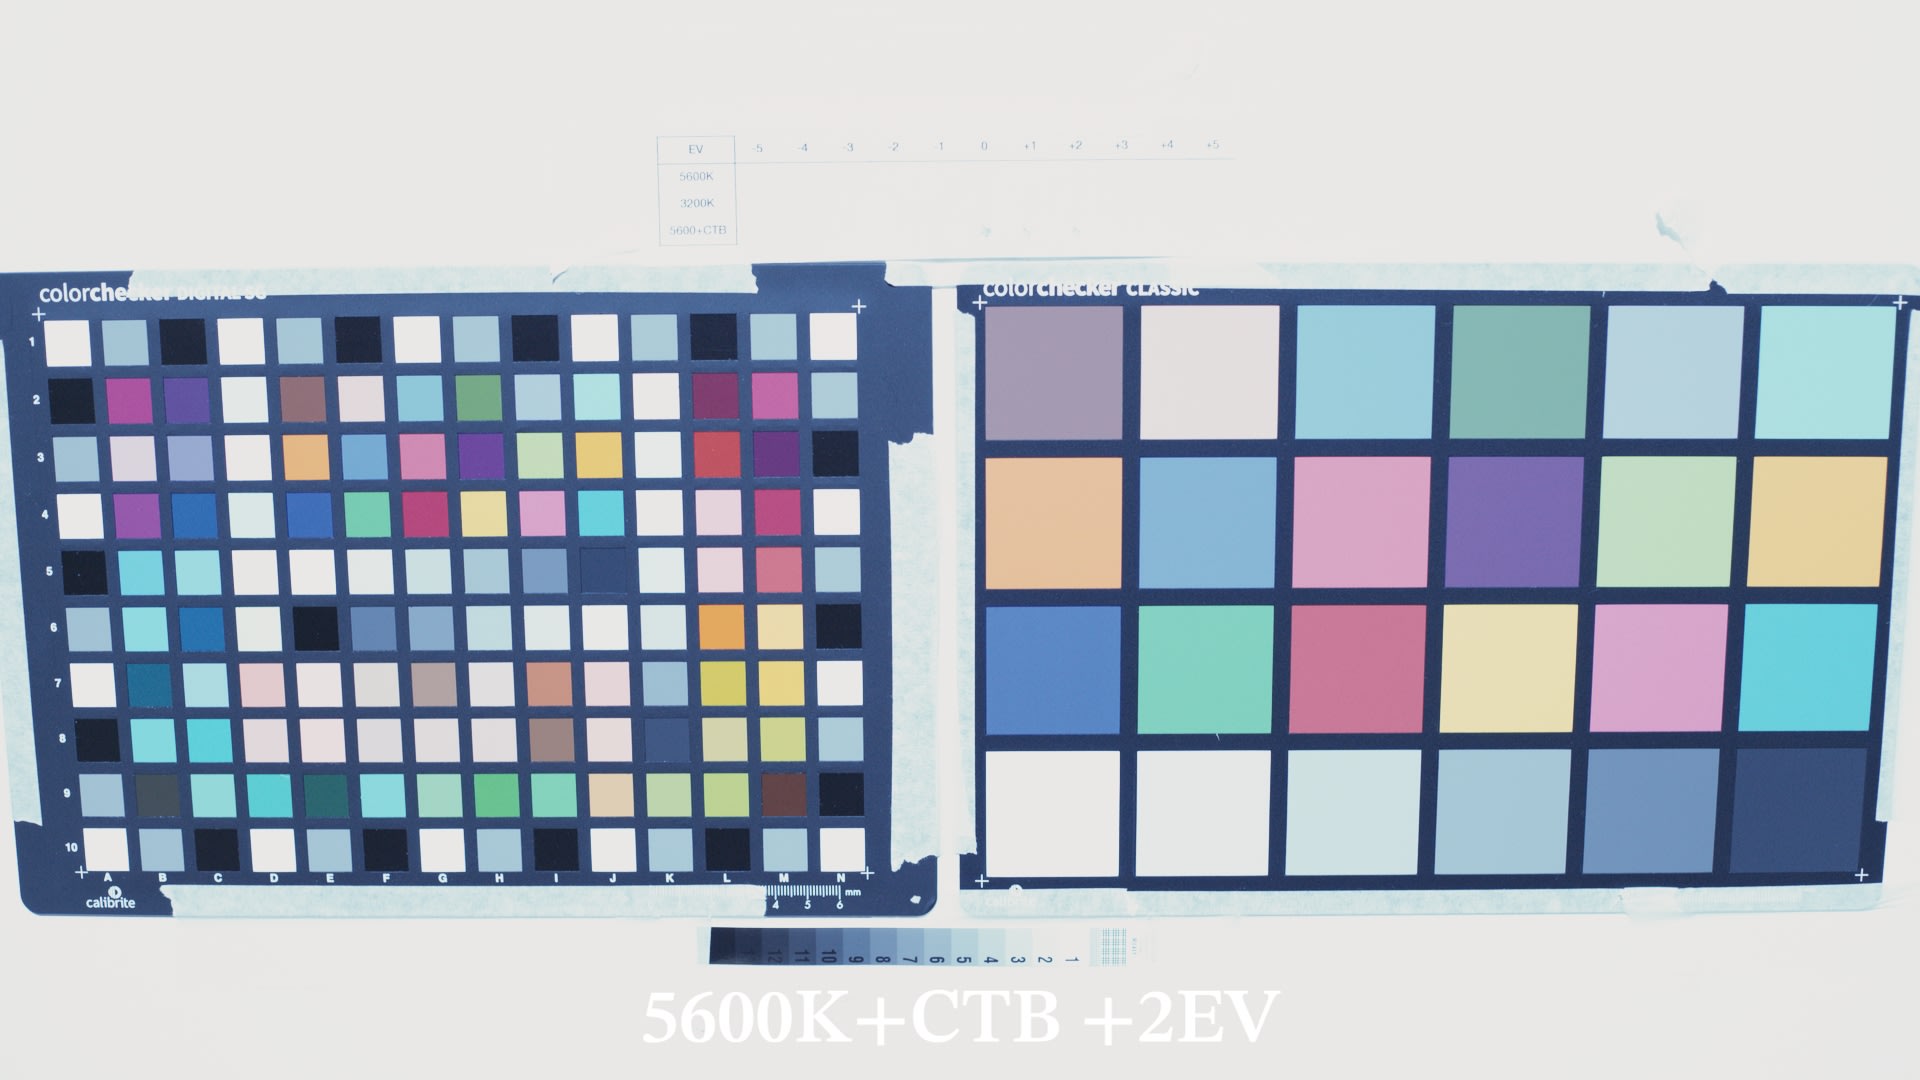
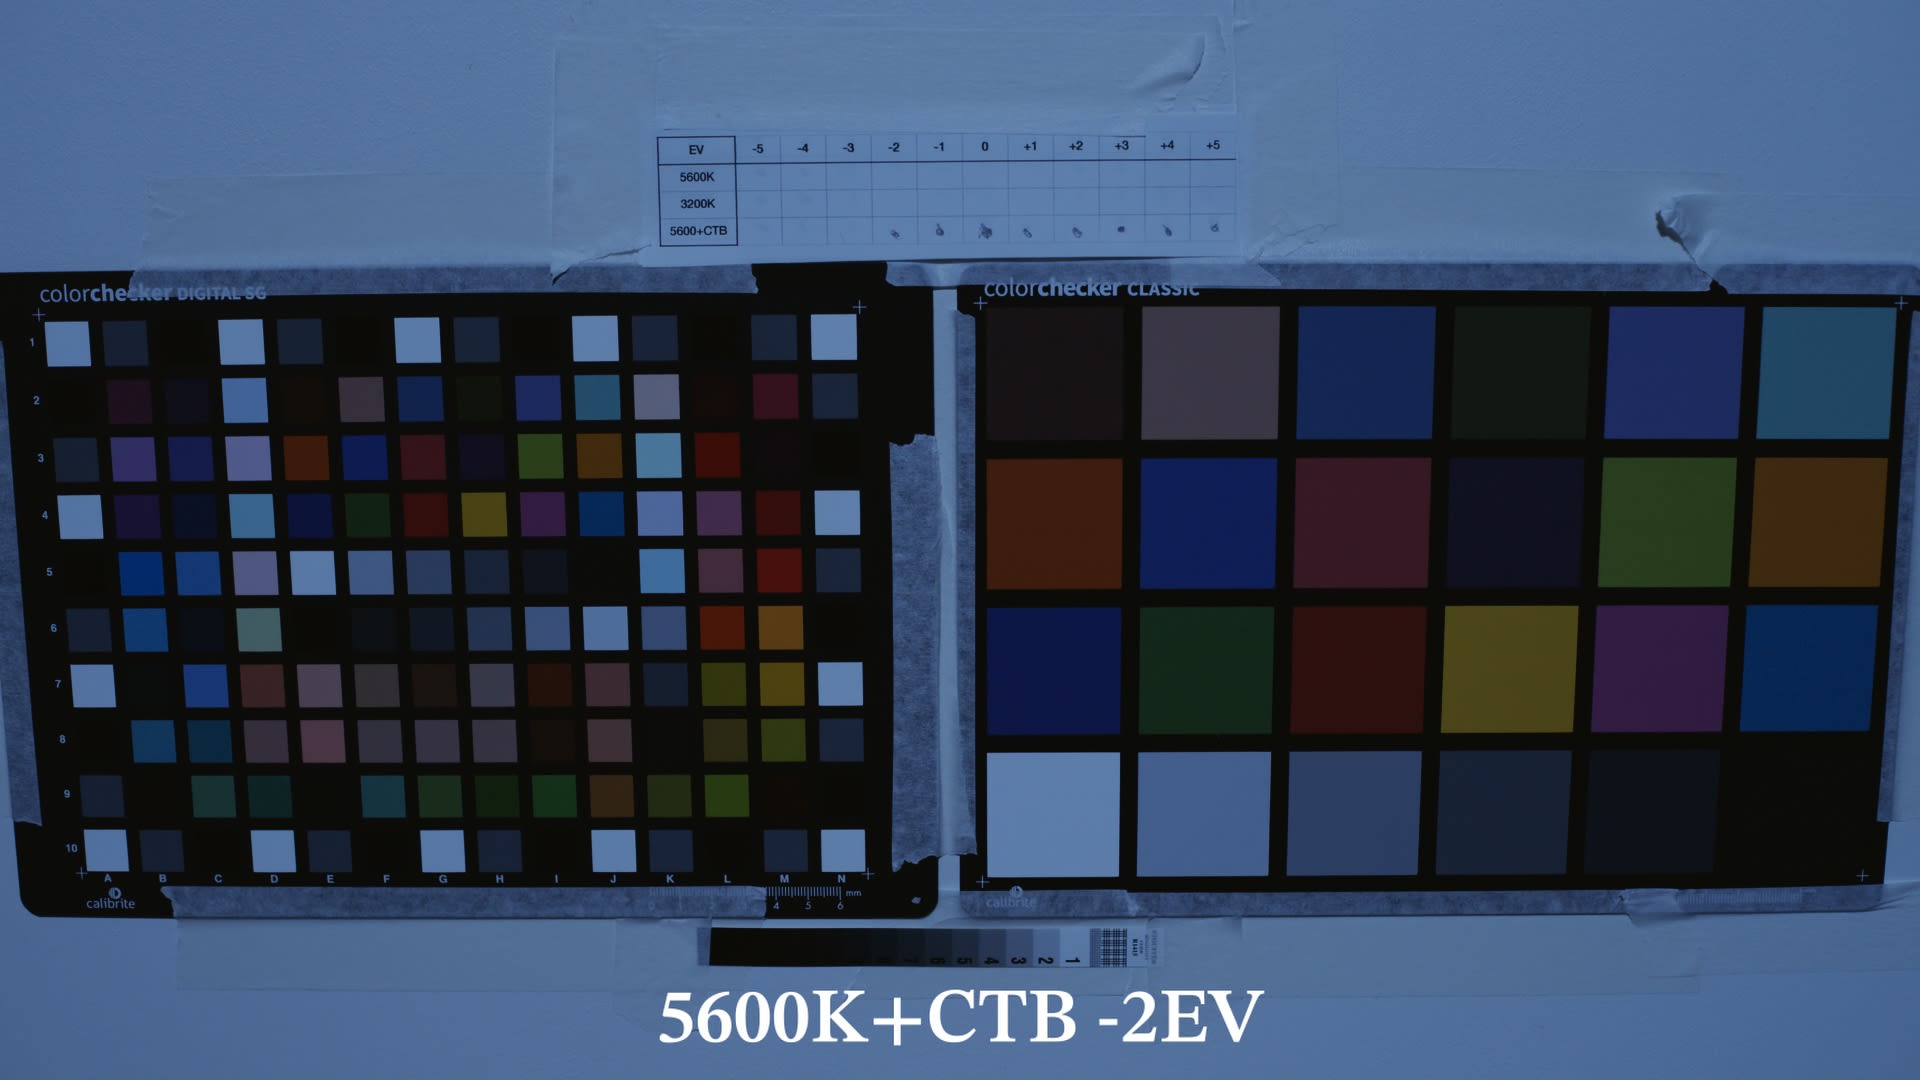
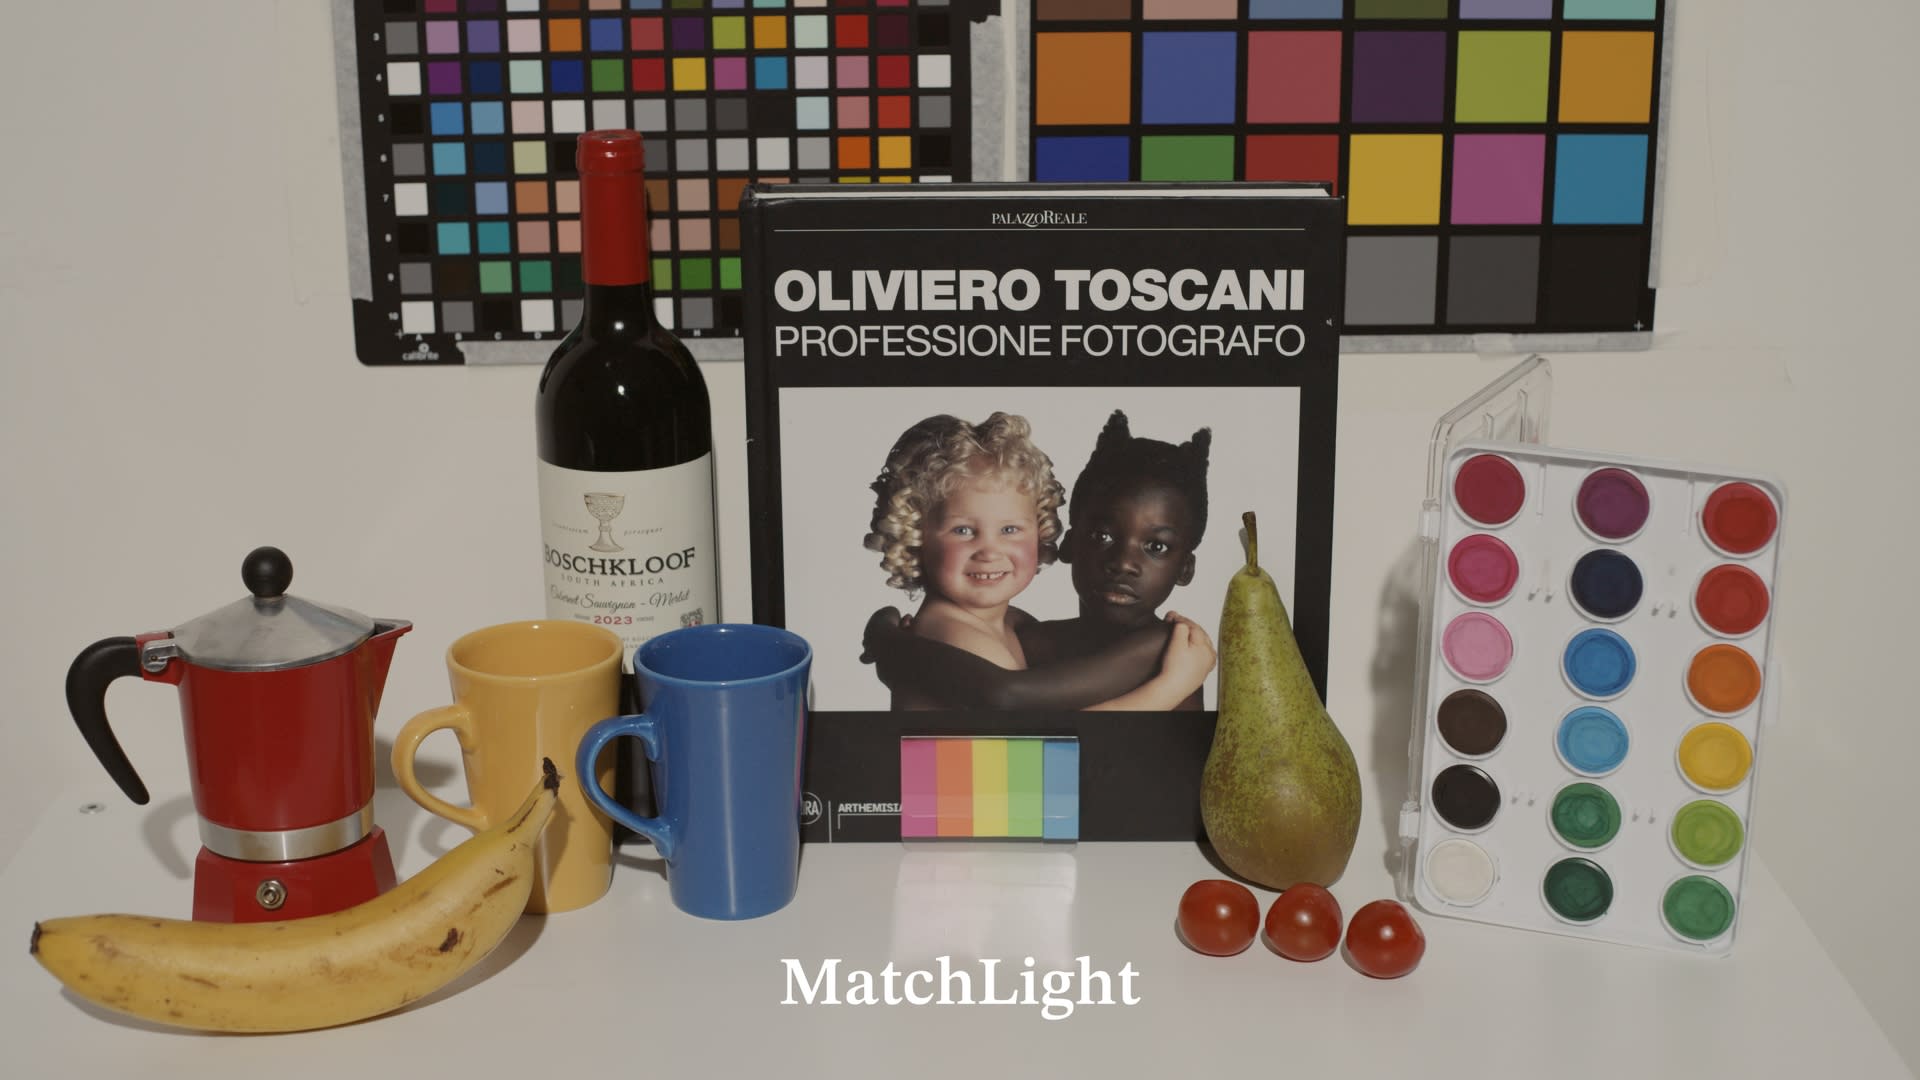
For each generated LUT I’ll compare the digital camera images with the matching LUT applied at 5600k, 3200k, 5600+CTB at 0EV, +2EV and -2EV charts and on a validation image (which is not part of the datasets the algorithms used) as well as stress test images.
THE KODAK EKTACHROME LUT IS NOW AVAILABLE AS A FREE DOWNLOAD. SIGN UP HERE TO THE NEWSLETTER TO GET IT FOR FREE, TOGETHER WITH SOME AMAZING PHYSICALLY ACCURATE GRAIN. IF YOU’RE ALREADY A SUBSCRIBER YOU SHOULD HAVE RECEIVED AN EMAIL WITH A DOWNLOAD LINK.
THE MATCHING GOAL
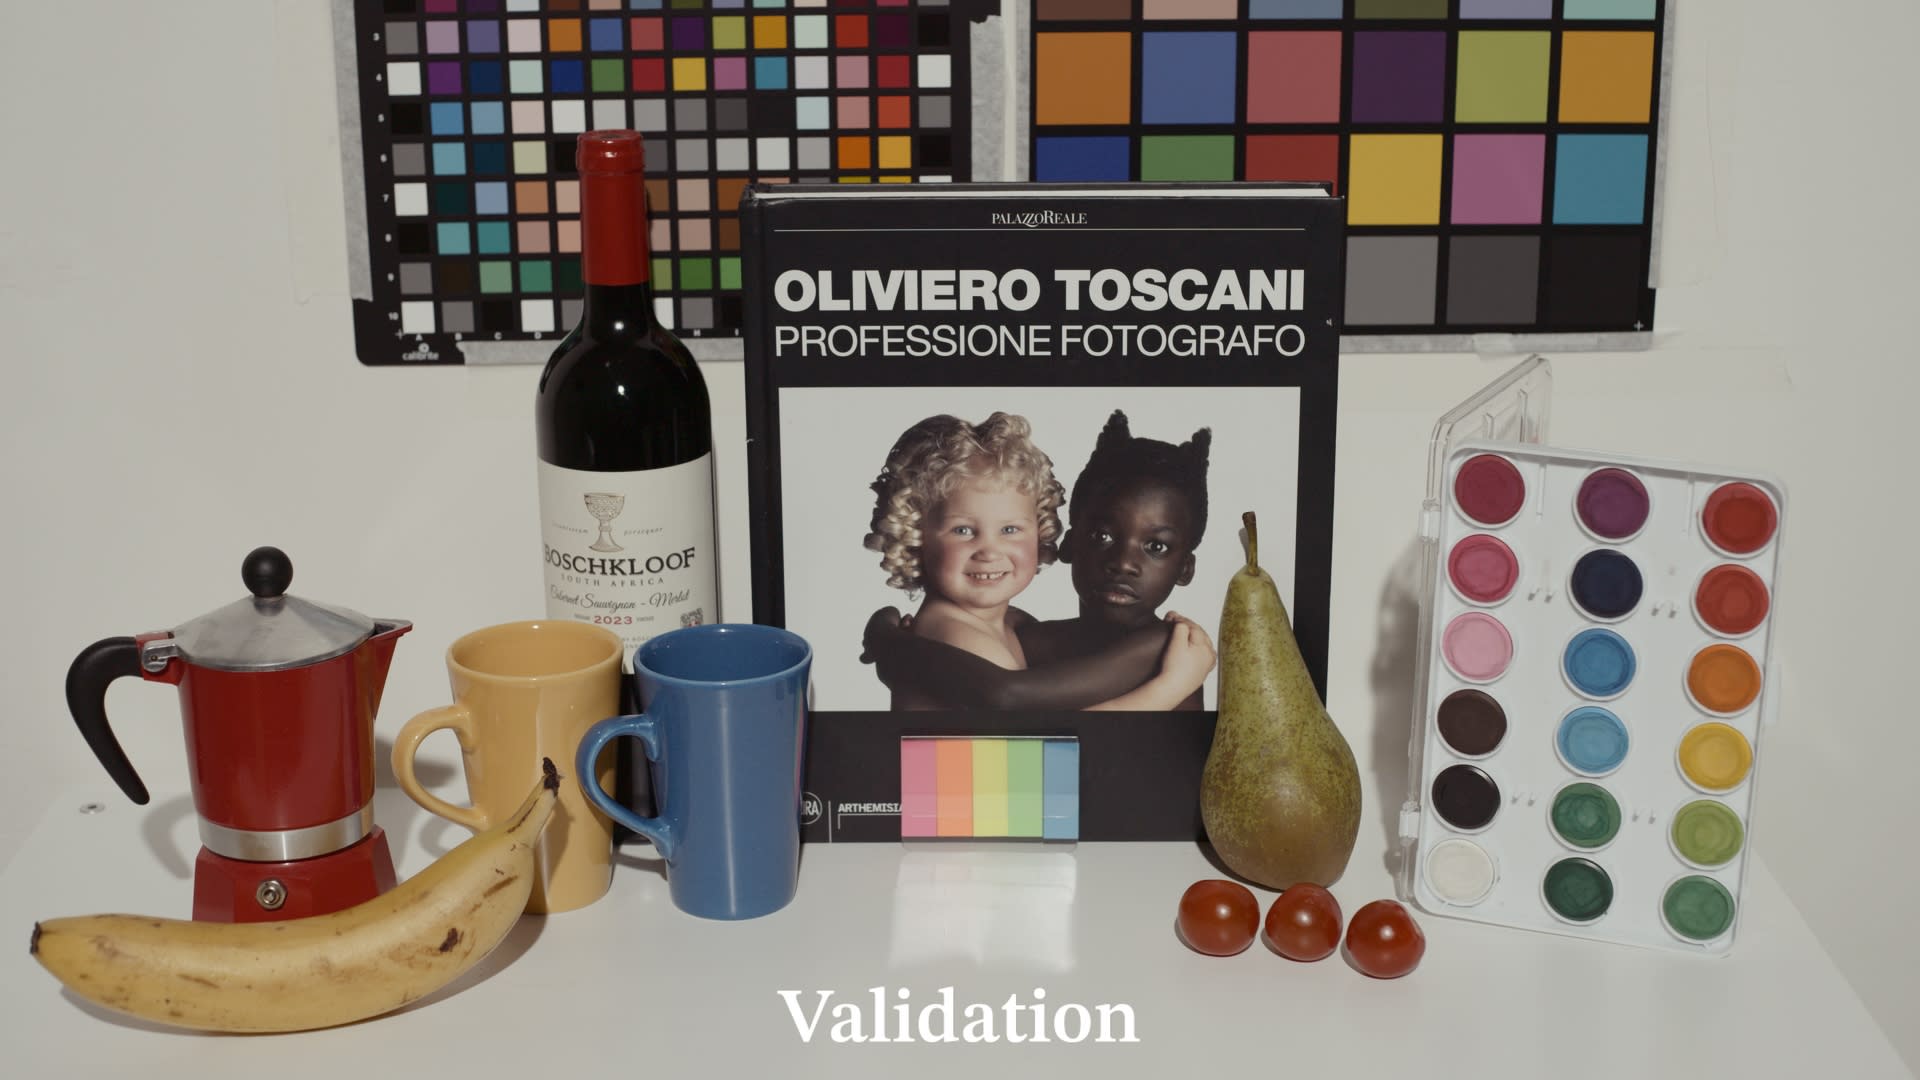
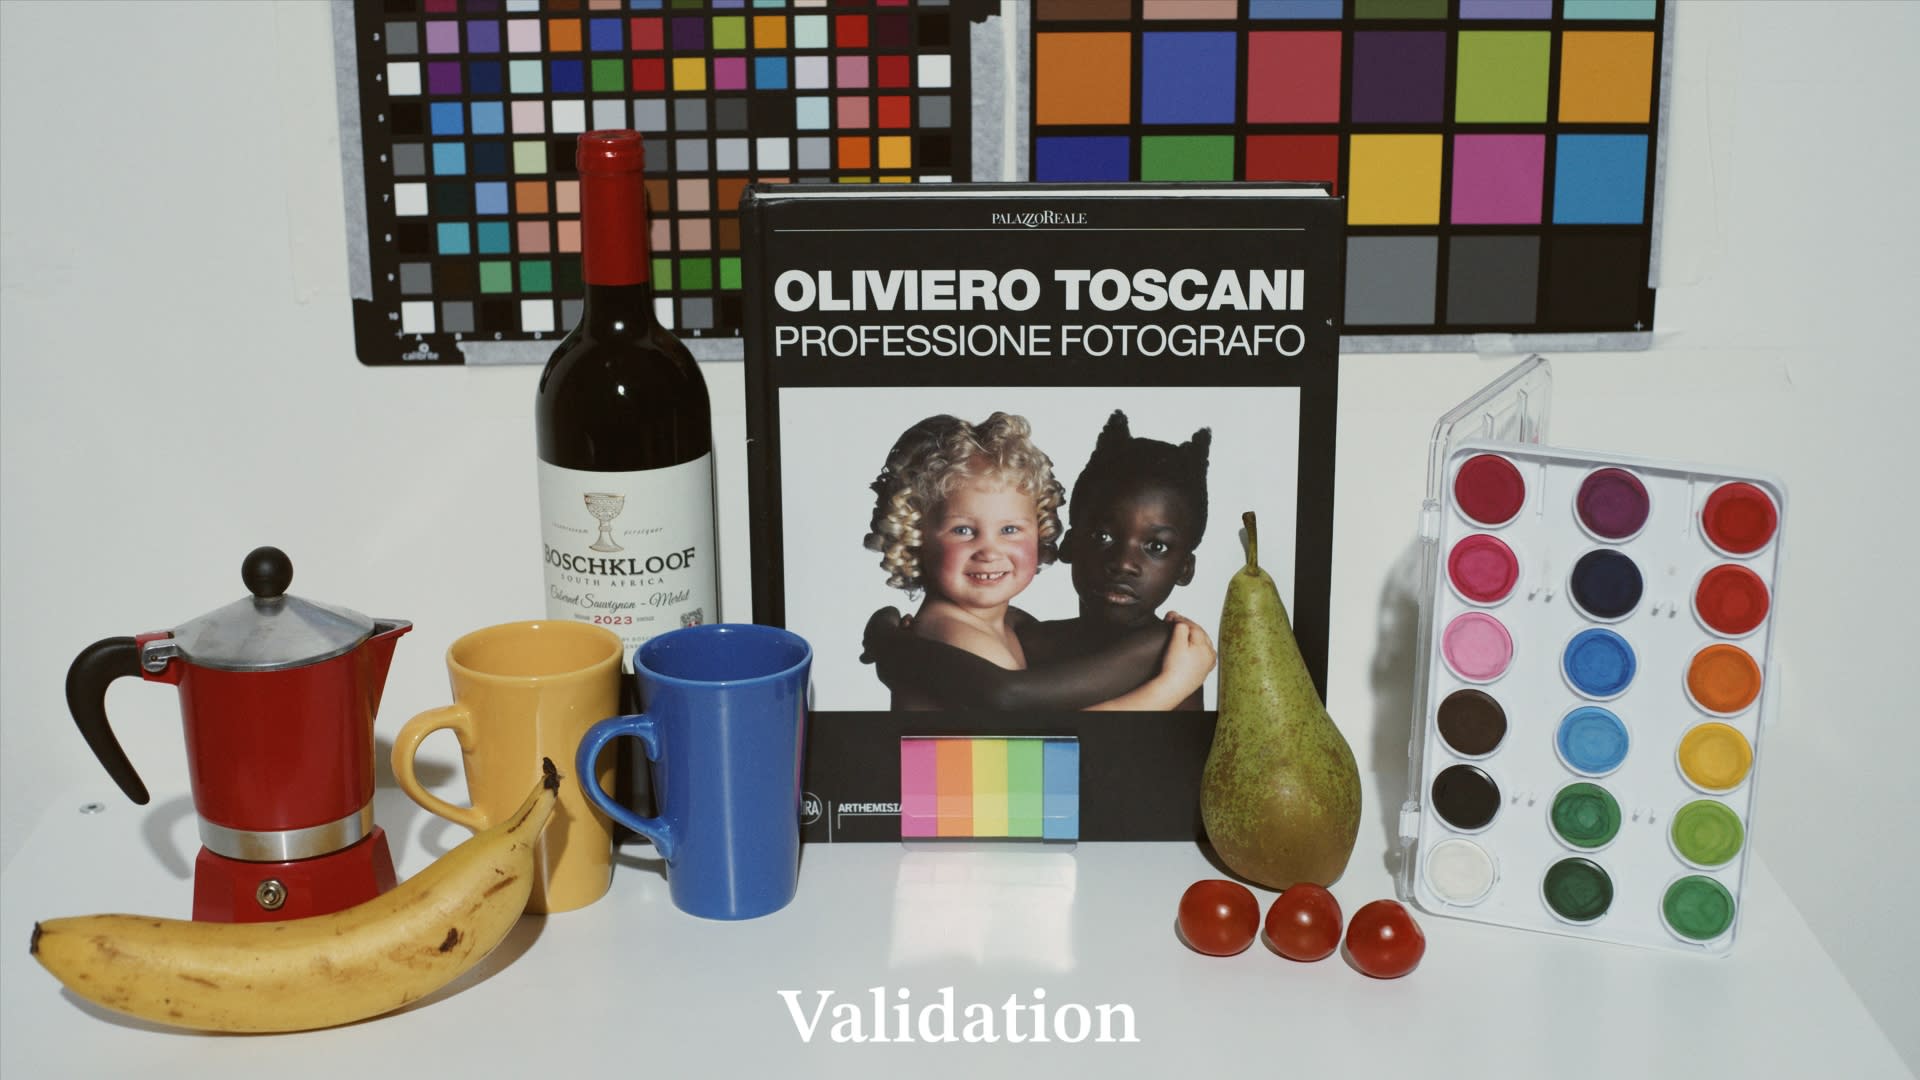
The use of validation image to determine the accuracy of the color transformation is fundamental. The validation image contains a series of real world colors that are not present in the dataset. Therefore it’s used to determine if the color transformation is accurate outside the limits of a dataset that, even if comprehensive of thousands of sample, it can’t possibly represent every shade, mixture, or nuance of color that exists in the real world. If the result holds up, it gives confidence that the transformation is not only mathematically sound but also practically useful when dealing with the endless variety of colors we encounter in real life.
COMPARISONS
Camera match
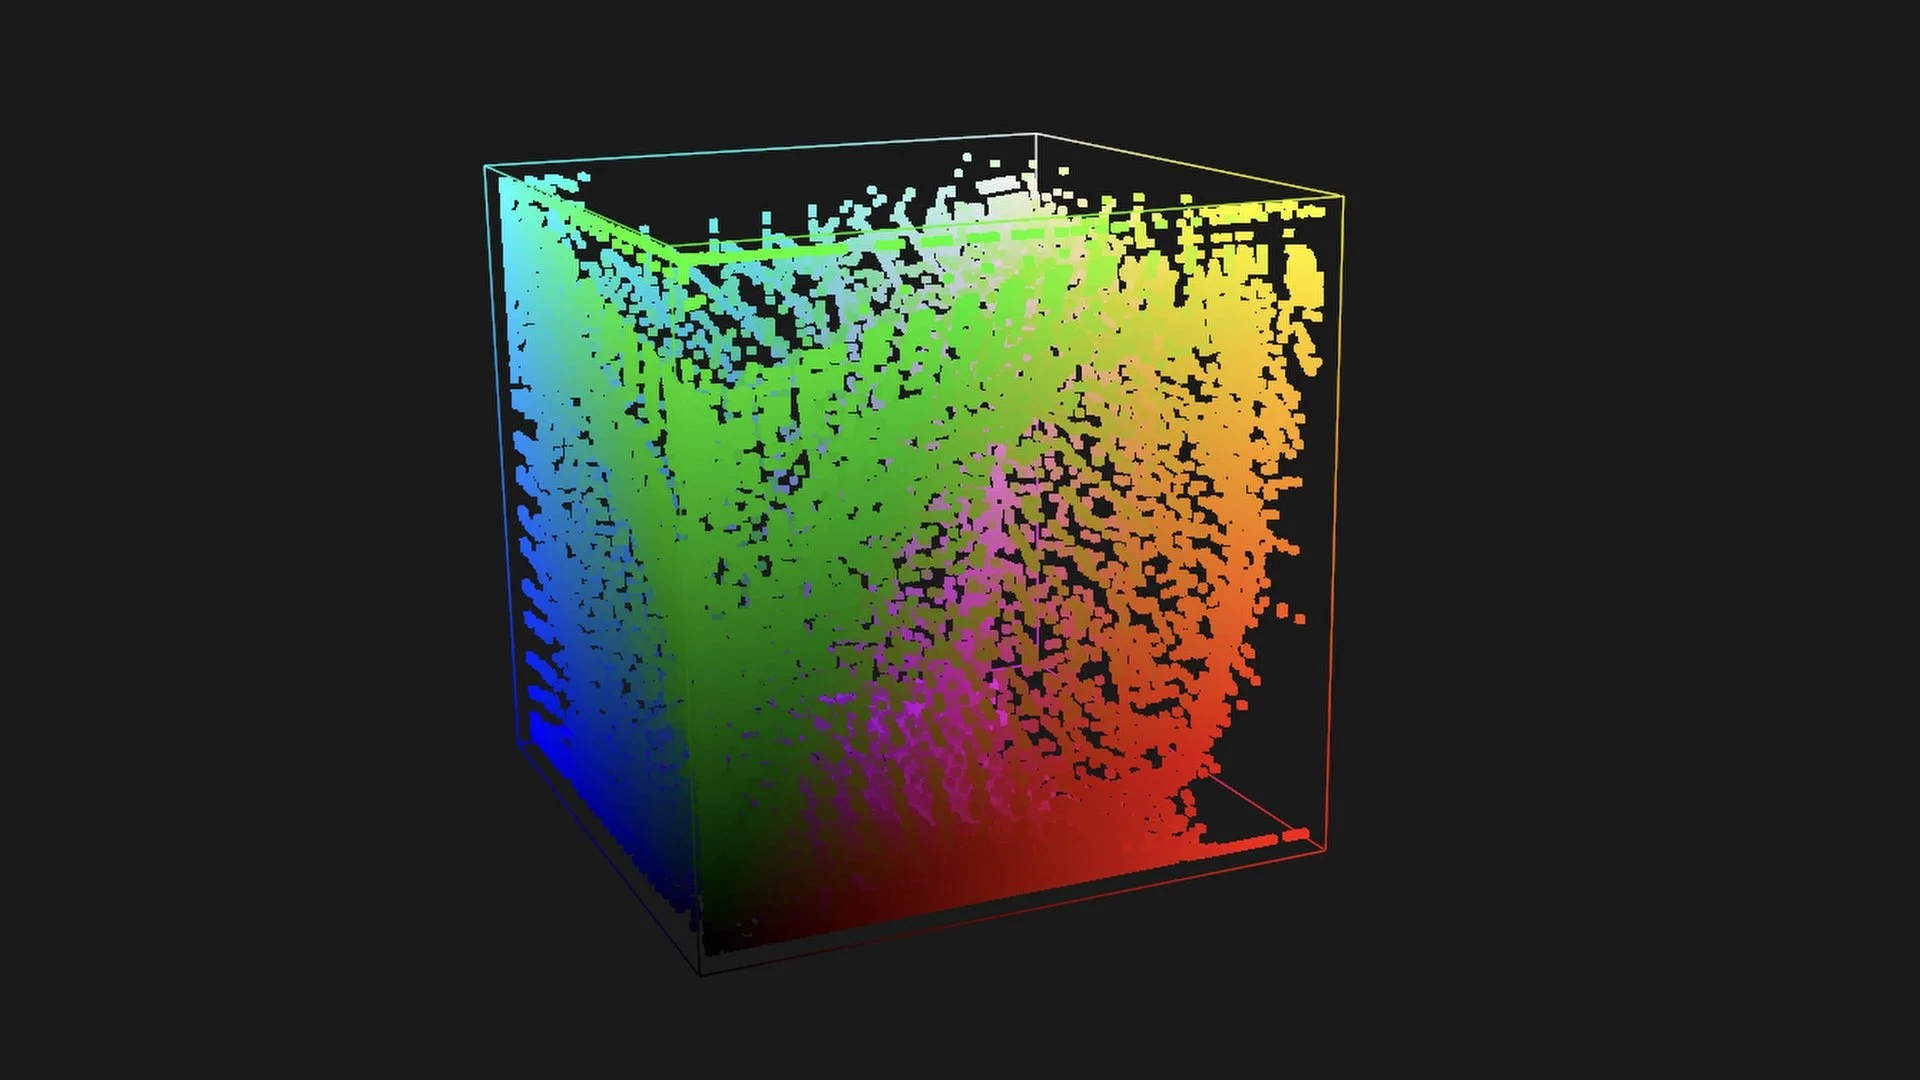
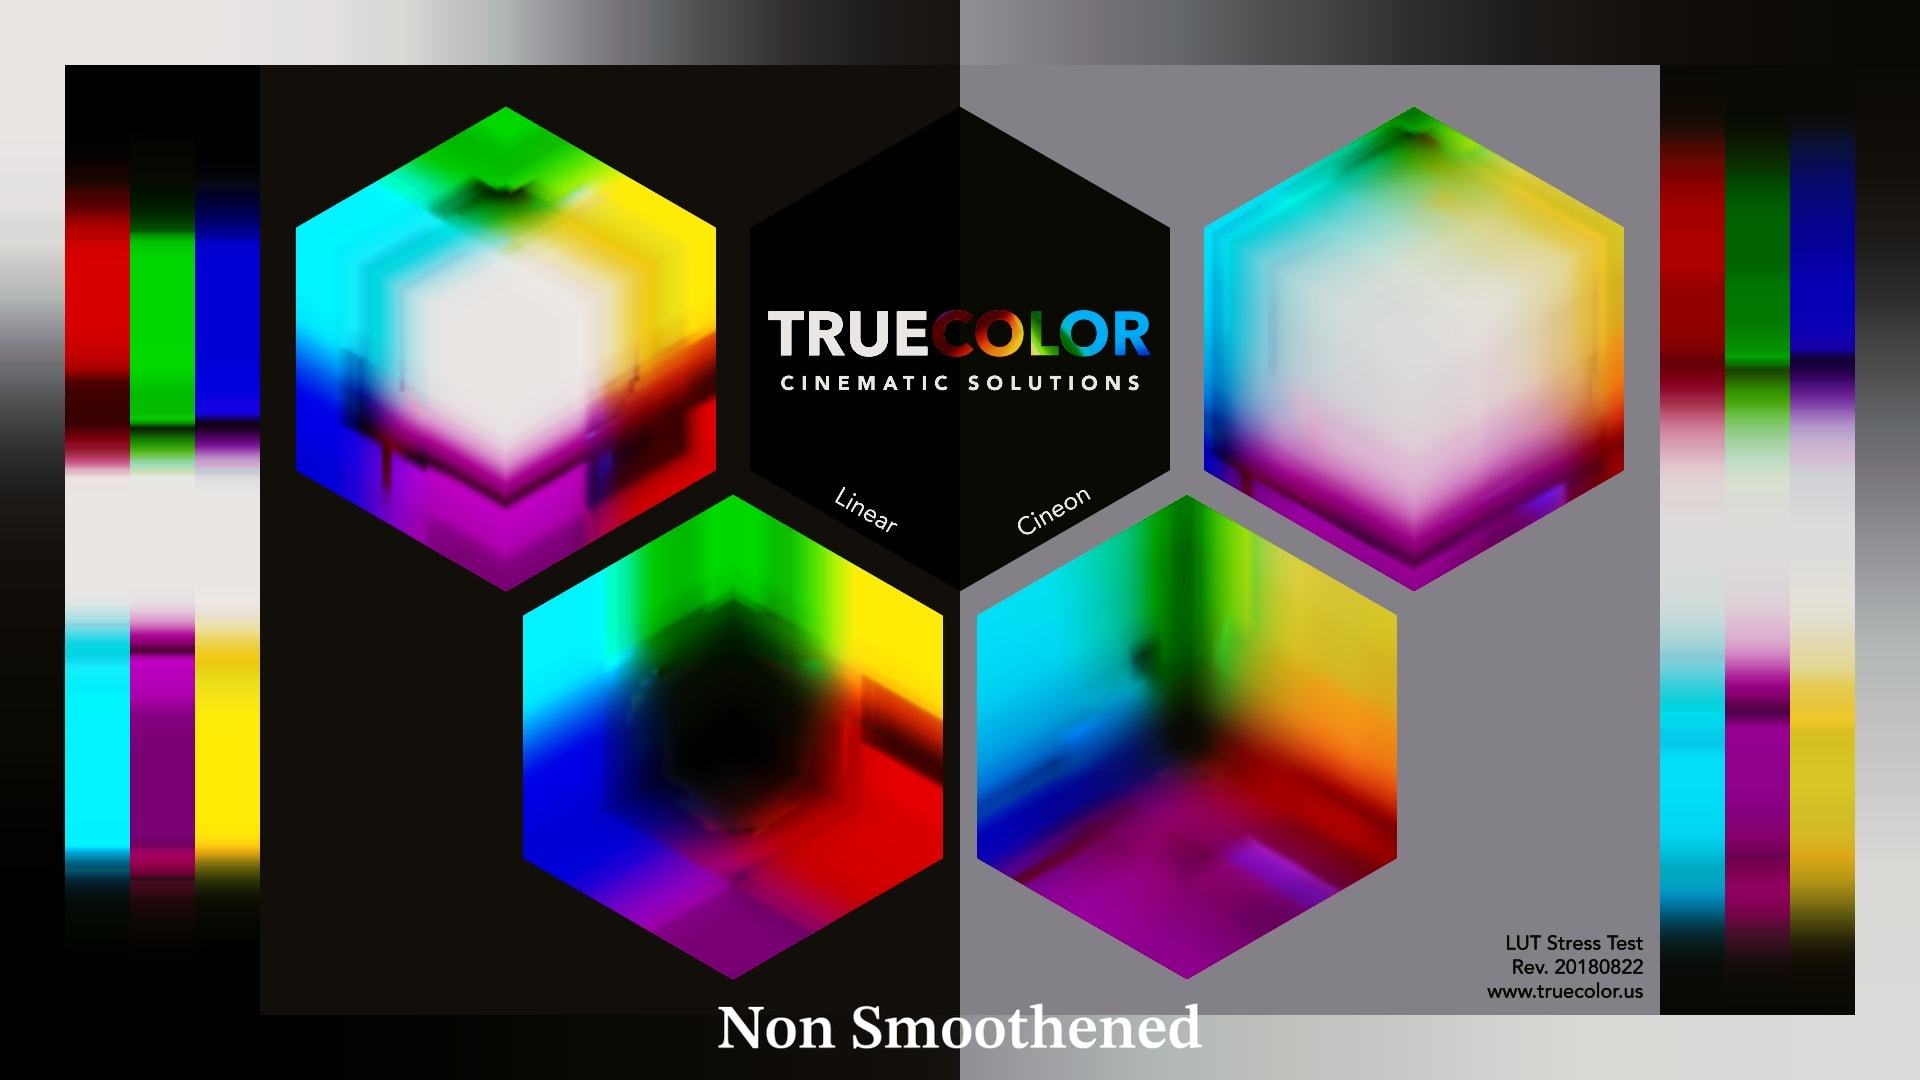
Camera match gives you different options when it comes to matching a source dataset to a target dataset for example it allows for a Linear Matrix, Tetrahedral Matrix and RBF (radial basis function). RBF is a type of artificial neural network and out of all the modes offered, is the one that would allow to capture the most amount of color complexity, as all the other modes wouldn’t be able to bend and shape the gamut in non linear ways. The ability to perform non linear manipulations when it comes to film emulation is a must as film is highly non linear.
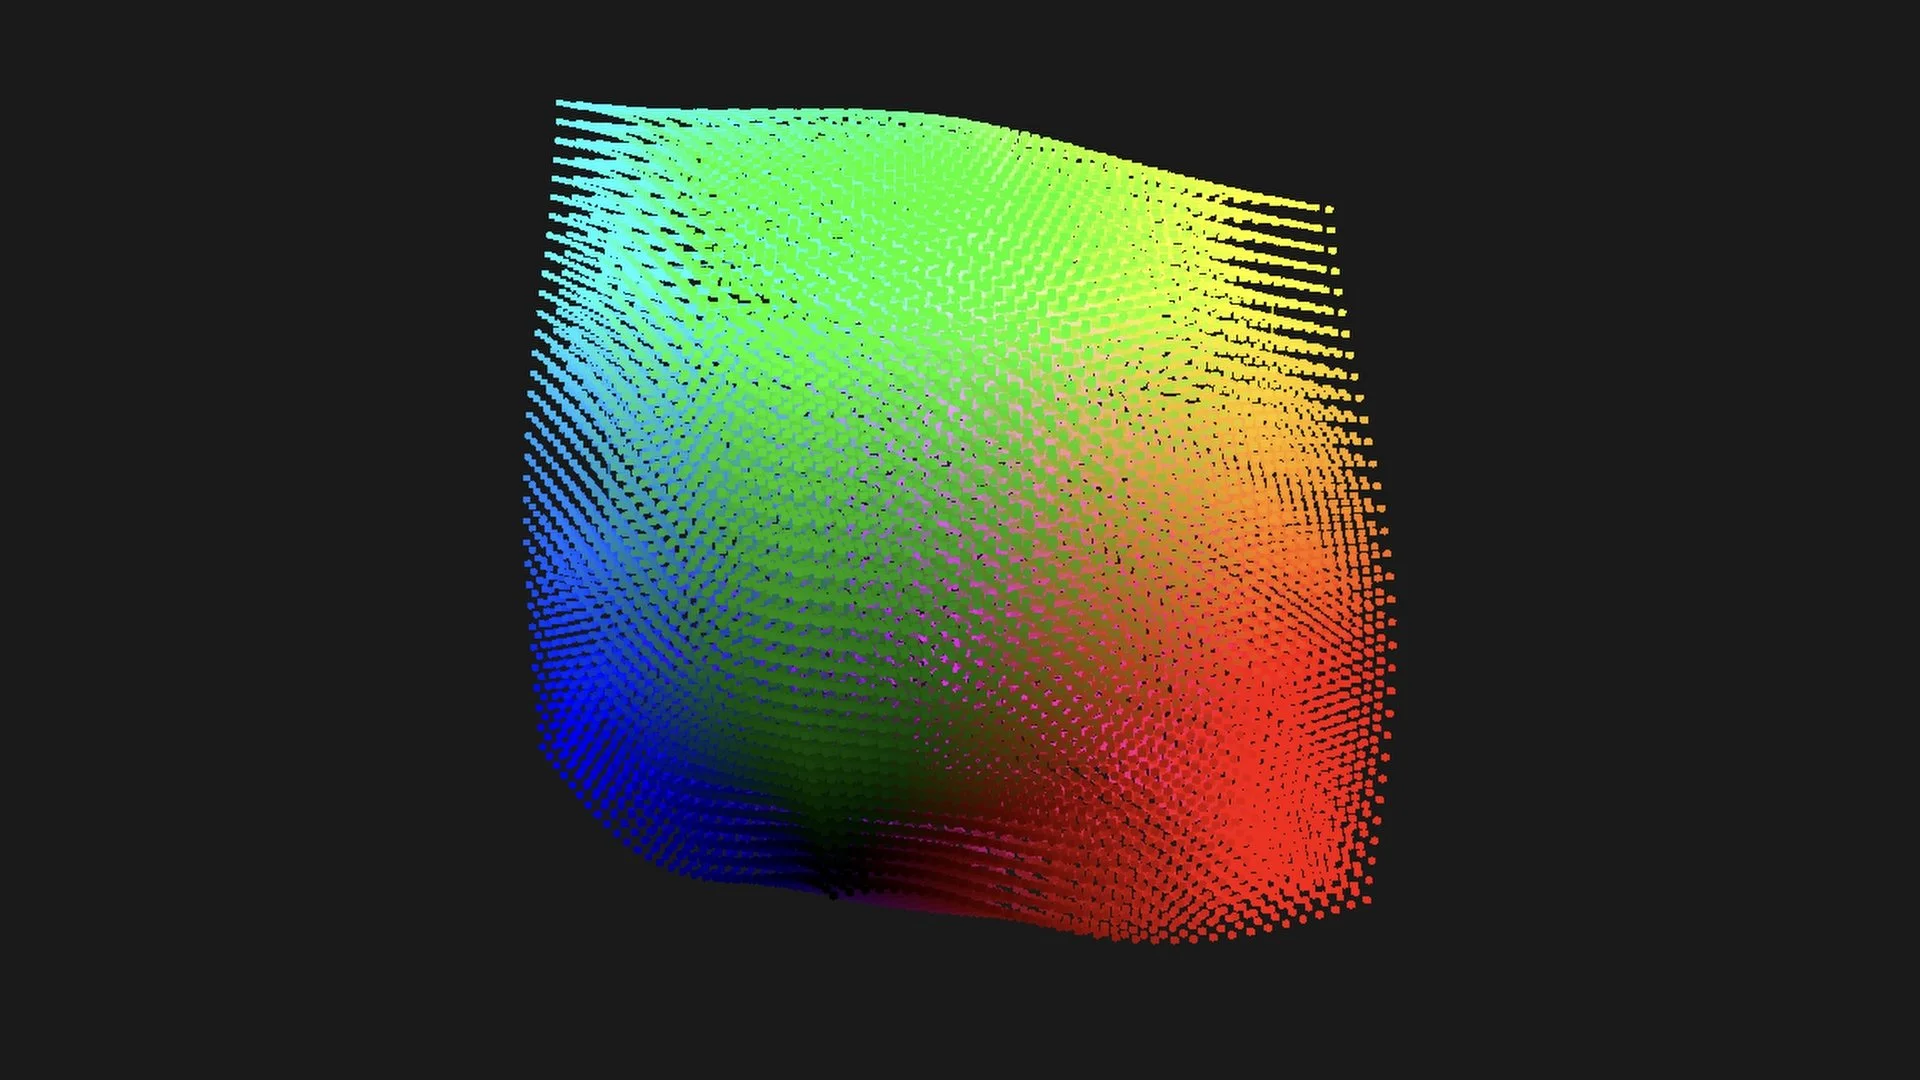
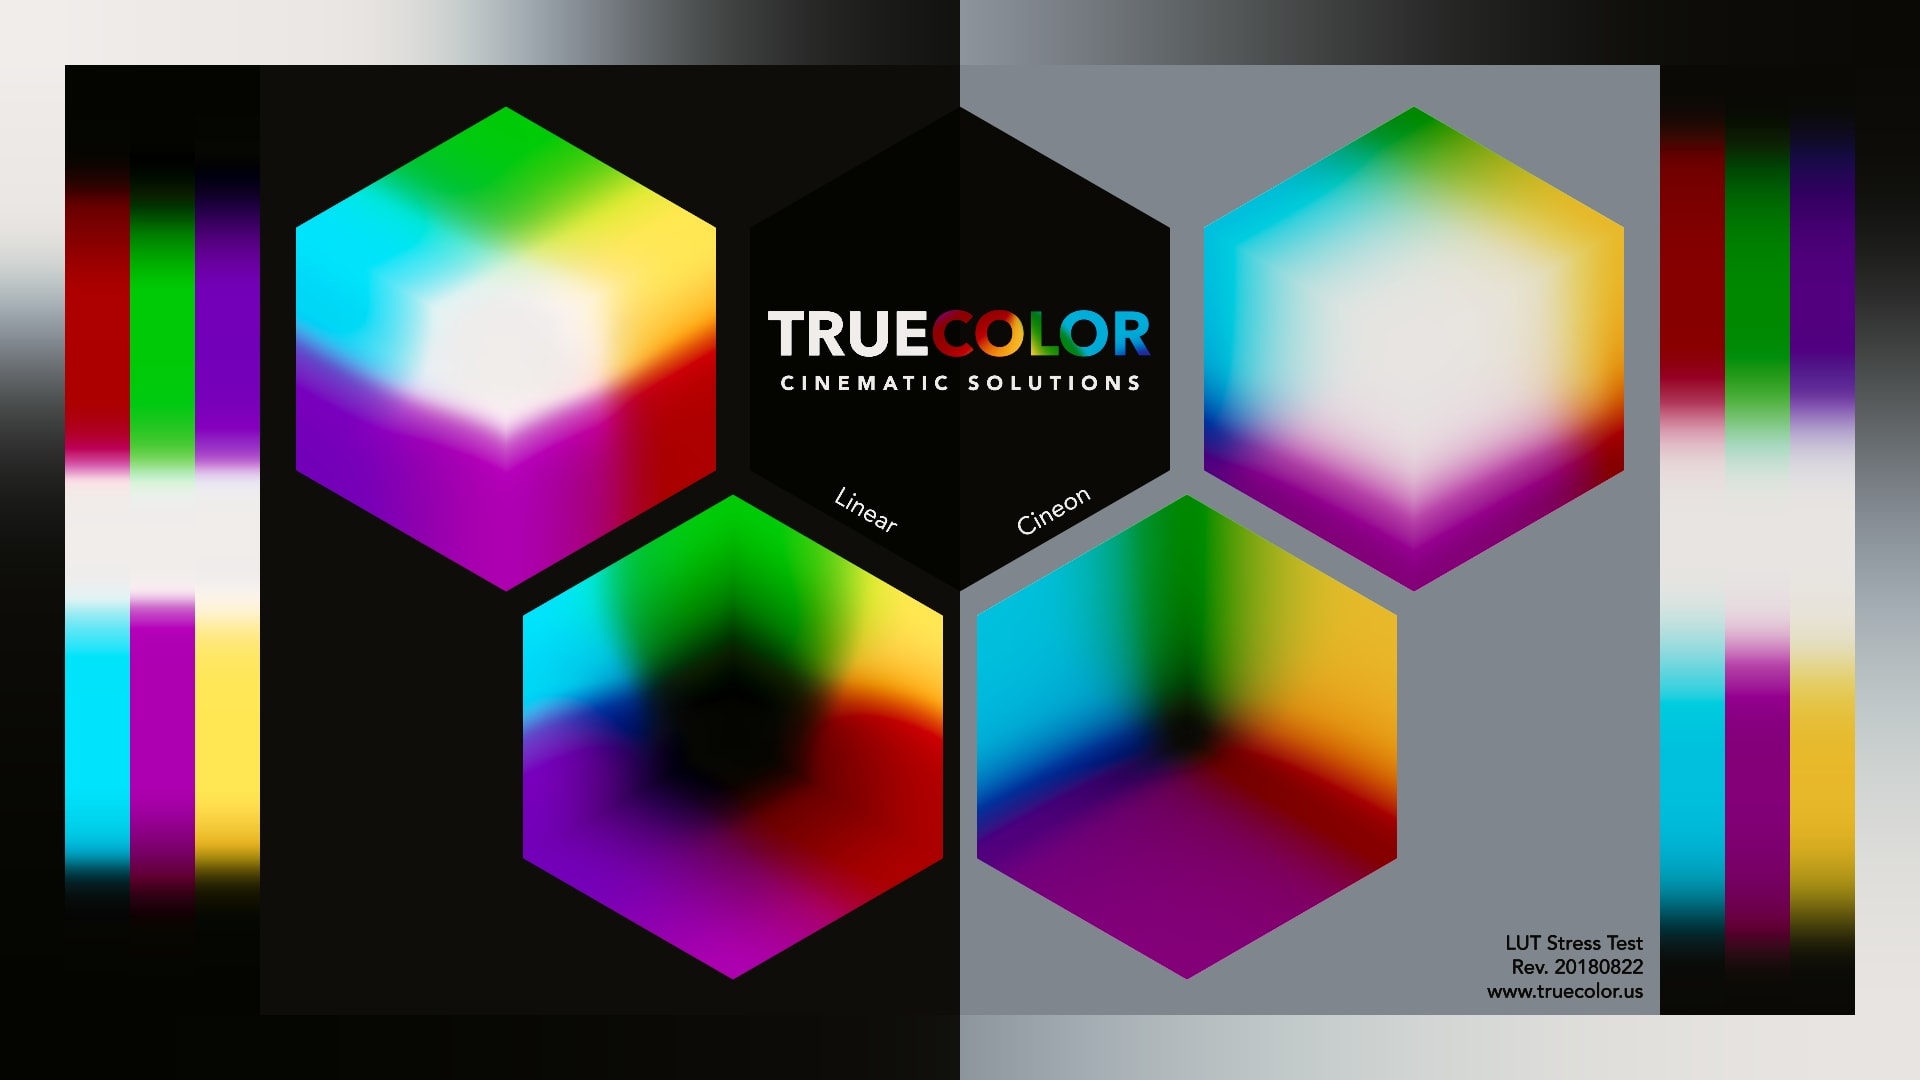
You can clearly see that the LUT expands passed the edges of the cube, which is something you’d want to avoid. Having said that, the LUT is still pretty smooth as you’ll be able to see in the stress test images below. Let’s look at the accuracy of the color transformation when applied to the color charts, as well as to the validation image:


Even though the LUT exhibits a smooth behavior we can see that the accuracy is not there as I don’t think that any of the images actually match the Kodak Ektachrome both in terms of tonal reproduction and color rendition. The same lack of accuracy can be seen on the validation image, where the colors and tones are far from being accurately matched.
MatchLight
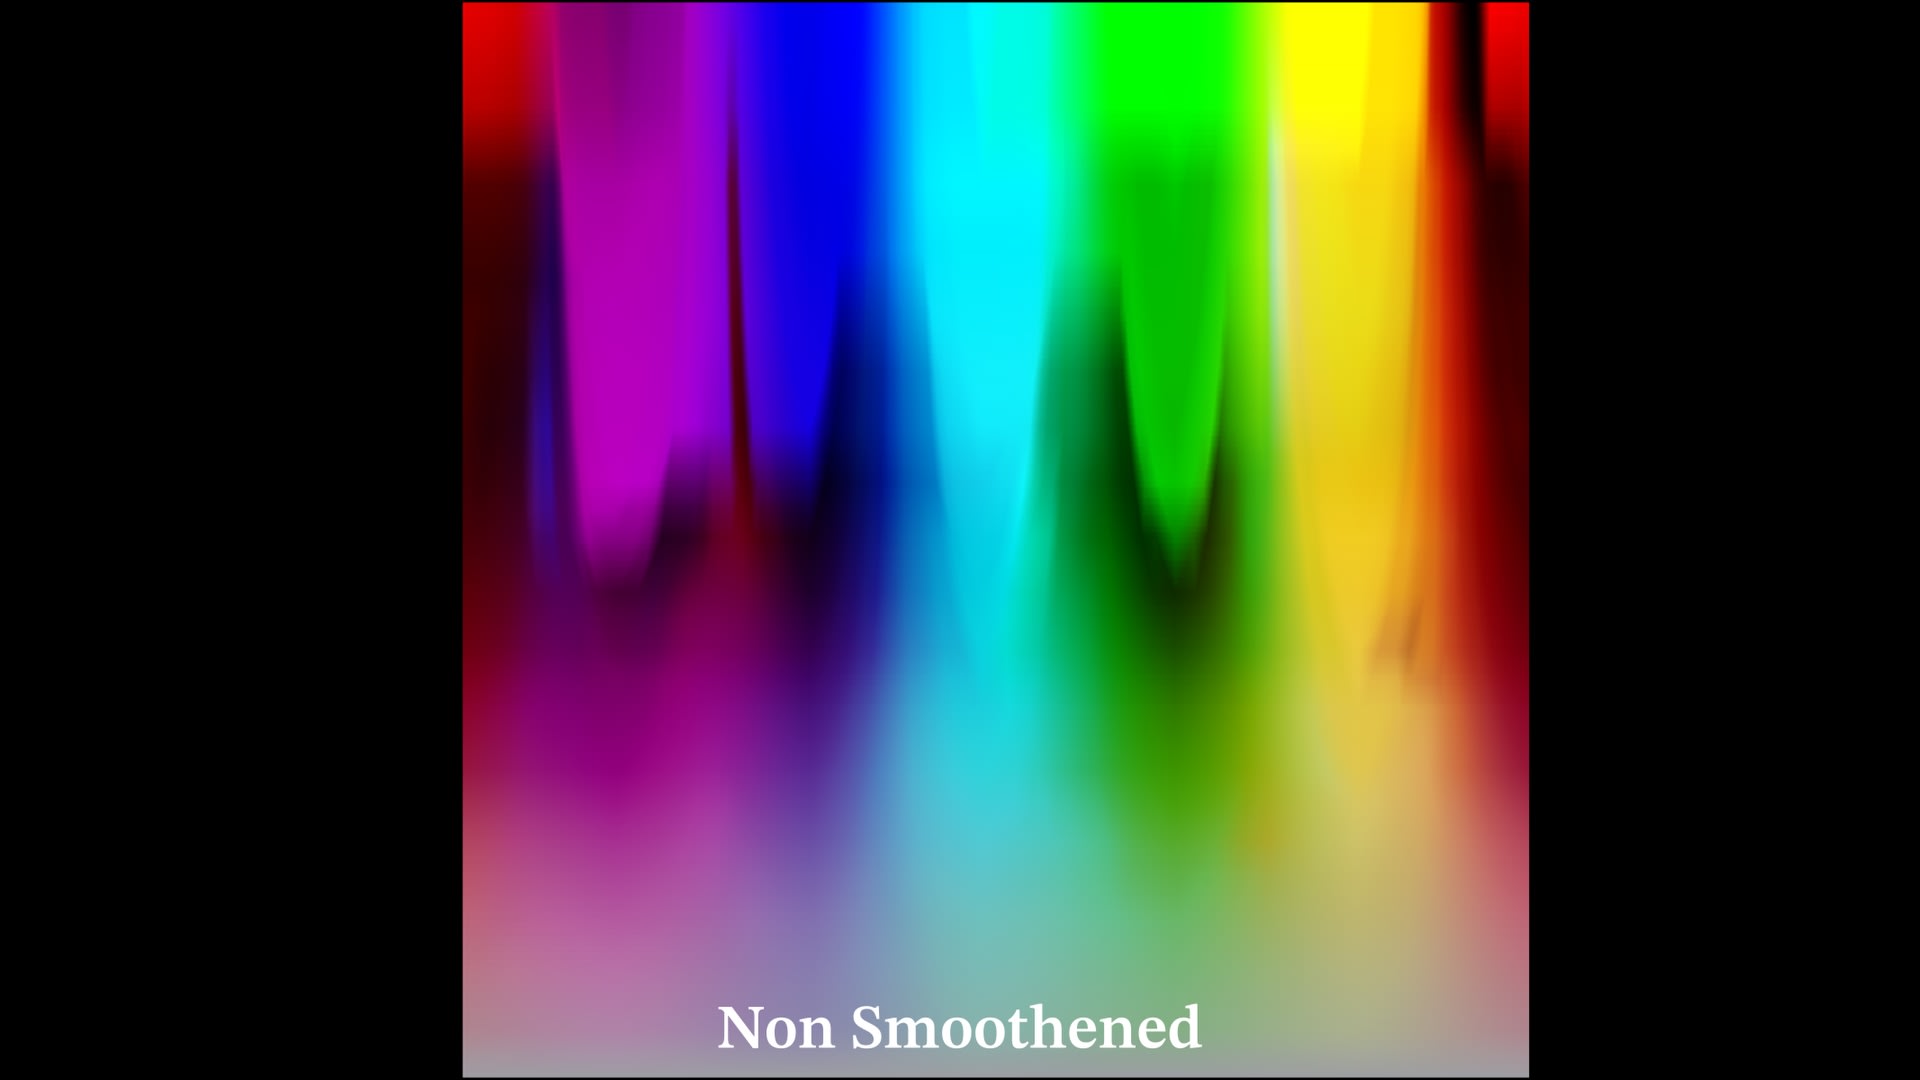
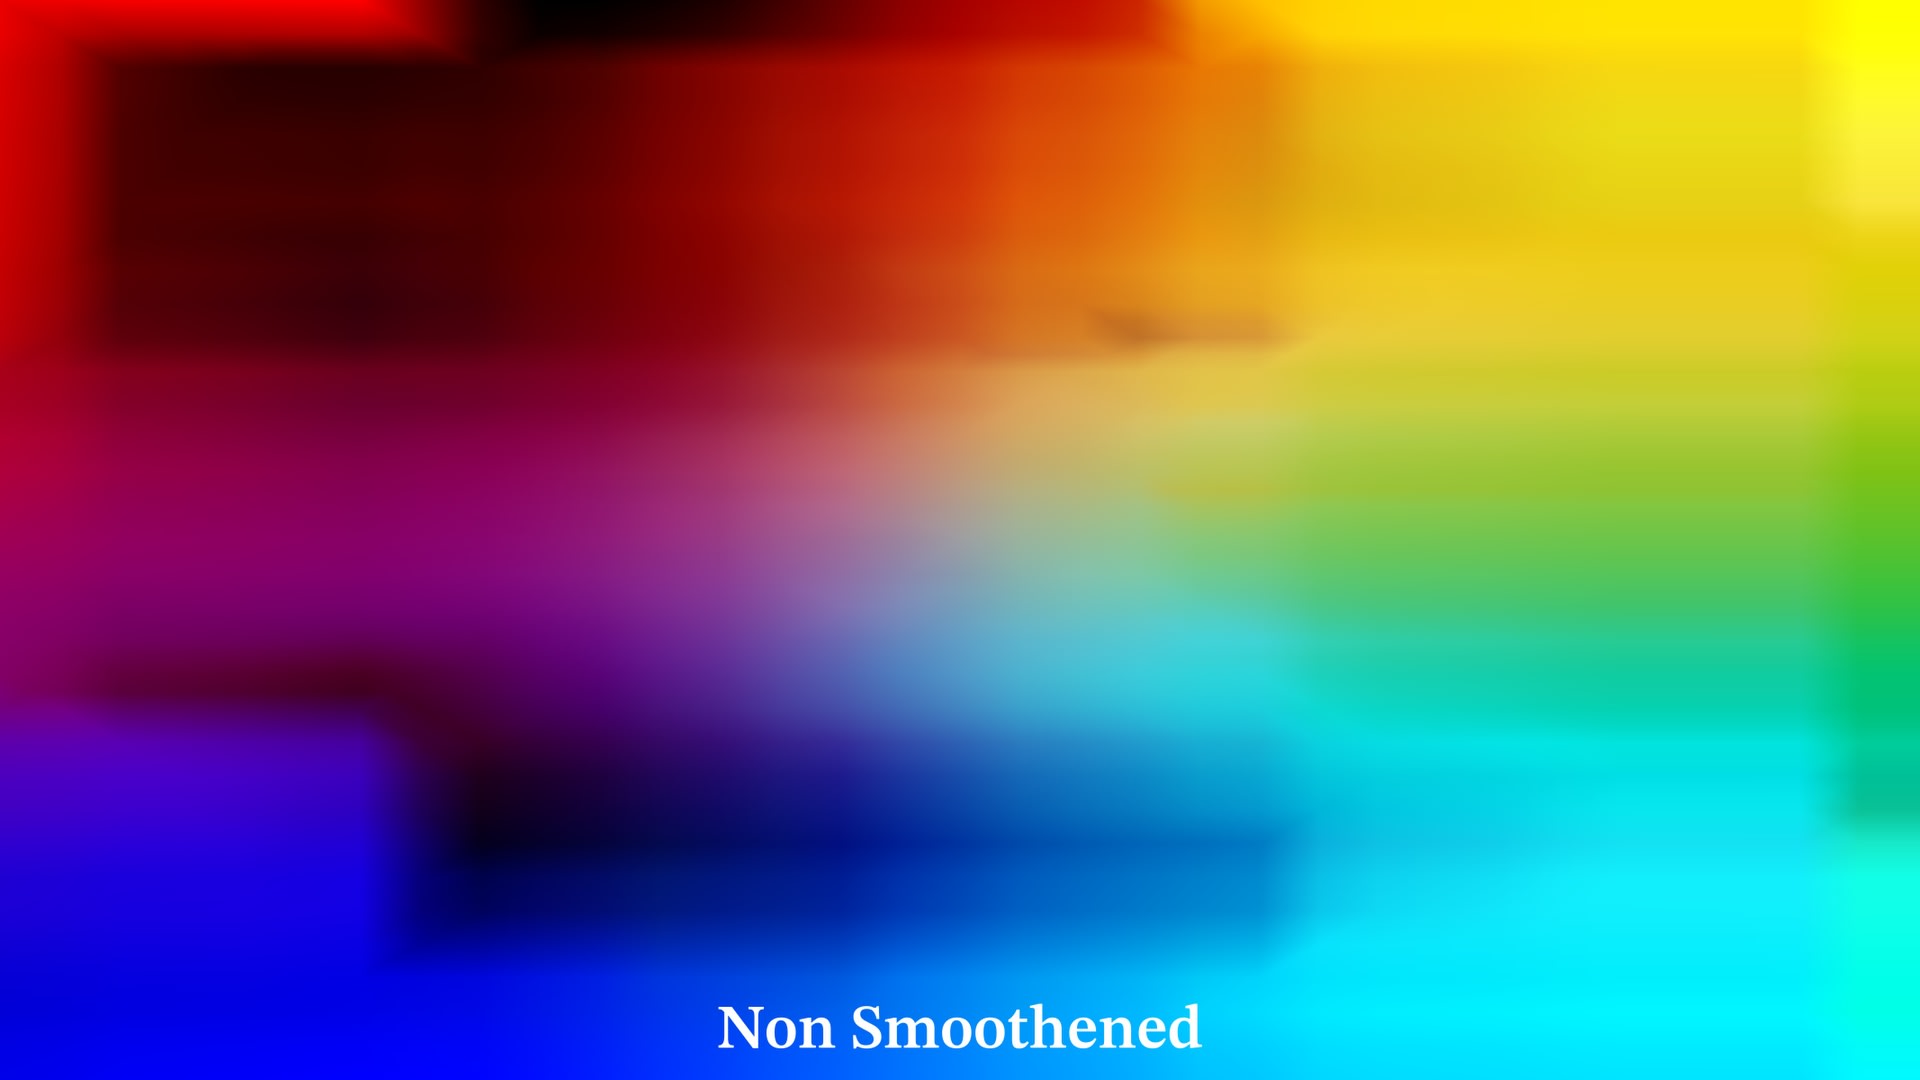
Let’s see now how MatchLight from LightIllusion performs. It should be noted that resulting LUT from MatchLight, right out of the box, is very noisy and it would break on most images if used as is. Luckily Colourspace provides a useful (and I would say mandatory) smoothing tool, that can help us here.

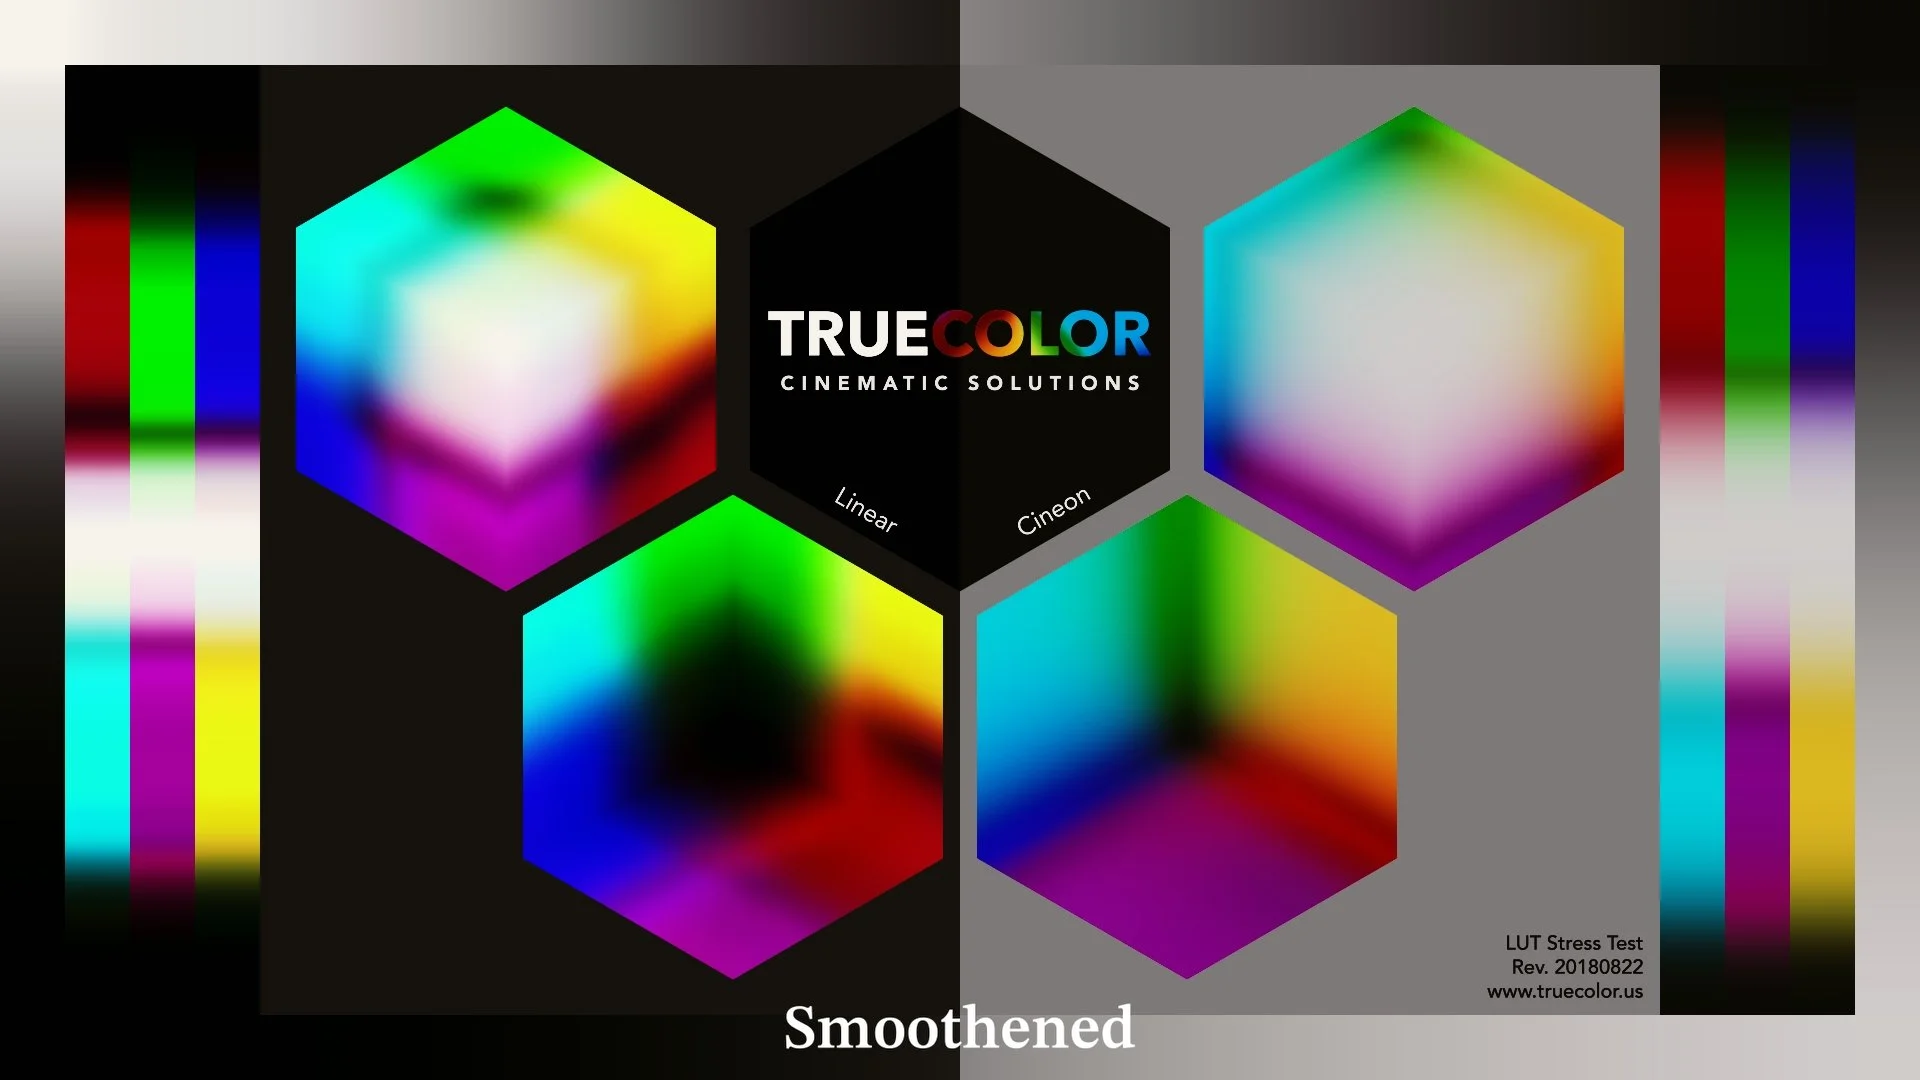
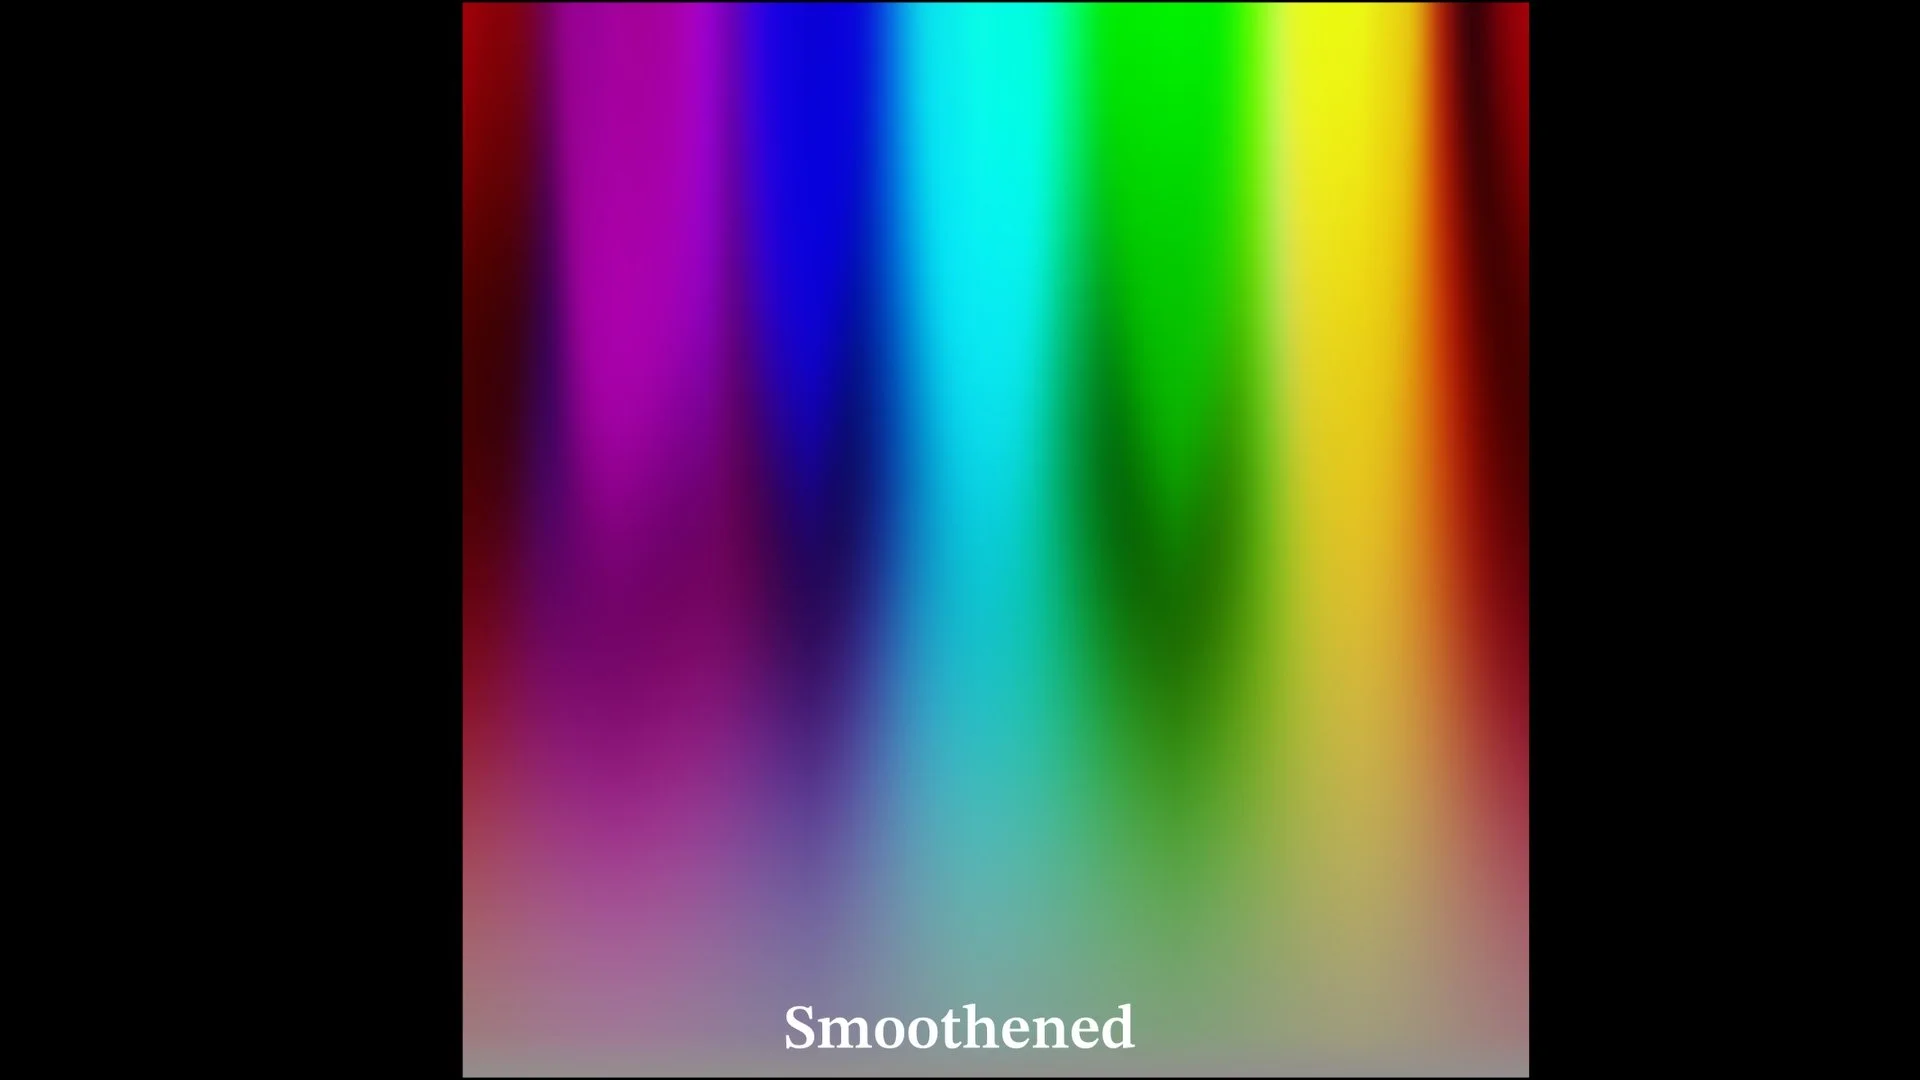
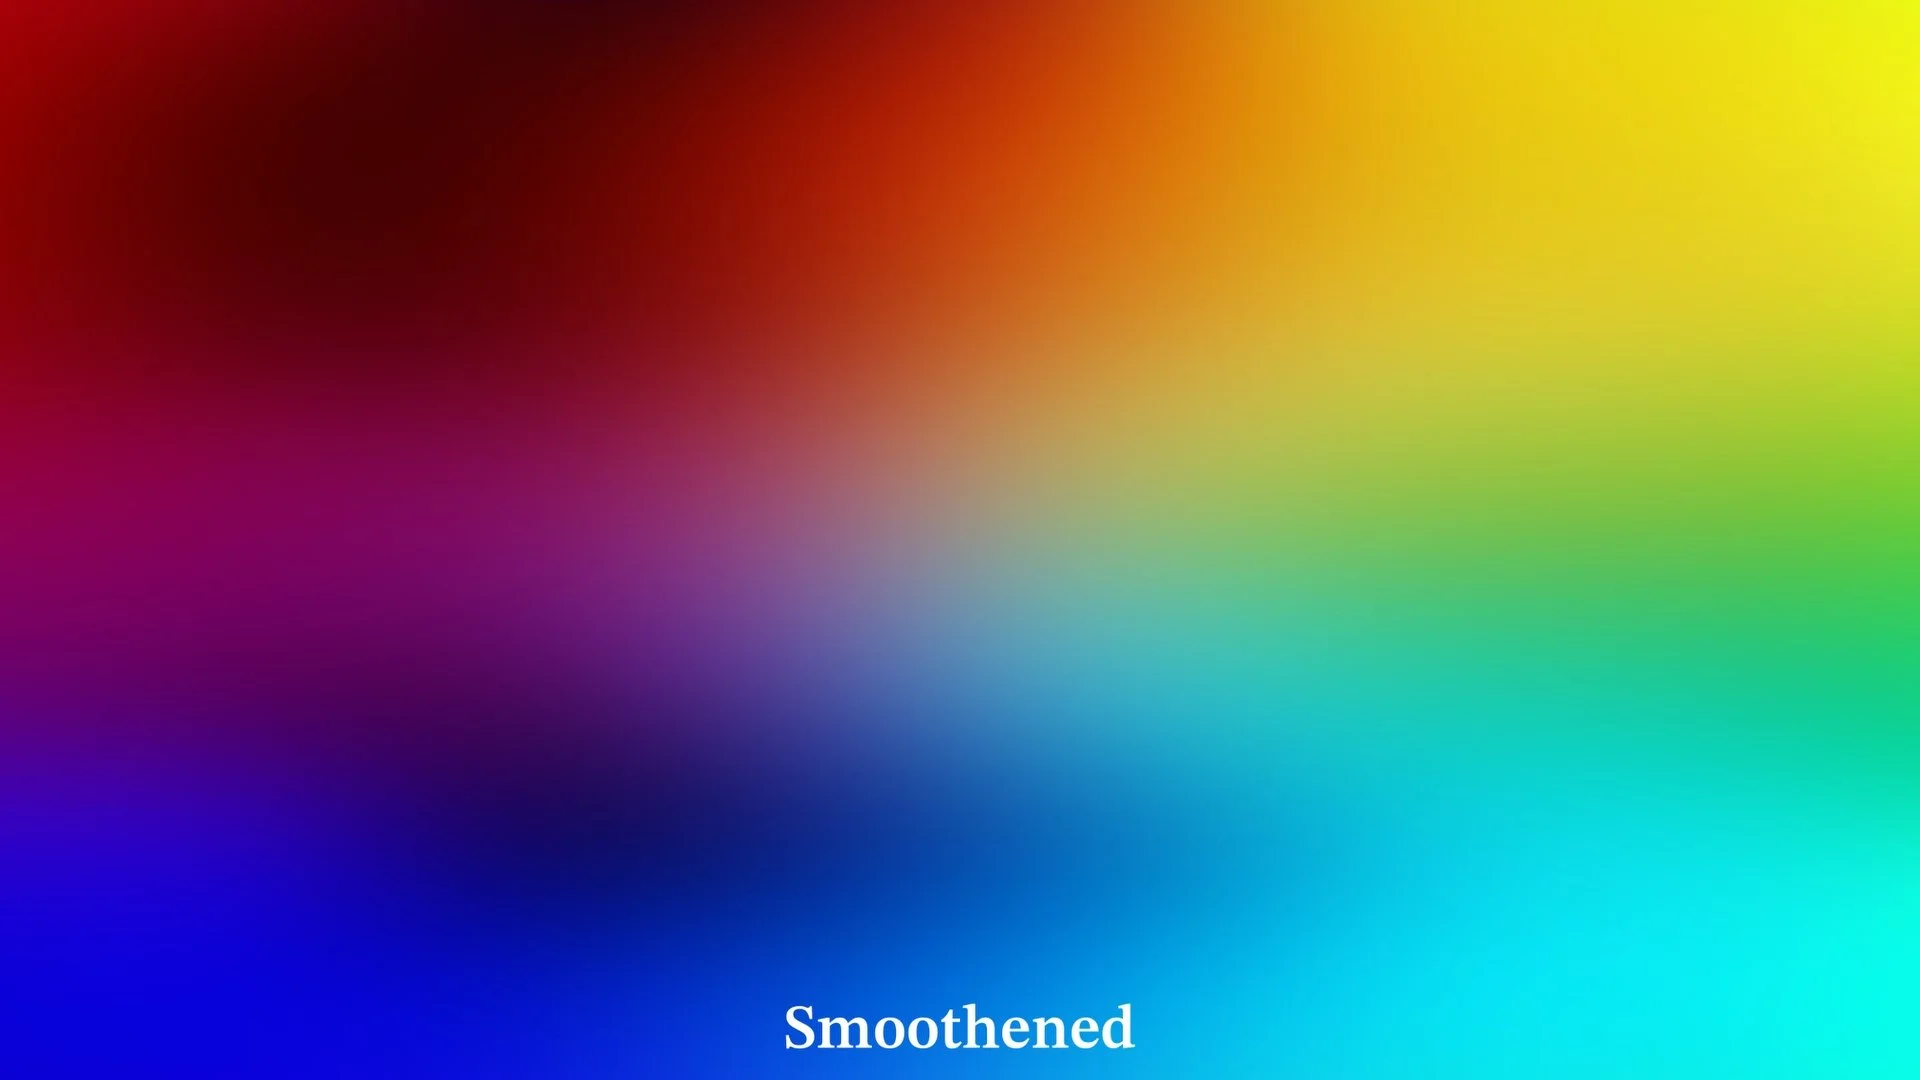
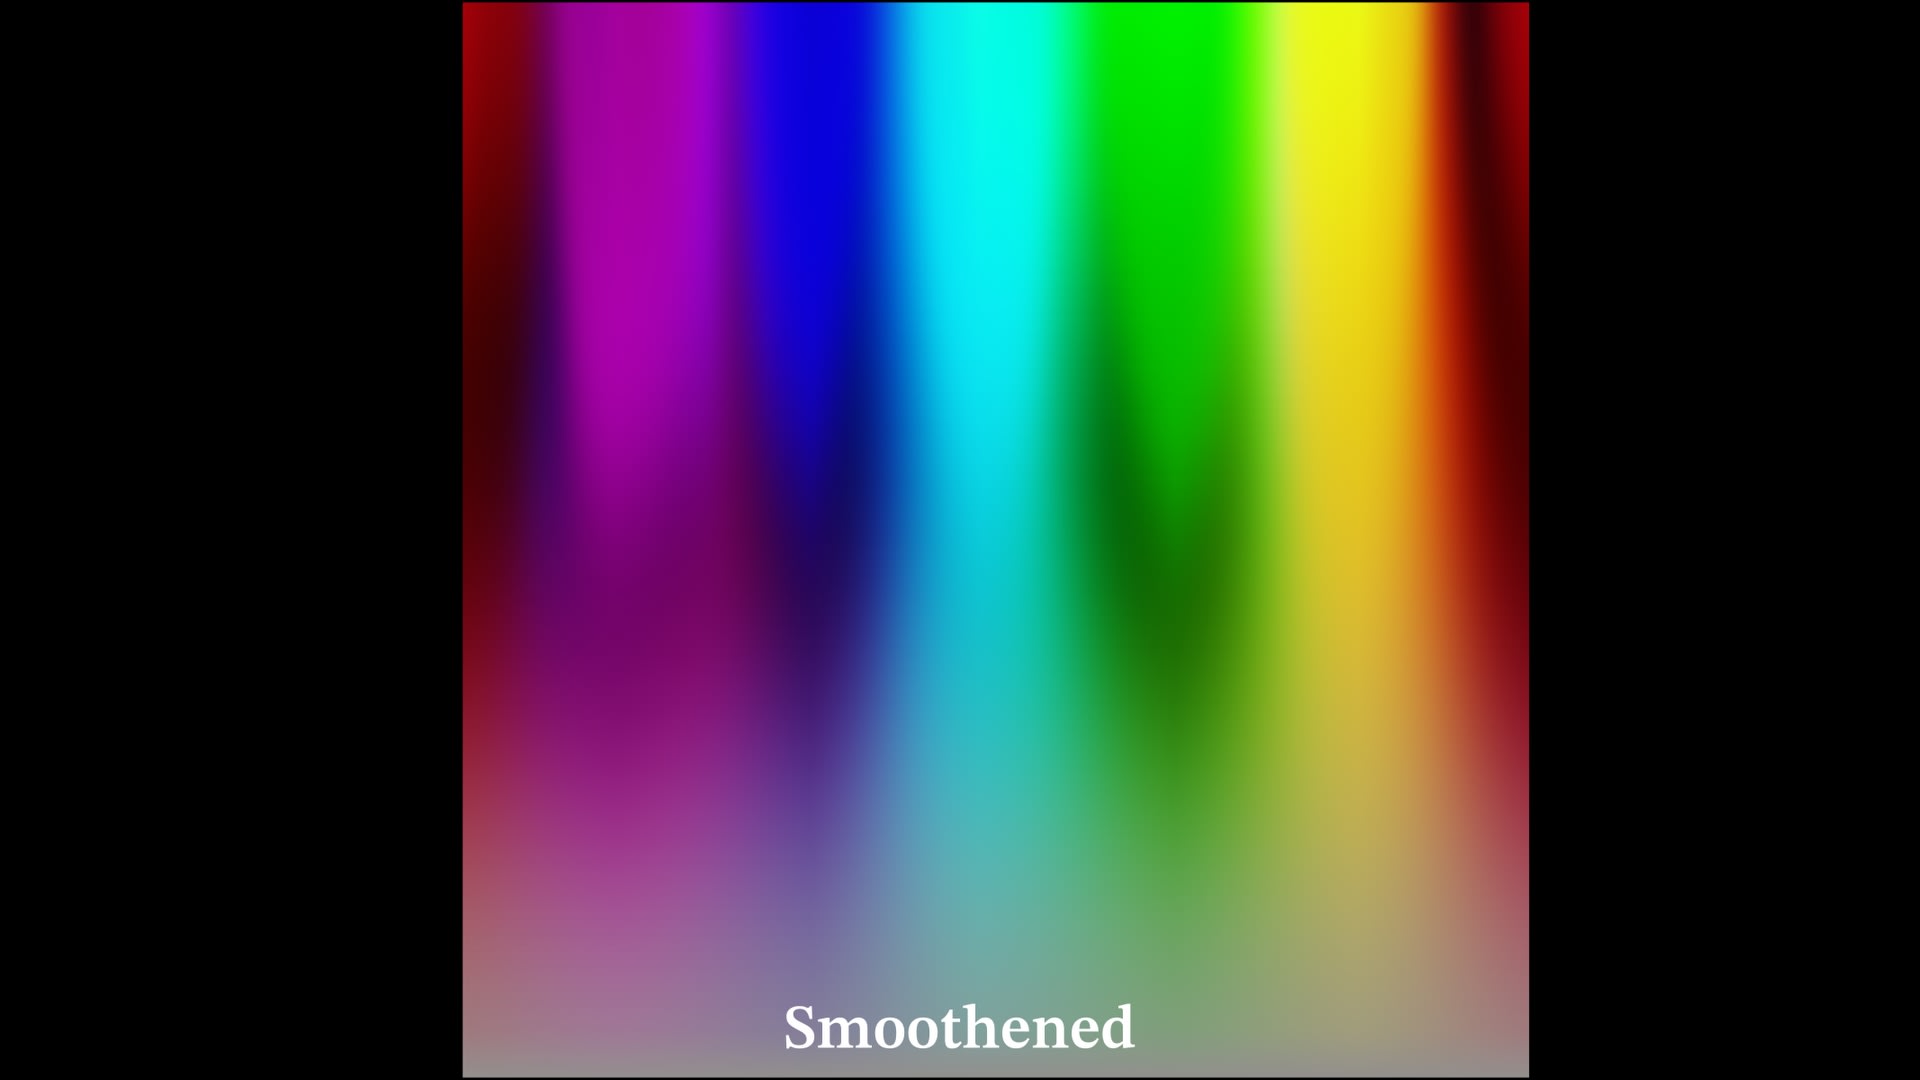
As you can see from the images above the smoothing tool does a very good job at “repairing” the LUT, but it should be noted that even the “Smoothened” version is not the best looking LUT in the world when we analyze it on stress test images. Note that, because of the unusability of the out of the box LUT from MatchLight, the images below have the “Smoothened” version applied. Let’s take a look at the accuracy of the visual match:


Even MatchLight fails to deliver an accurate match both in terms of color and tonal reproduction. That’s a real shame, because at its price point you’d expect a tool that delivers reliability and precision. I’m a big fan of Light Illusion’s Colourspace. When it comes to monitor calibration they are unrivaled, but MatchLight didn't provide accurate results.
ColourMatch
Lastly let’s see how ColourMatch performs on the same exact dataset that was used with the other 2 algorithms.
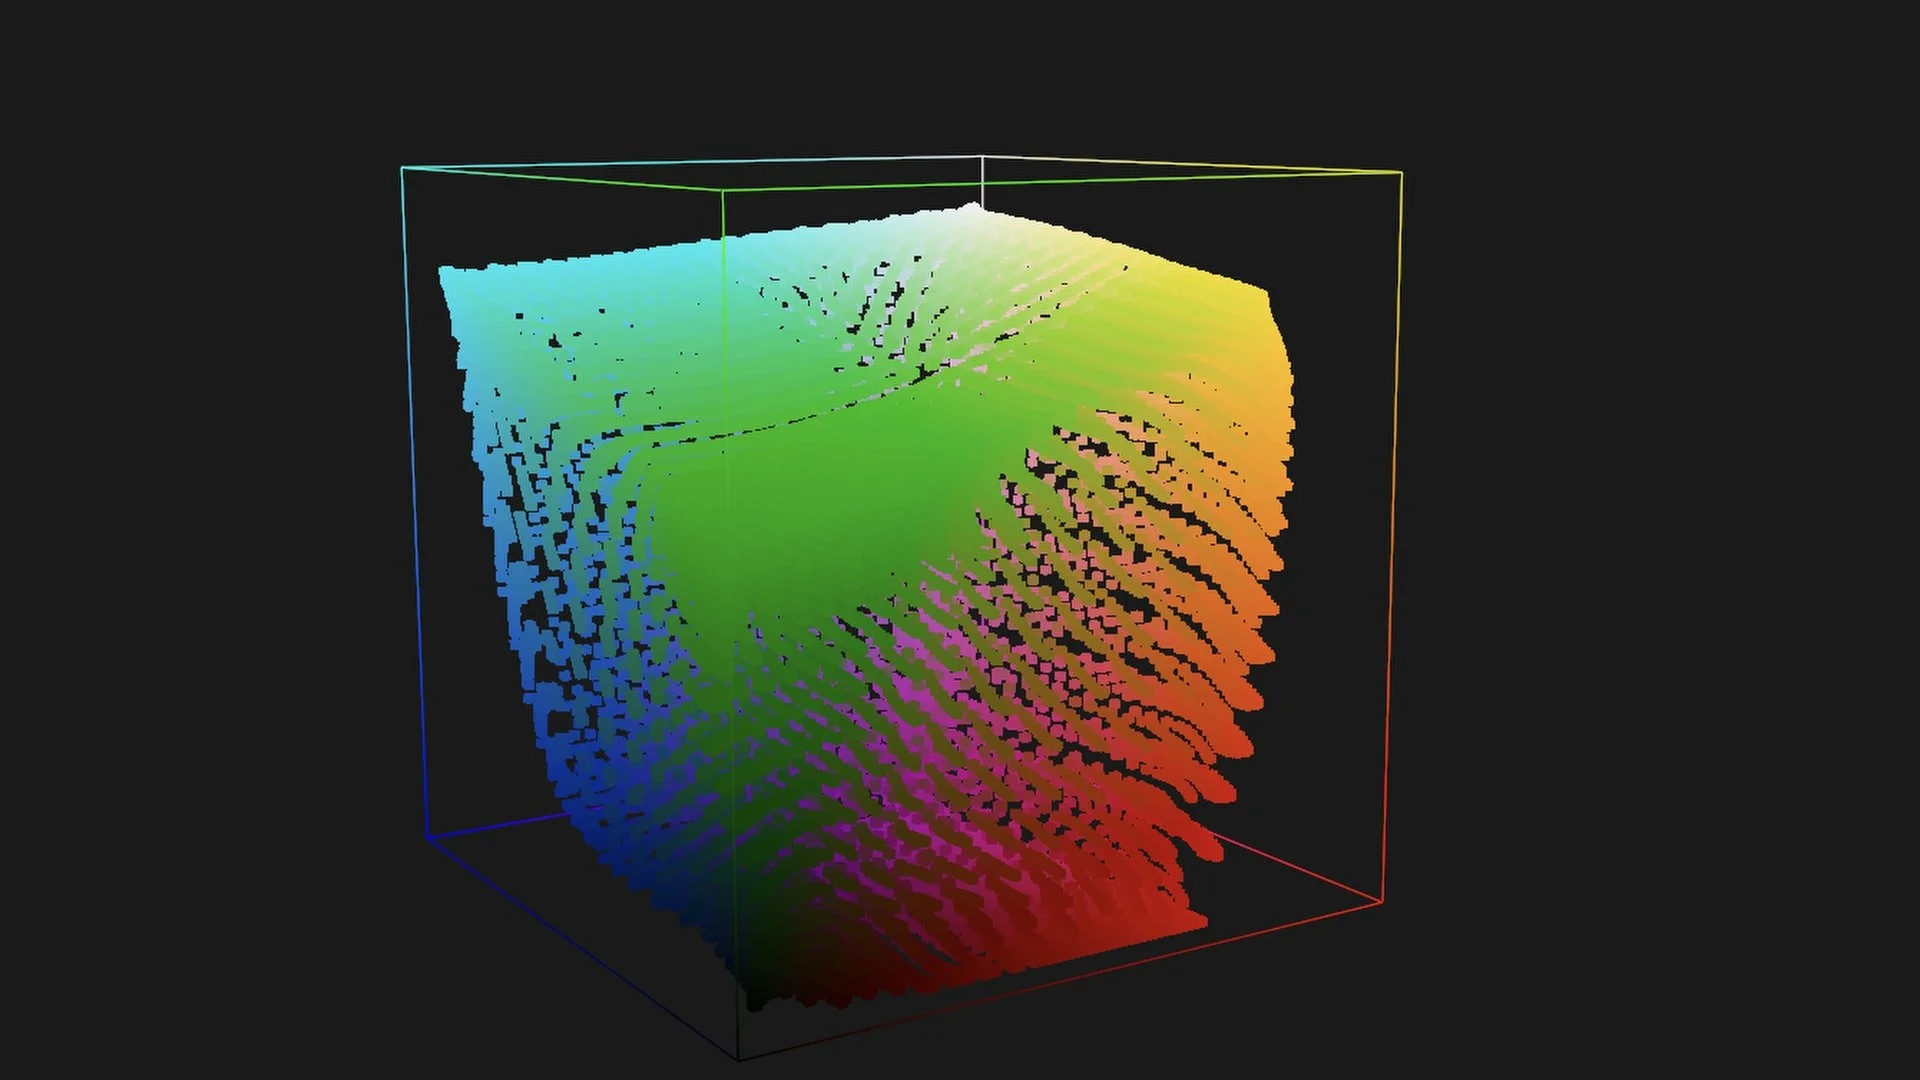
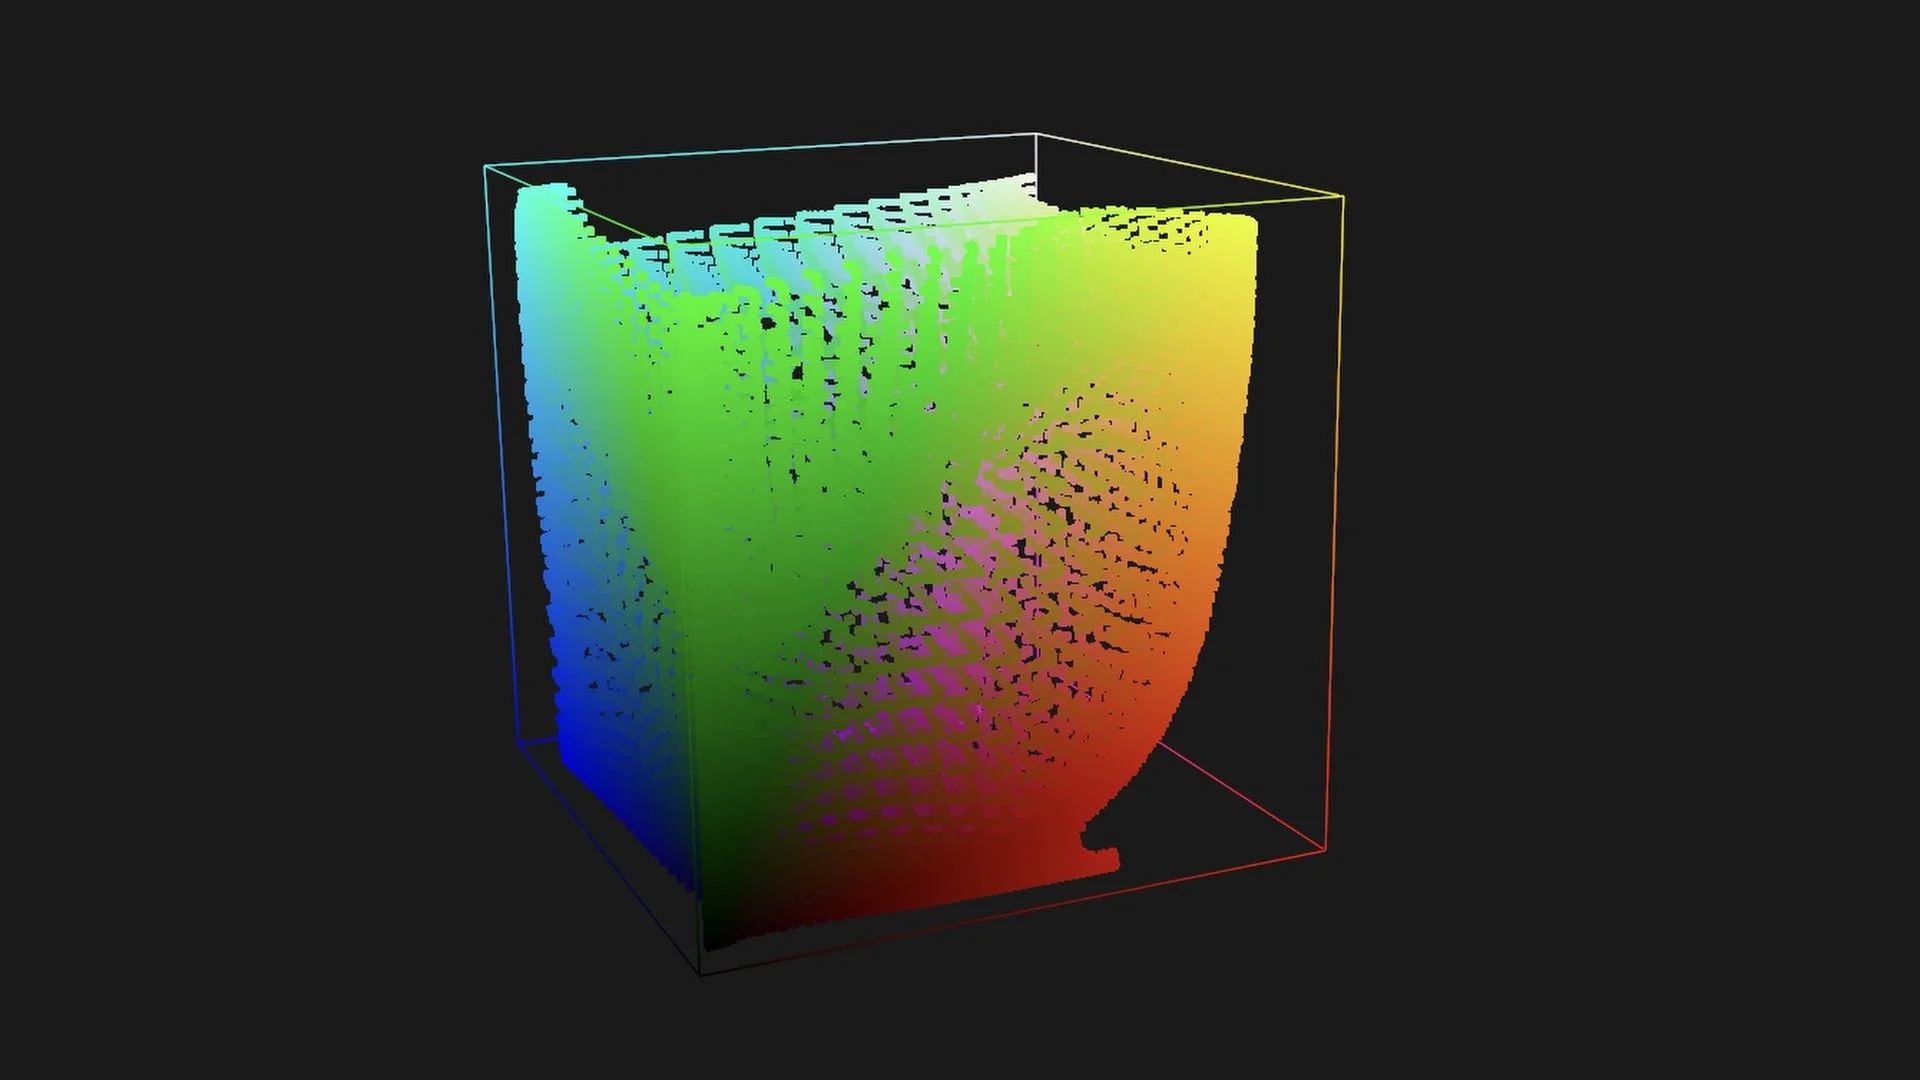
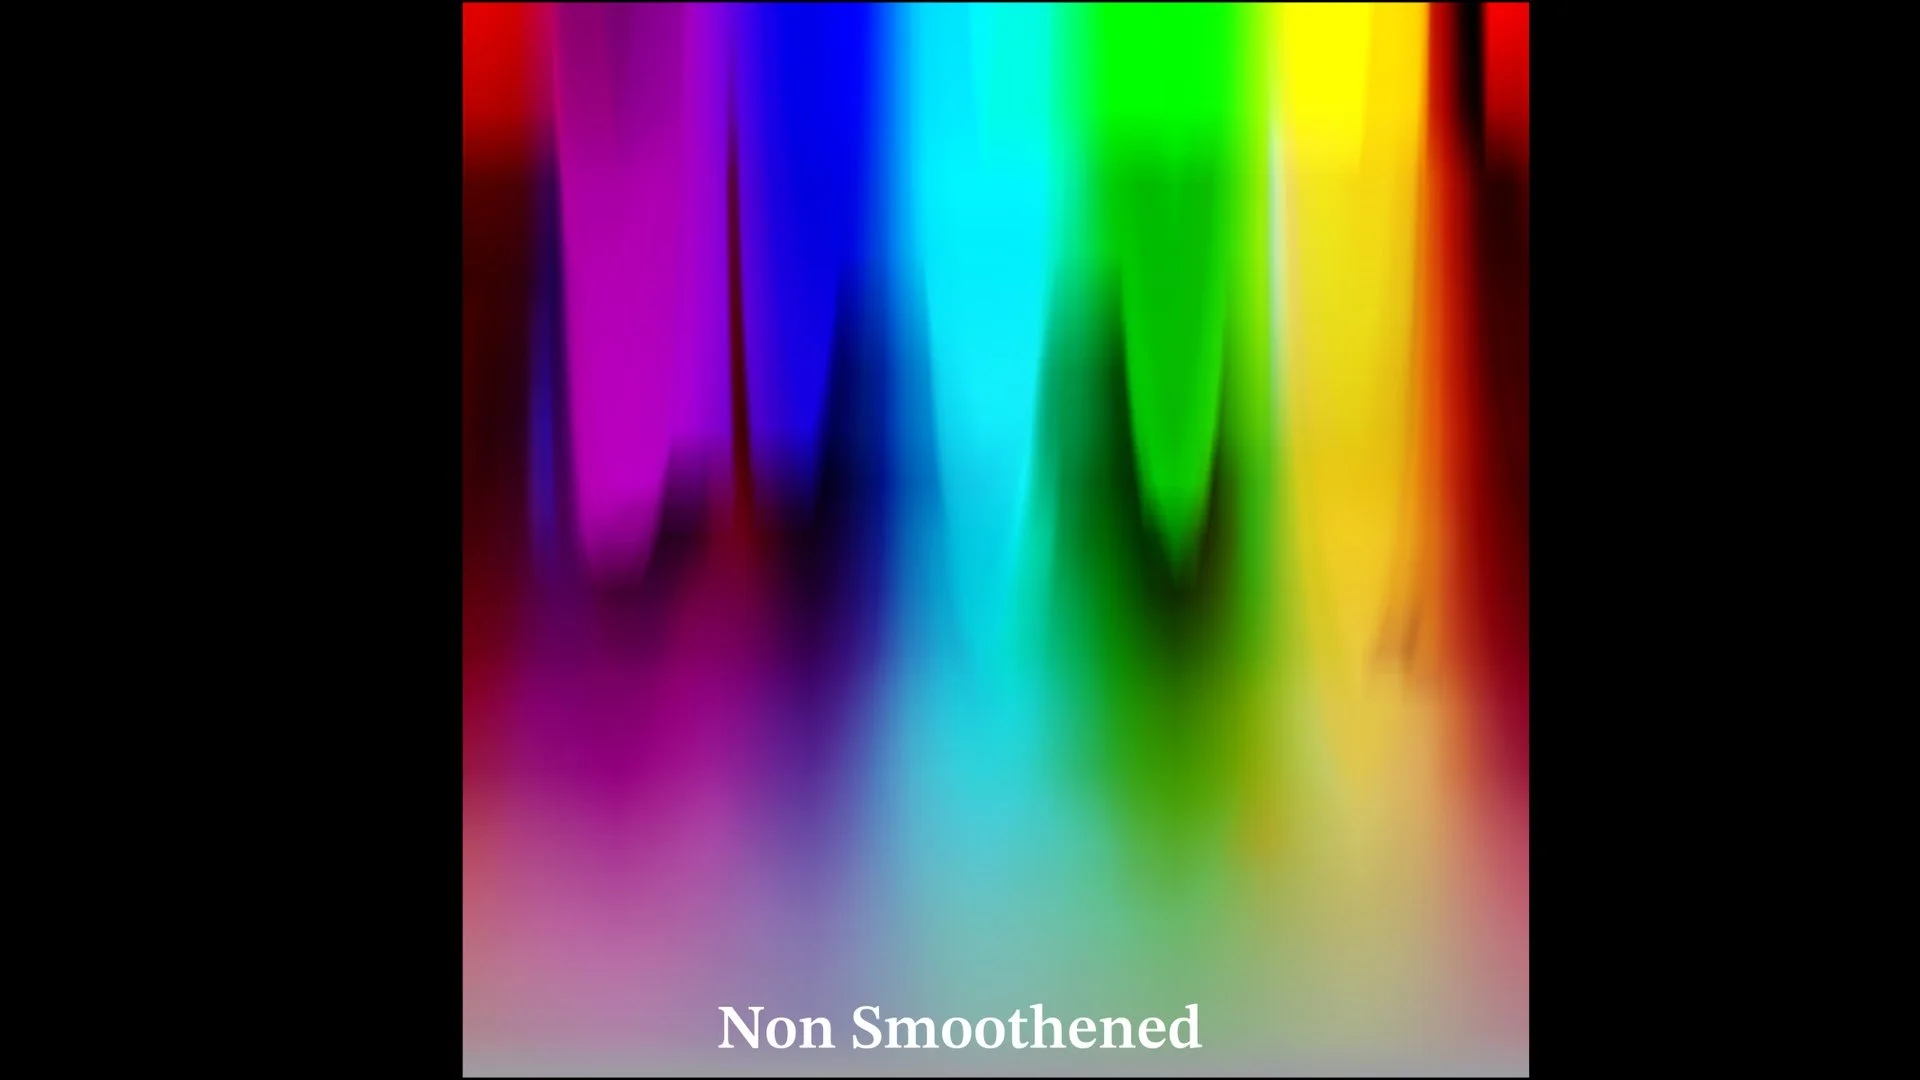
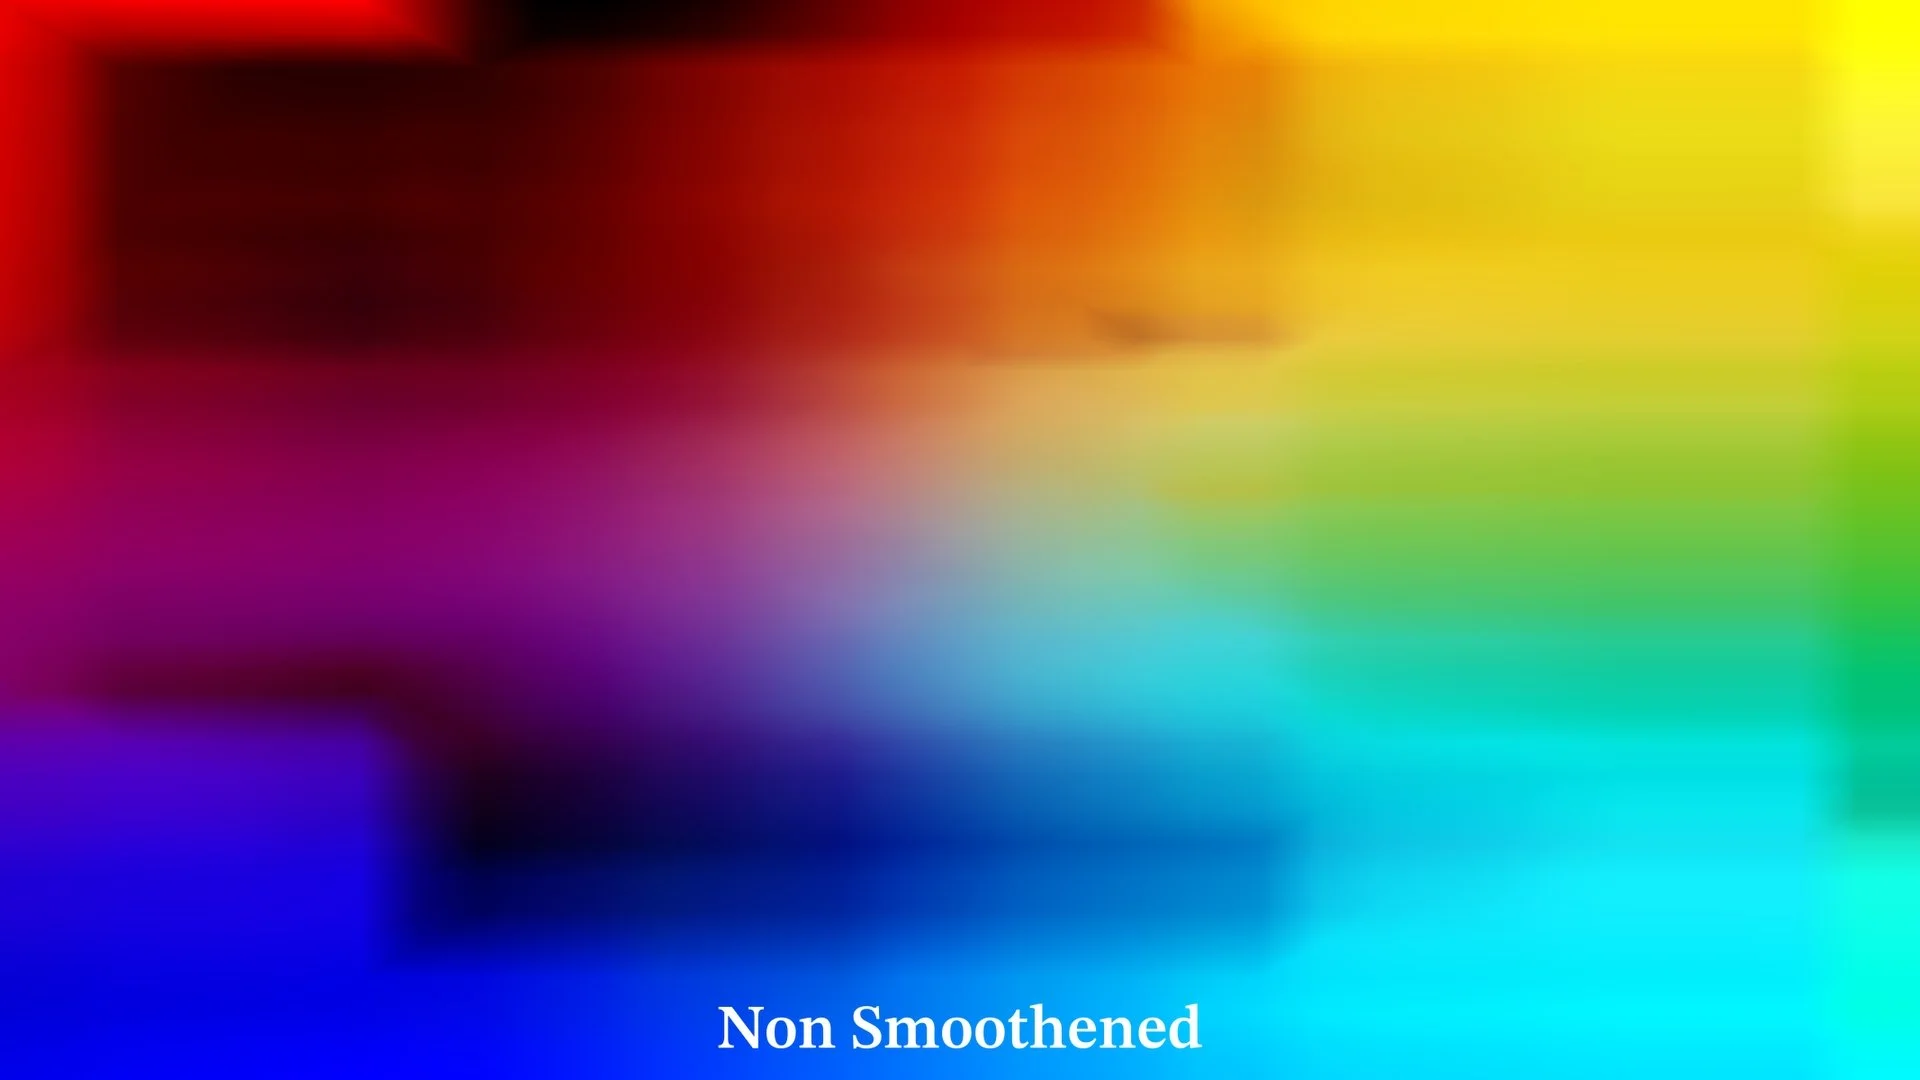
The Kodak Ektachrome is a positive film stock (slide film) and it shares many of the characteristics of a motion picture print stock. Straight out of the box you can see that the LUT looks as a print LUT should look like (if you used legacy print emulation LUTs and visualized them in 3D space you are probably familiar with this shape). Down below you can analyze the quality of the match on the charts and on the validation image as well as the smoothness on the stress test charts.

As you can see we’re getting very accurate results out of ColourMatch straight out of the box as no smoothing step has been applied. This shows that ColourMatch is able to capture the non linearities inherent of the analog medium without sacrificing smoothness as you can see by looking at the stress test images.
Side by Side Comparison of the 3 algorithms on the validation image


CONCLUSIONS
It’s clear that ColourMatch is the winner in this comparison. The reason it outperforms the other algorithms comes down to its robustness in handling both noise and incoherence (non-coherence) between datasets. When I say noise, I’m not talking about grain or digital noise, but about inconsistencies in the measurements themselves. This becomes especially relevant when shooting the film dataset with a still camera. Even with an electronically controlled shutter—like on my Canon EOS-1N—there will always be some level of speed variation. The tolerance for shutter accuracy in a still film camera can range anywhere from 5% up to 30%. Obviously, I wouldn’t consider using a camera with tolerance on the higher end of that spectrum, as the dataset accuracy would suffer too much. The other and more difficult aspect to manage is “incoherence”. By “incoherence” I mean that film and digital don’t “see” color the same way. Their spectral sensitivities are different. That leads straight to metamerism issues: two surfaces with different spectra can match for one observer under one illuminant (say, the film stock under D55) yet fail to match for another observer or another illuminant (a digital camera under tungsten). ColourMatch is able to handle these 2 challenges and with that, it outputs a transformation that is both generalized and remarkably accurate.
FUTURE IMPROVEMENTS
I’ll soon be running some experiments with an Arriflex 435 motion picture camera. Unlike still film cameras, Arri’s motion picture systems are engineered for extreme precision in speed control, so there will be virtually no frame-to-frame inconsistencies. That means the usual source of noise from shutter drift is eliminated, and the dataset will be inherently cleaner. With that in place, I expect it will be possible to achieve an even more accurate match—where the only real challenge left for ColourMatch is dealing with the fundamental difference in spectral sensitivities between film and digital. As you can see, at the moment the match is very very convincing. I would say that by adding textural qualities like grain, halation, weave and without a direct side-by-side comparison, we can say it’s possible to capture the essence of the film stock for a photographic look. That said, nothing stops us from taking this already close match and fine-tuning it further to nail the colors we care about the most. To do that I like using a DCTL from Kaur Hendrickson called Gamut Manipulator, which is perfect for refining an already very close match. Here I did a quick fine tuning:
